Sunday, April 17, 2016

Stand at your guns


Here's a little peek at what some of the finished bases looked like before primer painting!

First, the command groups.  I don't know if I will go with more than 2 in a group from now on, or if I will use these as a way to get a few more LMG teams into the mix.  That 'small squad' rule and the fact that just two command figs could potentially ride along in a transport with a squad has its appeal also!


The +4 leadership for the Major proved to be a major way to save pinned squads.  Those were veteran squads too, so all the more benefit for babysitting those free inexperienced squads.


Here's the 75mm light gun.  It seems quite 'heavy' compared to the FoW version, but it was certainly fun to base!  I think the companion gun will have to be set into a ruined building.

I'm looking forward to scratch building the 105 and 155mm guns!  I bought some of the crew figures already in anticipation.


Command groups surrounding their artillery piece!


Stay tuned for much more, including some articles on the scratch building of those heavier guns!  I think they will be a combination of sculpey and plasticard.


On the Razor's edge: Basing your Bolt Action minis


With each new genre of type of miniatures I experiment with, new techniques (or at least adjustments and modifications to existing ones) becomes commonplace.

I have used a mix of bark and branch techniques on the Bolt Action figures, with the unusual footprint of the various poses playing a huge role in influencing what I attempt.

Cork has been used more on these than most recent basing.


I was doing a massive basing run on many dozens of miniatures last week.  As you can imagine, this is a very messy process!  Better to create one huge mess than constantly cleaning up again and again.  This is the usual spread of supplies.

Bark, gravel, cork, sand, various glues, and so on.


This radio operator had to fit on one of these unusual oval bases.  It's probably smaller than a typical cavalry base.  The cork is bulletin board variety.


I arranged some pieces in advance to see what might be possible.  This was at the very end of a massive 14 hour session, so I was not about to dig out more materials for this one!


I didn't even want to break out the Oxide Paste.  So, it was going to be a test of what could be done with regular glue and super glue.


A few applications of sand and gravel not only filled gaps, but leveled off the heavier texture of that cork.


I didn't want to have to use the razor saw to chop off one more sprue/base, but the jeweler's block was handy, so away went that extra base!


That made him much easier to place on the left side.


These are tea leaves that we saved, since crushing them up proved to be a very nice ground cover material.  Unlike oregano and other spices, these blueberry tea leaves were easy to break up and scatter.


You can see some of these scattered over the sand and cork.  A little pinch of sand was added over the top, making it look more like real ground cover as opposed to lightly minced oregano leaves! :-)

It's just way to easy to recognize that gambit these days!

Stay tuned for much more!


Saturday, April 16, 2016

Golden Archers


Time for more Golden Boys!  This one was painted in the same manner as the other Galadhrim Cavalry figure.  As before, glazing and tinting after the Shaded Basecoat was the key.

This meant mixing glaze colors such as Secret Weapon Sunshine glaze with purple, and even the Vallejo fluorescent paints!


Let's not forget the 'reflections'.  These cooler areas of the metals were tinted with a mix of yellow glaze color with a grey or green.  Surprisingly, there are many hints of green to be found in gold colors.  Just a bit though... for effect.  Too much, and it might appear more like brass!


Just like the last figure, the colors of the cloak and the horse both influenced my shading and provided that all important contrast.  These views really show the hints of red on the armor plates!

Here's some views of the figure I used for the how to paint gold NMM video, and a few scenes:


The Painting Golds video is available directly from me, and from Kings Hobbies and Games:


Here's an example of what the videos are like:


Boxing day


One more Red Box barbarian for you on this early Saturday morning!


These have been the most heavily armored of the Red Box Games figures in a while.  There are many nicks and cuts in the armor plates, so that requires an altered approach from what I would normally try.


With this many damaged sections of armor, any glazes need to be very controlled, because too much extra liquid can go in some pretty unexpected directions!


Stay tuned for much more from this group!!


Friday, April 15, 2016

The old squirt gun trick again!


These Dark Eldar Grotesques posed so many challenges.  Not only was I trying to establish an overall theme for the army in terms of color and story (basing, freehand designs, etc.)m but I was trying out a host of new materials as well!


The skin tones had to be light enough to show veins and soreness/irritation where grafts had been made, but still deep enough to not get lost in the mass of blood effects and the new fluorescent paints.


The first few Grotesques took quite a while to determine how much blood effects that would be done.  I thought the deep reds would prove a good contrast to the very warm neon greens!


He's also here:


Army of the Dead


Since I had a lot of the fluorescent paints out for other projects, I kept adding more and more to this guy!  This kind of color scheme made the LOTR Army of the Dead one of my favorite miniatures sets to paint.

It's made even easier now by many new products, and an updated approach in terms of technique.


The stained, rusty dirt effects were made infinitely easier by creating them with the Vallejo Game Color Flesh Wash.  This particular glazing color has that "sedementary" effect which you have heard me mention over and over.


It was a massive advantage here, as it settled right into the areas where I needed it.  The natural translucency meant that it would not completely bury all the brighter fluorescent paints from earlier layers.

I really love these guys... and I think I will have to do something similar with a more "regular" fantasy style army.


He's also here:


Thursday, April 14, 2016

Standing among the stones


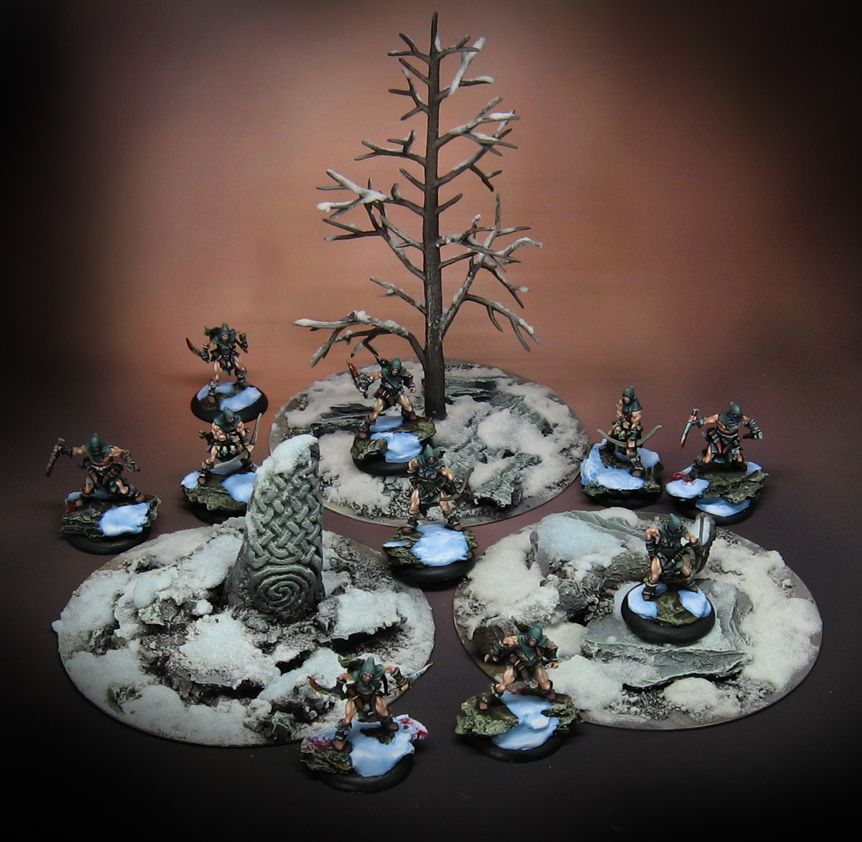
I thought it might be fun to see some of the "Ninja Archers" from Red Box Games in a group setting.


There's a series of articles showing how the miniatures were painted, and how the terrain was built and painted too!  I have included all the links that I could find here in this one article, so be sure to check those out!


Here's a post about creating the standing stone:


Here's a post about painting them:


Followed by a post on making the snow effects:


The first step by step on painting the archers, which includes the usual Shaded Basecoat and Glazing:


Another stage:


There's a few on glazing, and then the finish!


This article focuses on the skin tones:


This one is the big finish!