Tuesday, December 31, 2013

Monday, December 30, 2013

All hail the King


Finally!  The Gnoll King from Reaper Miniatures.


Once more, fun with muted browns, reds, and greens.  Let a little more green show here... even a little purple there...


Even a touch of blueish gray in places.  Since he is pretty huge, there were plenty of areas for fun subtle transitions.  I also had to add the blood, to get in a nice accent color, and something that was a bit more high chroma, or saturated.

As usual, lots of eays to establish contrast!


Sunday, December 29, 2013

More slime...


Back to the Nurgle guys once again.  This time, another rotter.


This is one of the rare beastman rotters... there are many more of all races.  Those will be coming up later this week!


Lots more of these slug bodies to paint...


Here he is with his buddy.


Sluggin' on!


You look a little green...


Here's a collection of figures with a variety of green flesh colors.  Three of them were part of the kickstarter videos.

The two Reaper Trolls were used for the Painting Green Flesh Tones video.  The Raging Heroes Ork Warboss was used for the Shaded Basecoat video.


As you look at these, you will notice that the color varies here ans there.  Some greens are warmer, some are cooler.  Also, some of the greens are very muted, or "grayed down".  That can be done by mixing in some red or brown.

Other colors are more pure, or 'saturated'  This is discussed a lot, especially in the Green With Envy color theory video concerning greens.

It does not really matter what the size of the figure is, or what type it is... making more variations in those green flesh colors can make anything seem more elaborate or interesting.


I try to have transitions in the color across a single figure.  The trolls are a very good example of that.  You get the whole range of warmer and cooler greens, as well as the more muted colors on the back.


Mixing in purple of one shade or another with the green also yields some interesting results!  That is a favorite trick of mine.


This is just a drop in the proverbial bucket when it comes to greens and skin tones made with them.  Hopefully this gives you a few ideas!


Saturday, December 28, 2013

The long road home


Hi there folks!  I hope that you have been having a great Holiday season!  It has been incredibly busy here, as you might imagine.

I apologize for the lack of posts yesterday, but the 8+ hour drive, packing and unpacking, etc., made that impossible.  I had these images saved to post for today.  Soon I have another Victoria Miniatures post, the Gnoll King from Reaper, and other things.


This was the very first scratch built Chimera that I made.  The other 3 were much easier to construct.  I did all of the side panels and the treads from sculpey.  The turret that you see here was not the original turret.  I made this one for a campaign setting that needed some cleansing fire!


It was fun to be able to create an entire fleet of these vehicles from nothing more than sculpey, plasticard, and matboard!


The scale was exactly the same as any 'regular' Chimera.


At some point, I will add further markings.  I am still tempted to repaint this in the green color scheme of the new all girl IG army...


The view from above.  Again, lots of plasticard in this area.  The rest of the lower hull was created with scraps of matboard.


The flamer option never really worked as I had wanted it to perform.  It was part of the huge 4-part warpgate campaign.  In the final climactic battle, a massive city fight was undertaken.  I had hoped to dig out certain hidden troops with it, but that was never really possible.


There were too many angles from too many nearby structures to get at them.

So, time to get the studio back up and running!!!!


Thursday, December 26, 2013

One more set...


Here's a fun set of images using the newly printed backdrop.


I love seeing all the minis together!


From the back...


Chorus line!


Now the side...


Gather 'round the icon!


A little view of the bases as well...


Painting fur... this time in 2D


Some of you remember the posts from a while back that discussed methods for painting fur.  This is about painting fur, but more painting in general.  I like people to see set of images such as this, as it is the way I go about painting my miniatures.

Here were the colors that I used.  As usual, my Filbert brush and the craft brushes were on hand, just like in the videos!

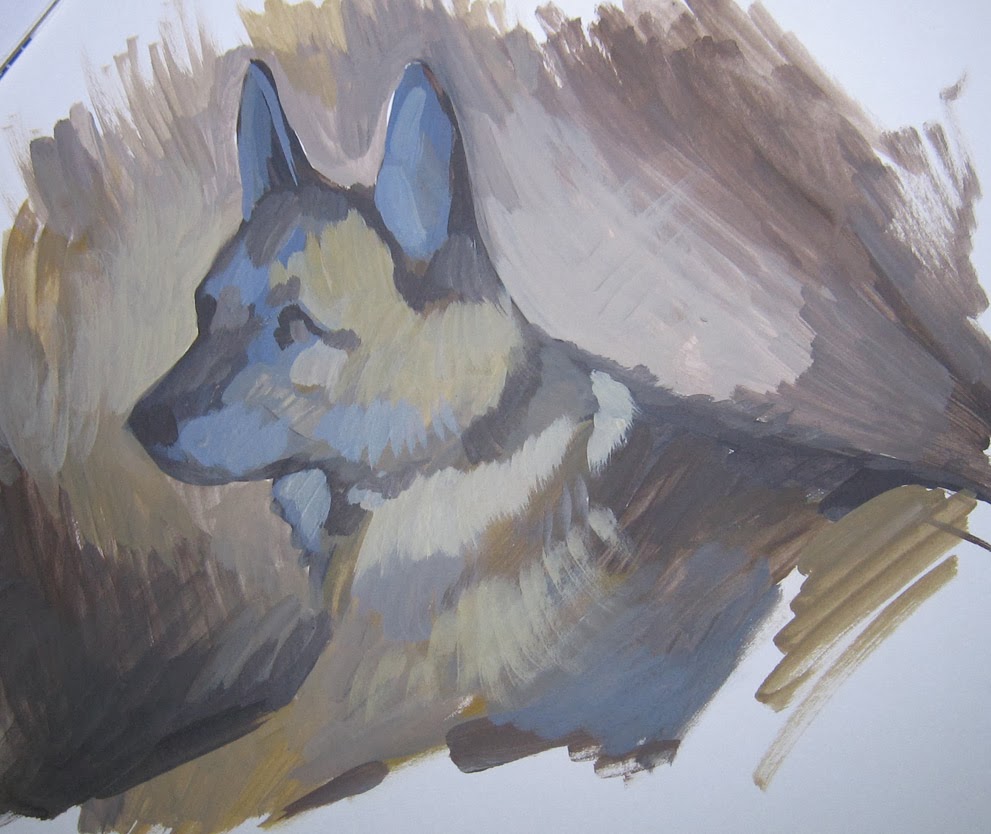
Miniature paint makes fine '2D' paintings, it turns out!!


This is the equivalent of the "Shaded Basecoat".  You can see very broad strokes used with the filbert brush, setting the lights and darks in place very rapidly.


In these early steps, I am trying to 'set up' the final stages.  I am also trying to balance where 'warm' and 'cool' colors are placed.  Even now, the "center of interest" must be established.  

That can be done by a variety of contrasts... opposing colors, light vs dark colors, and how 'hard' or soft the edge is, such as those on the face.


More dark shades are added, refining the drawing and setting up more details.


Not only are lighter colors added at this point, I am also thinking about directional brush strokes.  These flow in the direction of the fur.  However, you will also notice that I am letting those first layers show through a bit.

That is, I allow the 'underpainting' to show through in spots.  This will provide more depth overall.


Still more details are added.  Some edges are smoothed and faded, others are sharpened even more.

I am also using that opposition of warm and cool colors...


You can see more refinement around the nose and eyes.  Obviously, this is the area that I want to feature in that 'center of interest'.  Not restricted to paintings like this, a miniature also need one.  The face is almost always that spot :-)


More edges have been enhanced with stark highlights and more directional brush strokes.


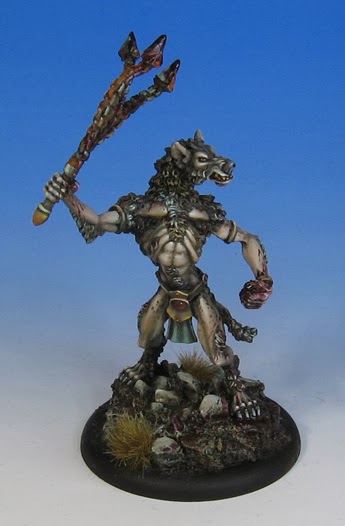
Final result!  If miniature paint can do this on some matboard, just think what it can do to a miniature!

Trust me. painting this way on miniatures is a blast.  This is what I try to bring across in the gentlest possible way on the videos.


Wednesday, December 25, 2013

Yule Tide workshop


OK folks, something even more festive than miniatures!

That means cookies!  Gingerbread style.

Kimberly and Cathy baked the cookies, and left them to me.


I had never mixed the frosting before.  Many years I had decorated the cookies, but this would be a first.  Time to gather up the ingredients...


Definitely a tad thicker than my miniature paint!  But, I can mix any color I need...


Don't blink!  Weeping angles hiding amongst them!!


Skeleton gingerbread men!  And some Imperial Guard...
Don't forget the Christmas sharks!


And the Ninja Bread men!

My job was done.  Time to eat them!!!!

Merry Christmas everyone!!!