You have all heard me go on and on about Shaded Basecoat, and the many reasons why I use/developed this technique.
The list is pretty long... increased speed, simplified color palette, you can be interrupted for long periods with less consequence, and more.
I'm going to profile one of the reasons which is discussed less, and that's when you don't have the "correct colors" at your disposal. In this instance, I completely forgot all the paints that I wanted to bring to our last Draxtar excursion!!
I was not a happy camper, because I had set up most of what you see here when the unfortunate discovery was made. There was even talk of turning around and heading back.
However, there are some paints on a carousel available for people to use, so I thought this could be a teaching moment for all involved!

I grabbed what I could find that I thought could be useful.

I figured it might be best to focus primarily on some of the Bolt Action special weapon teams. I took the reddish flesh tone and did a little application on the bases as well as parts where skin was showing.

That was lightened with the only light colors that I had, which was the seafoam green and a very light blue.
I also took the grey color, mixed it with a little Secret Weapon blue wash to tone it down, and began working on the rocks.

You can see that I am developing the rocks and the weapons with that blue/gray mix.

Once I had the grays as light as needed, I started to mix up some colors for the greatcoats and packs of the soldiers. A brownish green is required, so I mixed a mid tone and then made it lighter with the seafoam green.
For those not familiar with the Shaded Basecoat, the idea is to start at the halfway point between the lightest and darkest colors, and then lighten it with simple mixes until you reach your highlights.
Keep in mind, this is not drybrushing, and I am working with the bigger #8 round craft brushes.

A little more shape emerges as I get lighter and lighter on the coats and packs.

As I reach the highlight color on the coats and such, I must always be mindful of the next stage... that is, all the glazing and tinting which is to come. The Shaded Basecoat and Glazing go hand in hand.

As this article has shown, I have used very few colors, and done very simple shading. All the complexities come in through the glazing, which will not only get me the darker tones, but allows me to tint things like the coats and packs to be more brown or more green with simple tinting.

The helmets are a basic blue green, and then lightened with the light blue. All the while, I am trying to be aware of the future glazes...

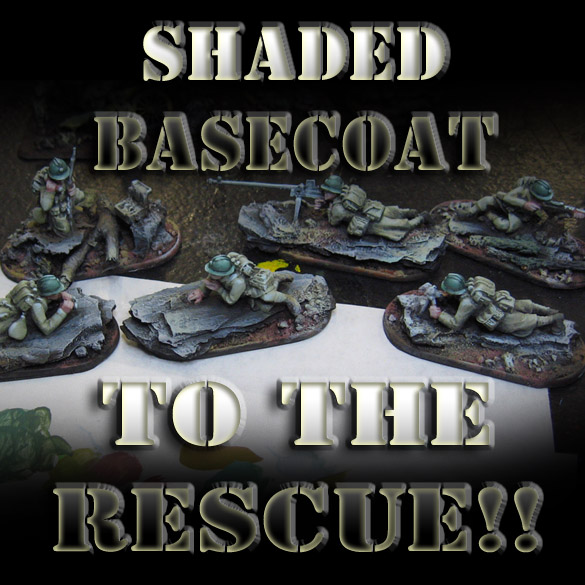
We now reach the end of that Shaded Basecoat phase. This, along with the Glazing techniques, are available on video directly from me via USB drive or dropbox, and also from Kings Hobbies and Games.
Those videos go into great depth on both techniques, and show you new ways to approach painting your minis. You can contact on facebook if you wish, or through the blog!
Stay tuned for much more!


