Showing posts with label Dioramas. Show all posts

Saturday, January 24, 2015

Dare to enter the Tomb City of Pseusennes


Now that I FINALLY have all the LED daylight bulbs I could possibly collect (at $15-25 each, it takes a while), I was able to consider setting up the Tomb Kings display board for some new photos!

It's all far too complex to do in one, or even two posts, so here is the first of the series!


This was for my 2013 Adepticon Warhammer Fantasy tournament army. I know that it won Best Painted, but it may also have won Player's Choice (it's been a while!).

There was a very intense story written around this entire concept, as many of you already know.  I will include as many links as I can to the back story and some of the concept sketches.


There were a number of scratch built or heavily converted figures for this project, including the two giant living statues on top.


Many elements were removable, both for transport and for use as terrain pieces.

The board itself was covered in magnetic primer so that my movement trays, which were magnetized, would stay in place.  Again, I have a ton of articles on the process, which started with the initial layout of interior lighting and miniature placement:


Some of the figures were removed from their movement trays for display, and placed as "guards' in and around the lower levels of the tomb complex.


The interior lights were meant to create an effect, but also make sure people could see inside!  One thing they could not see was the ceiling of the complex, which had a map of Khemri painted on it.  Each city was designated by a bit of fiber optic lights, which I had strung through the ceiling gap.


Here's an article on painting the board:


More painting!


I really wanted the Casket of Souls to be visible, so I had to make the most intense spotlight right above it.  That took some doing, but it was well worth it!

Here's the story of Pseusennes, and the Tomb complex:


Using the fluorescent paints definitely helped in this effort


This shows you some of the "guards" which I mentioned earlier.


I will also post some links to the creation of the movement trays in one of the next posts so you can see how that was done!


I have not seen all of this together in nearly two years, so this is very exciting!  I really don't want to take it down again.  The tournament games did not last very long (these are Tomb Kings after all!), so I was mostly denied the opportunity to have these available to look at and look back...


There are still new units that I am making for this army... yes, I know, it is no longer viable, but then it never really was.  It's something that I will have for display, and a living laboratory for new techniques.

That's what it was in the first place!


So, I hope you don't mind my walks down memory lane over these next few days.  In some ways, looking at all this makes me very sad, and then it also makes me amazed at how rapidly it was all developed.
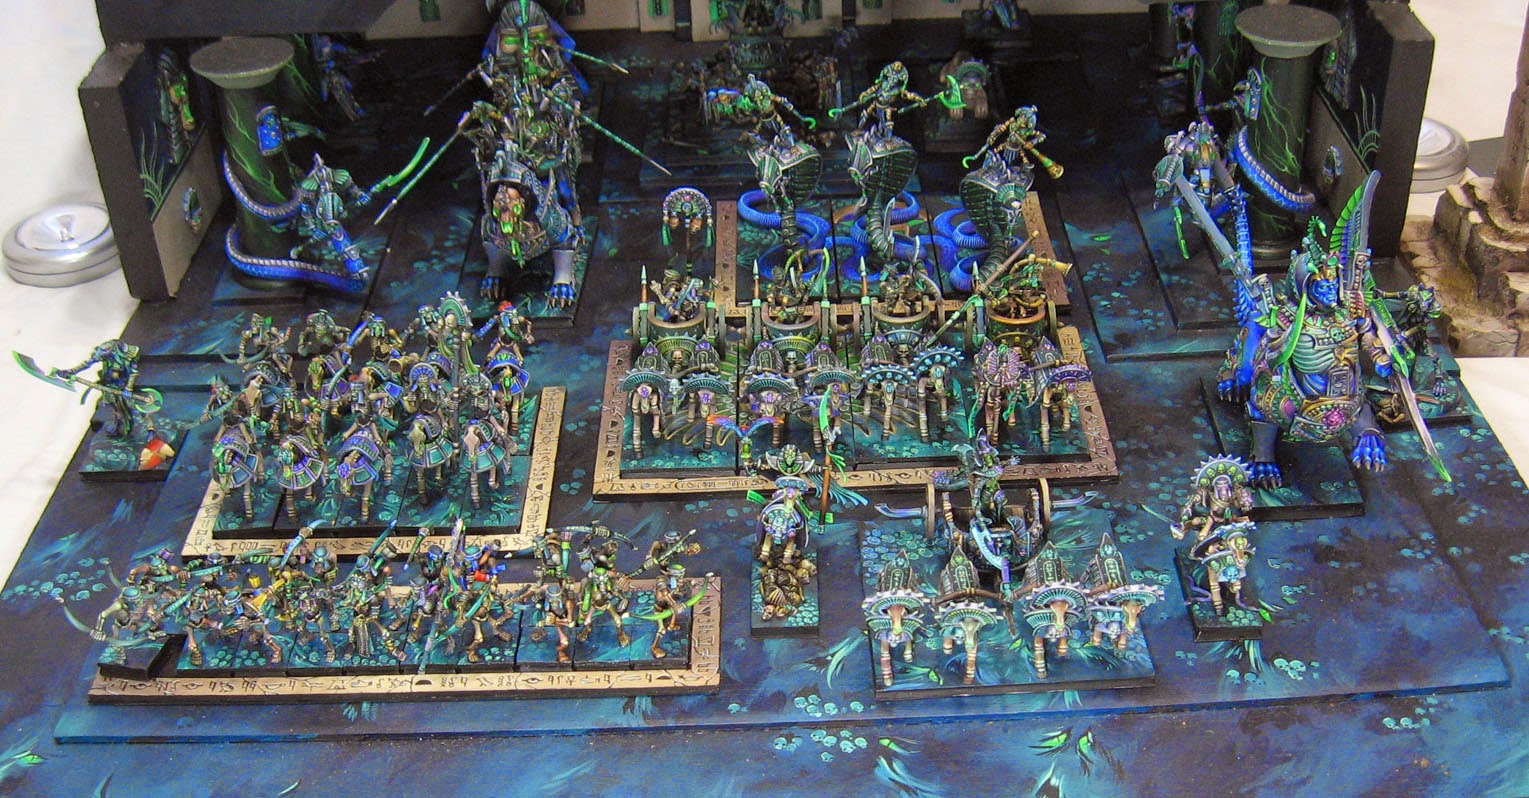

Keep in mind that almost everything you see on this board in terms of construction, painting, sculpting, and so on, were all 100 percent brand new ideas!

I had to create them as I went along, in order to solve one problem after another.

Thanks for looking!!!


Thursday, July 3, 2014

Raven evermore...


Time for some close ups!


Here's a few close in shots for you.  They are kind of fun, since the focal point of the camera blurs the background a bit, making the mini come forward even more. :-)


Fire!  I wish I knew about fluorescent paints at the time, but it's possible Vallejo was not making them yet...


Here she is!


The very distinct sculpting style of Denis Mize.  Very cool!


She surveys the landscape...


A few images of the miniature itself.


It took a little bit of jiggering to get it just in the right spot...


But there she stands!


Somewhere I have a shot of the little raven than I sculpted.  Can't find that just yet...


Tuesday, July 1, 2014

From 2D to 3D...another dimension!


After I showed you guys the sketches of the miniatures, and the drawings that I had hoped to turn into miniatures someday, I thought you might have fun with this.

The miniature is from Dark Sword, and it is based on the Larry Elmore Raven Stone artwork.  Both painting and miniature are very cool!


I set about with my sculpey and my landscaping rocks to create the diorama.


I pressed my rocks into the unbaked sculpey, which gave me some fantastic texture!


It was a little difficult to translate the rocks perfectly to the image... and I had to figure out what the back might look like!  Remember how I said that in 2D, I never had to worry about such matters. :-)


I loved the sloping angles of the rocks... and creating the fire as well!


I enjoyed the story of this piece very much.  A wonderful vignette.


I carved the runes into the stone, and placed all the rocks together once they were baked.


I have some close up shots of the diorama coming, as well as individual pictures of the miniature itself, so stay tuned!!!!


Thursday, February 28, 2013

Ragnar Runecaster from Celtos


Here's one more vignette from Celtos.  The character is a dwarf named Ragnar Runecaster.  It was done with the same technique as the Cernunnos.  White sculpey was textured by pressing actual rocks into it prior to baking.

This allowed me to put one boulder on top of the other and build up the height of the formation.

I also sculpted the water texture with the sculpey.


Once it was baked and painted, I put some layers of gloss varnish over the water to give it some extra sparkle.


Some close ups of the mini...

I remember having lots of fun working with a whole range of blue/black colors on the raven the staff and the axe.


Wednesday, February 27, 2013

Cernunnos the Horned One


This was a fun little diorama I did back in the day, featuring another Celtos miniature.  He is Cernunnos the Horned One.  I believe he was part of the Fir Bolg faction.

Once again, this was done mostly with sculpey.  I pressed real rocks into the unbaked clay to create the texture.  If you look in the basing techniques category, you will find several posts describing this process.


This faction was all about swamplands, so I wanted to create a pool area for the water effects.


I built up the rock formation so that it would hold in the water effects material.  I knew it would take a few layers to get the depth I wanted.


I also had to make it deep enough to hold the horse and rider casualties.  The shield is from a Gael miniature.


These views give you a better look at the water and the casualty.


You can see how much I was able to submerge that horse and rider...


And for a close up on the miniature...