Tuesday, February 7, 2017

Whiteout Conditions


I conducted an interesting experiment over the last few days.  The idea was to see what I could do with weathering powders to achieve a whitewash effect.

Before I could do that, however, I had to do all the tri color camo, and shade it as well.


Using various combinations of Vallejo acrylic glazes, I shaded and darkened the added stowage, the zimmerit, tools, and so on.  In the image you see Sepia and Black.


I also added a few other colors, like the Vallejo green glaze.


I didn't have to be very precise here, since most of it would be obscured with all the whitewash effect.  The most important issue was to create the dark shadows!  I used acrylic so that it would dry in time for my facebook live session...


My goal was to show the flexibility of using powders and rubbing alcohol.  Since it only acts as a medium to help the powders flow like paint, that means you can completely wipe away nearly all of the wash if necessary.

 Here's a link to the video, which was too long to actually post here:


These images show what I was able to do in a few hours.  Keep in mind, more effects are to be added, such as mud and piled snow.


I did try to show a few tips in the demo on how to use the powders for more than just snow.  I mixed in Secret Weapon Miniatures water effects with the powders to make mud, do spatter effects, and so on.  

Another session is planned for later this week to do those final techniques, so stay tuned!


Monday, February 6, 2017

Cutting Edge


This figure was an interesting challenge in that I had a few different types of metal surfaces to deal with.  I wanted the brassy/bronze armor to stand out from the shinier swords in order to have those stand out.


I tried to reflect as many colors as I could onto the swords from nearby surfaces, which helps to enhance that shiny effect.


In contrast, the armor surfaces were 'dulled' by fewer such reflections.


Sunday, February 5, 2017

Urban Warfare


Just as I was about to finish off the basing on the winter American army for Bolt Action, I thought that it would be nice to have a follow up to the original step by step article.

This was a more urban style of basing, with cobblestone roads and broken walls.

I rolled out some Sculpey sheets using Happy Seppuku Moulds and Green Stuff World texture rollers.

Here's a link to the original article:


I also made another set of bricks, which was just a sheet of Sculpey cut into rows.


The advantage of the Sculpey bricks is that I can break and chip them very easily.  Then I can build a wall, or make a pile of broken bricks.


The brick texture could be used for either a wall or sidewalk.  If I wanted extra texture on the wall, I could take some white stucco texture and place that over the bricks.


Here's and image that shows those little bits of bricks chipped away, and then made into piles.  Keep in mind, snow will be added later, so I didn't want to get too crazy with extra textures at this stage.


I thought it might be fun to introduce another element to get the village ruins look, so I tossed in a few "boards", in the form of coffee stirs.


It was a simple, rapid fire answer to introducing some variation across all the bases.


I liked the broken boards so much, I added them to the MMG team.  Again, it was one extra level of texture that was easy to add, but makes it seem like they have set up shop inside a shattered building.


All set for primer painting!!


These lads will join the Winter Germans in the Battle of the Bulge, so stay tuned!!!


Saturday, February 4, 2017

Line of Fire


I tried to make a number of different sci-fi style bases for the Isorians, using pretty much any material you can think of.  In this case, it was some leftover MDF bits from a wild west terrain piece!


Yes indeed, it was an extra wooden shutter, which also seemed to be a nice vent or something along those lines.


To add an extra touch, I used a sawed off bit of sprue and a few "coins" chopped away from thin polystyrene tubes.  I have a number of sci-fi basing articles on the blog, and I even have a number of basing videos that are helpful!  

This is a preview video (one of 12 basing videos that were part of the Painting Pyramid series.  You can tell that I have a bit of an obsession with basing!!!


Friday, February 3, 2017

Tea Time!!!


Next up for Bolt Action we take a look at the growing BEF, which are complimented by the fantastic dice from down under... Dice of War!


I was very glad that these were red, since they contrast nicely with the French flag dice that we also use in our Bolt Action France '40 scenarios.


As always, the insignia is on the "6".  The 'flag' dice such as these have a printed design.  The unit specific insignia are usually etched into the surface.


The Maxim machine gun team should get plenty of these dice to roll each game!


This army is getting more heavy support, in the form of vehicles and even a 25 pounder gun.  That will make quite a BANG! :-)


I used to use the blocks of 30 smaller dice, but I do enjoy the feel of the bigger dice.  Besides, you just don't roll that many all at once, even for Flames of War.

I don't think that I have managed to exceed the number of dice that I have for any one roll.  However, that British national rule of the extra shots might do that for the big squads that have a LMG tucked into them!


Here's a link to the site, where you can see that there are a large number of nations and units to choose from :


Thursday, February 2, 2017

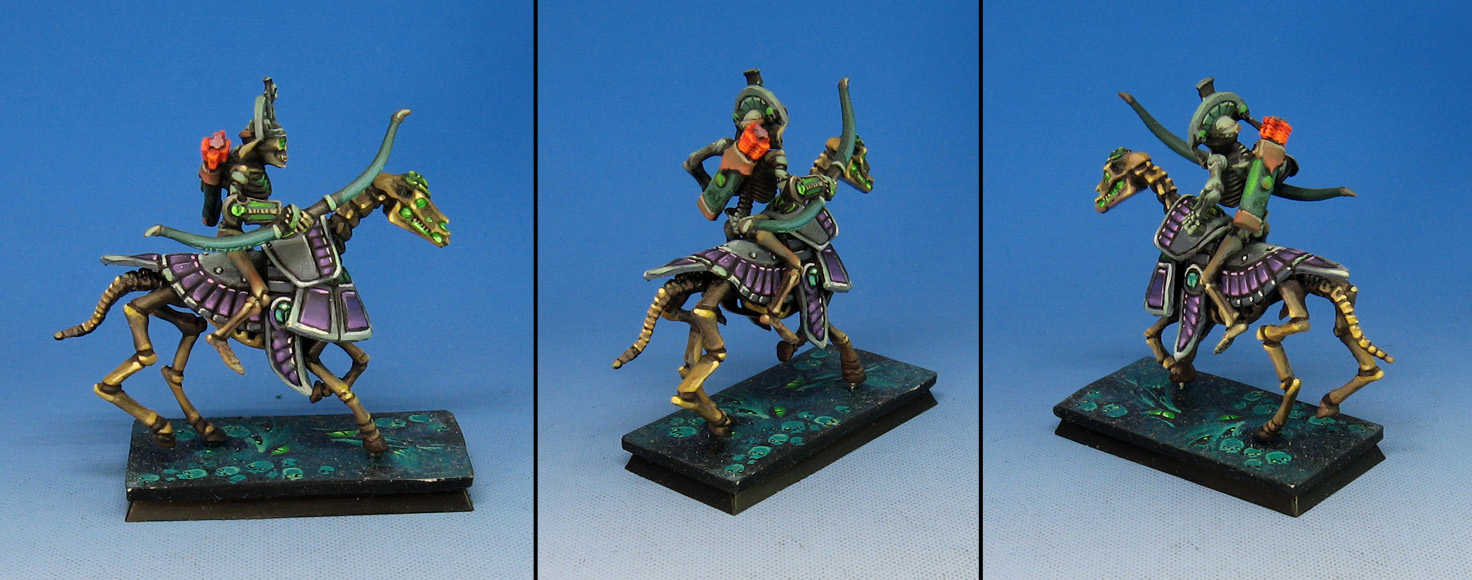
Terror Steeds


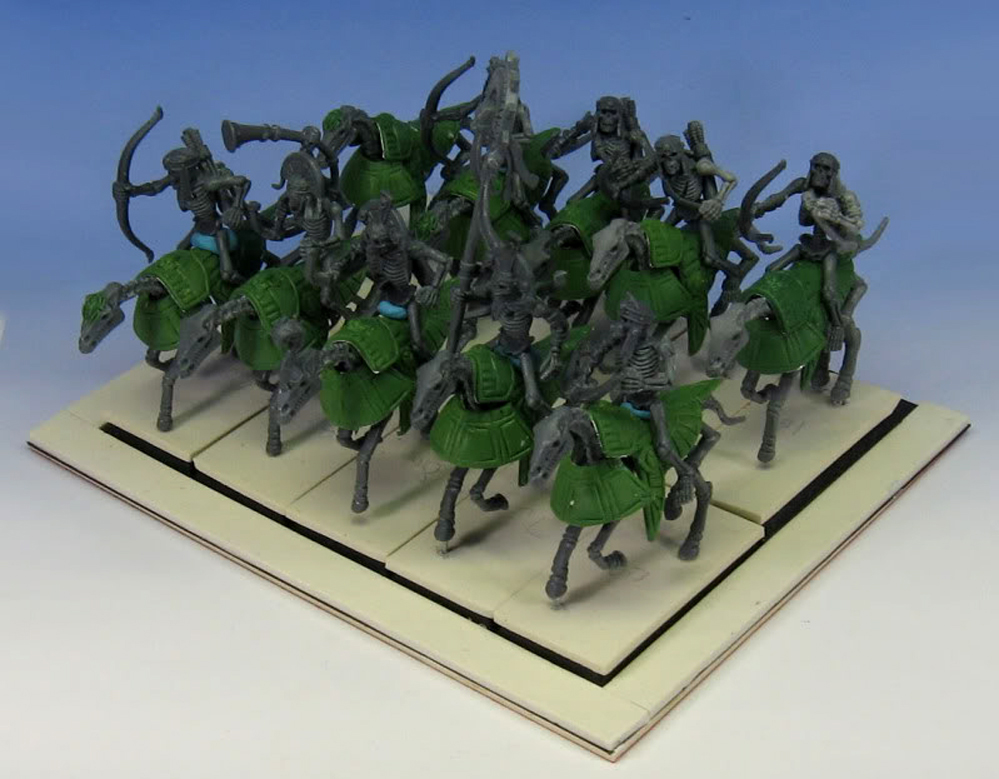
This is one of my favorite units of the old Tomb Kings army.  It's a converted skeleton cavalry unit that helped set the tone for everything else in the army.  Here's a look at the entire batch:


As you can see, each horse and rider is completely unique, in pose and in colors.  That was to reflect the Tzeentch taint of the entire army.  What was gold armor had turned to 'mercury', and was now every color of the rainbow.  

While you don't get bored painting every single figure differently, it can get a little crazy trying to make sure each one is unique, but yet maintain the same color set!

To learn more about the story of the army, I have this post:


He's also here:


Here's a peek at the green stuff work.


Wednesday, February 1, 2017

Blade and Fang


Here's one more from the wulfen series.  Just like the previous versions, I used a very limited set of colors.  Greens and purples were very very prominent, as well as burnt sienna.


Since green and purple make a very nice gray, that is handy for metals and fur alike!


Tossing in some lighter colors or dark blue, etc., alters this mix to widen the range of grays.  Mixing the lighter gray with the sienna helps to create a grayed down flesh color.  Using this tone helped to make the 'fur' have hints of a skin color.


He's also here: