Saturday, November 22, 2014

Lights, camera, ACTION!


Bolt Action, that is.

In 2014, I was introduced to Memoir '44.  As you know, it quickly became my favorite game!  You have also witnessed many paint sessions on vehicles, infantry, and terrain.  The idea was to slowly work my way into historical miniatures, which was the one remaining genre I had not tried.

I had always worried about the limitations of historical minis... assuming that I would be locked into repeating the same color schemes over and over again, forced to follow strict Osprey publishing guidelines.  As it turns out, it has not really been the case.

The more Memoir '44 items that appeared on the blog, the more the hue and cry arose for Bolt Action figures.

I had not heard of that system before (Flames of War was the game that I had first seen years ago), but it kept popping up in my Facebook feeds.  More messages on the blog continued to call for them... since folks were getting very curious to see what I would do with a tank that is actually larger than a nickel!!

So, Marty kindly introduced me to the world of Bolt Action.  This is the standard German Starter Army.  Let's see what's inside!


I was very surprised to see that almost everything was plastic.  For some reason, I thought that it was all metal and resin.  I believe the switch was made a few years ago...


Here's six sprues of various infantry.


And the half track sprues.


Some handy instructions, and the bases, which are essentially 25mm rounds.


The PZ IV is resin, with a few metal pieces.


Here's a shot of one of the infantry sprues.


You also get a mortar crew, and an artillery piece.


Both of these crews are in metal, as you can see.

Well, I guess you know what is lurking for 2015!  I am looking forward to trying out these 28mm scale WWII figures.

Speaking of Flames of War... I will be playing that as well!  It's gonna be quite a year. :-)


Friday, November 21, 2014

It ain't 'easy' being green


Back to the late war Easy Eight.

When we last left our intrepid tank crew, the final touches of the Shaded Basecoat phase were being added.  As usual, the idea behind this is to set up subsequent glazing, shading and tinting.


To do the glazing phase, the usual suspects made their appearance.

Lots of washes from Secret Weapon, augmented by a few Vallejo glazes.


You can see the various glazes set up on the palette, ready for action.

Just as I did with the Shaded Basecoat, I want to be very aware of color temperature... that is, vary the greens from warmer to cooler.  That's why there are so many glaze color options out here.


This view shows the difference some of the warmer glazes on the wheel assemblies.  The cooler glaze colors will be placed on upward facing surfaces.


The turret is another key area for that warm/cool balance.  The vertical walls will have more warmth to them... but the opposite on the top.


You can see the basic glazes starting to take shape.


Also, keep in mind that you can do a number of glazes in one area to make it darker if needed.  It's far better to do this gradual approach, as you get some nice smooth shading that way!

Once the primary glazes and shading are complete, I get to do the next fun part.  That will involve mixing the glaze colors with the regular paints and working in the middle tones.


Once I am done with that, I will do the weathering effects.  I have added a few cursory paint chips for now.  Much more to come, so stay tuned!


Brookfield Zoo


OK kids!  Time for a trip to the zoo!!!


This is a batch of those Mierce Miniatures Monsters... all on 60mm bases.


Lots of fur to deal with on these guys. :-)


And some big honkin' weapons too!


Not as much armor though...


More to come!


Eight is enough


After all the very tiny Memoir '44 vehicles, it was suggested that I try out the "next size up", which would be Flames of War scale.  

Rich donated a U.S. Easy Eight for the experiment.


This is an example of "Primer Painting", where my first layer is a combination of regular paint and primer.


Early on, I had to feel around for the various details, as I would have to get familiar with the various cuts and shapes.  I didn't prep this, which is the time I normally use to pre plan where certain lights and darks will be placed.


The hull and turret are each very different for me, as I have been painting early war Shermans with the one piece cast hulls and short barreled guns.


Even at this early stage, I am trying to think about where I want warmer or cooler greens to go.  This is very important in limited palette exercises such as these... where all I have to choose from is a variety of green!


This is about the extent of the cooler greens, highlighting to a very grayish green.


Adding some yellow should be just enough to warm up a few highlight areas.


This variety in warm/cool shades of green will keep this from being too boring to look at.  When you combine this with the eventual rust and dirt effects, there should be lots of fun stuff for the viewer to check out!


Also, I have been using the #6 filbert the whole time.  It keeps the line moving, not letting me get bogged down in one area for too long!


This is getting closer and closer to the glazing stage.


OK... time for glazing!!!

Stay tuned!


Thursday, November 20, 2014

This little piggy went to market...


Hopefully you are not getting "boared" with these Mierce Miniatures yet :-)


This time we have a regular boar, also on a 60mm base.


These could also make some interesting mounts for 40K orks.  Toss some plasticard armor on them, a bit (or a bunch!) of Dakka, and BOOM!!!


Wednesday, November 19, 2014

Landscaping your Tablescapes


Tonight we have two tastes that go great together.

A brand new set of Tabelscapes tiles from Secret Weapon Miniatures, and a whole metropolis from Burn In Designs!!!


Lathan, Master of Lasers, carefully plots the layout of his Medieval village.


As you can see, the structures are designed to have decent height, as well as a wide enough base to actually block LOS, instead of hiding the foot of a goblin. :-)  Check out that windmill!  And yes, it does spin!!


The Tablescapes tiles are held together by some ingenious plastic clips.  They fit snugly, but can be removed without too much pressure.

We rolled dice on them, and we were pleased with the lack of clattering, and that they did not bounce all over the place!.  It was so much nicer than a certain other variety of plastic tiles that we all remember...

Joe also happened to have some very neat flame markers on hand.  These were LED tea lights with painted cotton over the top.


Another view of the windmill.


We all loved the fountain, as well as the Astronomer's Observatory.  You get a nice view of the flame marker as well!


The Tablescapes could be oriented in any direction, in any combination.  Once these are painted up, it will present a magnificent table on which to play!

The terrain is not so tall that movement trays will topple over, but enough to get the point across.


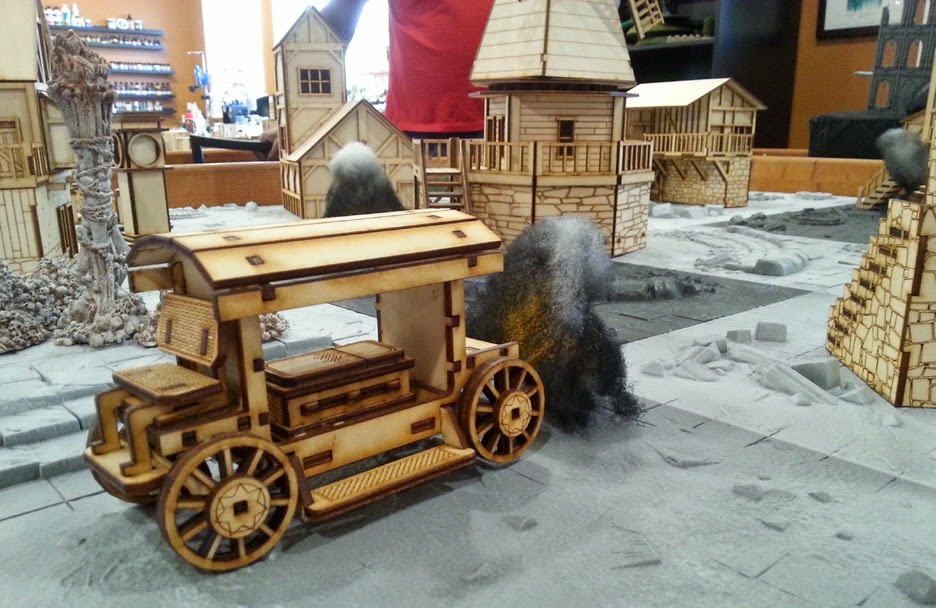
The Black Coach/Hearse is a very nice item.  There is even a casket which can be partially open!  Bring out the Dead!


These towers are just that... towering over the battlefield.


Down on street level, you can see just how cinematic this scene can be with some paint and some minis!!!


Rudy certainly appears to be excited!!!


In other business, I meant to show you those rivets that were cut from the tubes of baked sculpey.

As you can see, I have two sizes.  I mention once more that it was so much easier to cut these from the tubes than it has been with the polystyrene tubing which I have used thus far.

Those chunks just flew off into space like comet landers with no harpoons.  Not so with the sculpey!!

So, kudos to Mr. Justin and Lathan on the incredible work they have done making such wonderful terrain for us to enjoy!!!