Friday, June 13, 2014

Spitting fire in the desert


Another plane for you!  This time, one version of the Spitfire.


With the future emphasis on the North African campaigns, I thought I would try out some desert camo (Rich has the more traditional green covered already).


This is also a very fun pattern, with lots of neat colors.


Some comparisons with the P38 Lightning.


More to come!


I was working from a number of photos, including this:


Rolling along with the Krios


Work has continued on the Mechanicum Krios tank.  One of the reasons I wanted to take all these WIP images was to illustrate how the Shaded Basecoat  works for much more complicated things like this tank.  Lots of pieces, lots of color changes.

You have seen a number of WIP images with the Shaded Basecoat on these bits.  Now it was time for some glazing.


Glazing on the main hull and cockpit as well!


Remember, the whole idea behind this technique is to start lighter... work even lighter, and do much of the work with glazes that shade and tint those colors.


Take a look at this piece now, and check it out a few images later.


On this interior piece, I tried to make sure that some of the shading would be tinted more towards the red.


And now for that piece again.  I mixed a blue gray with the glaze colors, and worked the middle tones back towards a blue gray.  I just felt like I wanted more color variety there, despite the fact that it will be mostly hidden!


Same deal here... mixing the lighter colors with the glazes, creating that semi-transparent color that works nicely for making lighter colors that blend easily.


I have been waiting to use the fluorescent paints in the cockpit!


I also went back into these sections with that same semi-transparent middle to light color...


I was not looking forward to the treads.  However, the Shaded Basecoat technique would be just as important here!


I have to consider the eventual weathering techniques that will be used here.  Plus, lots of glazes will be used to get more depth of shading and colors in the darks.


I have to plan out which planes are going to catch light from above, and which ones are going to reflect the 'ground'.


Now these are just about ready for glazing!  Stay tuned!


Thursday, June 12, 2014

Getting Happy with paint.


All right... finally time to show the images of the painting process.

For those not familiar with this string of posts, these are bases that I made using one of the Happy Seppuku moulds.  Go on their website and see them!  You can also check out previous posts on this topic.


I started out with some tan for the non-metal part of the bases.


Once that was done, it was time to apply some dark blue-gray.


I gradually lightened the mix...


I lightened it some more, making sure to get more green or more brownish grays here and there.


Final highlights!


Glazing time!  I have a variety of colors from Secret Weapon, Vallejo and Reaper.


Even the initial blue/black glazes make a huge difference. The Shaded Basecoat technique applies to basing too!


Gotta have some rust effects, beginning with a mix of glaze colors and a reddish brown.


Adding a little more orange to that to make it lighter.

Just a few more details and tidbits, and they will be all done!!!


Making a case for the Dragon


With all the chaos and mayhem that has been a part of daily life for almost 2 years, heading over to the Wandering Dragon Shoppe has been an imposibility.

I have only seen the Shoppe once since the move to the new store, and that was at night when it was relatively  crowded.  That meant I didn't get to see some of the incredible things that Kevin and Laura have done with it!  Fantastic.  Just look at this room!!!


It is truly a Palace of Gaming.  This is still the same room!


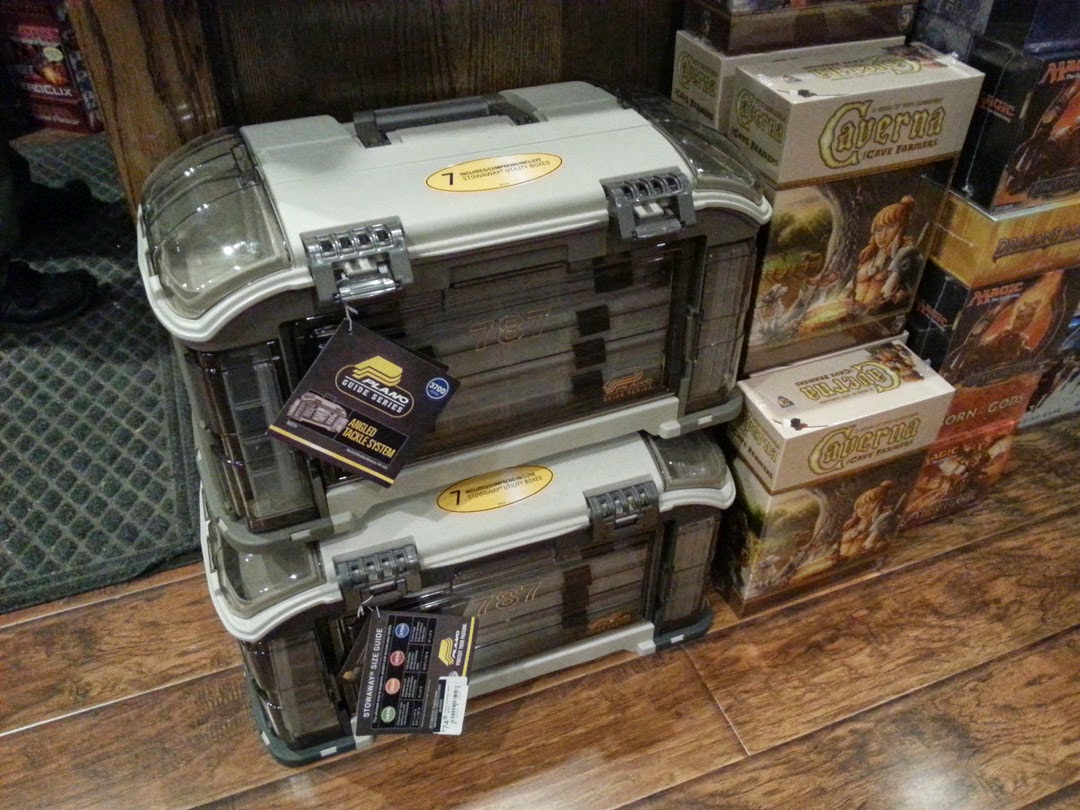
I don't think these were around the last time I was there.  In fact, there are so many sizes and types of cases, I don't think I was able to spot them all! It was like an Easter egg hunt.  More and more of them everywhere.


There were small cases, inserts, craft boxes, and some of these very large cases, which would work for gaming stuff, painting stuff, and anything else imaginable.


The wall of X-Wing and the Star Trek version...


The hobby section continues to expand as well.  Paints, minis, tools, supplies... the list goes on and on.


Down this hall you will find room after room for RPG's, tournaments, private games... it's like a castle that you need to map out like a D&D game.


Just one more area, this near the register.


We were also able to take advantage of the Menu Book that is also part of the Dragon Shoppe experience.  This time, pizza was chosen, delivered right to the room!  Wow...


I guess I should mention that a few games were played.  This was a common sight as I played the Germans in the first round.  It's hard to believe that I was able to keep the score as close as I did in that first game.  The margin was 6-4... almost 6-5.  That  meant a good game as the Americans could still yield an overall victory.

Sure enough, my tank brigades made mad dashes around the flanks of the dug in Germans, which enabled the double envelopment tactic.  I managed a 6-3 victory, for an overall 10-9 win!


Setting up for that first game.  Many thanks to Rich for hauling me out there, and to Kevin and Laura for being such wonderful hosts!!


Wednesday, June 11, 2014

The first round of bases


Hey folks!  I just made the first round of bases with the Happy Sepukku moulds!

I thought I would choose one of the sci-fi moulds, and see how I could incorporate that into my existing techniques


As you know, I use sculpey, cork, plasticard, and polystyrene tubes.  The Happy Seppuku moulds are meant to eliminate the need to constantly buy more plasticard textures.

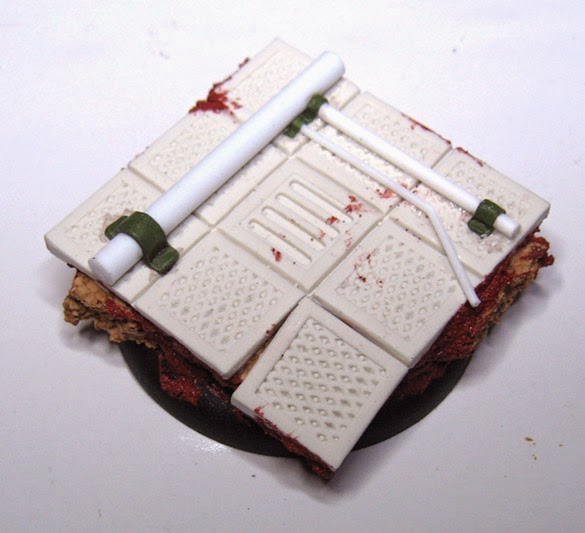
What I loved about these was the possibility of chopping them up into smaller sections.  Sure enough, it worked like a charm!


I thought that I would do a few combinations with cork to start.


As you can see, I "broke" off one of the panels, and used oxide paste to secure it in place.  Then it was time to add some polystyrene tubes!


Tubes added... looking good!


I did some more smaller bases, once again chopping the big panel into smaller chunks.


Adding tubes along the way...


Here's the whole collection!  The silver bullets (irony, yes) are from Secret Weapon Miniatures.  You have seen me use those many times now.

By the way, I also added some green stuff brackets to attach the tubes.


My next post will show the process of painting these guys!