Saturday, May 12, 2018

Savage Blades


I have been using the oils for a greater and greater percentage of each figure as I learn more techniques, and manipulate the colors even more.  A set of four figures was painted all at once using the oils, and I pushed much farther into the skin colors, eyes, gems and other surfaces than I had thought possible.


Keep in mind, the primary use of the oil paints is to allow me to work on a much greater number of figures at the same time.  It is not necessary to paint entire figures with them.  In fact, the vast majority of figures will be finished off with standard acrylic paints once the majority of the work has been done with oils.


The ability to continue blending colors on the surface long after they have first been applied is a massive advantage for me, and that means I can work on 3-5 times as many figures as I used to.  It also makes painting very large creatures, or figures with many hard to reach areas take far less time with way less hassle!


Thursday, May 10, 2018

Roadside Forests: A new tool for trees!


As I was working on the display board for the Little Wars tournament, I was continuing a similar process on my road sections and some other elements for the upcoming Battle of Arras board.

Since I was making roads and trees for the display board, why not make usable terrain pieces!

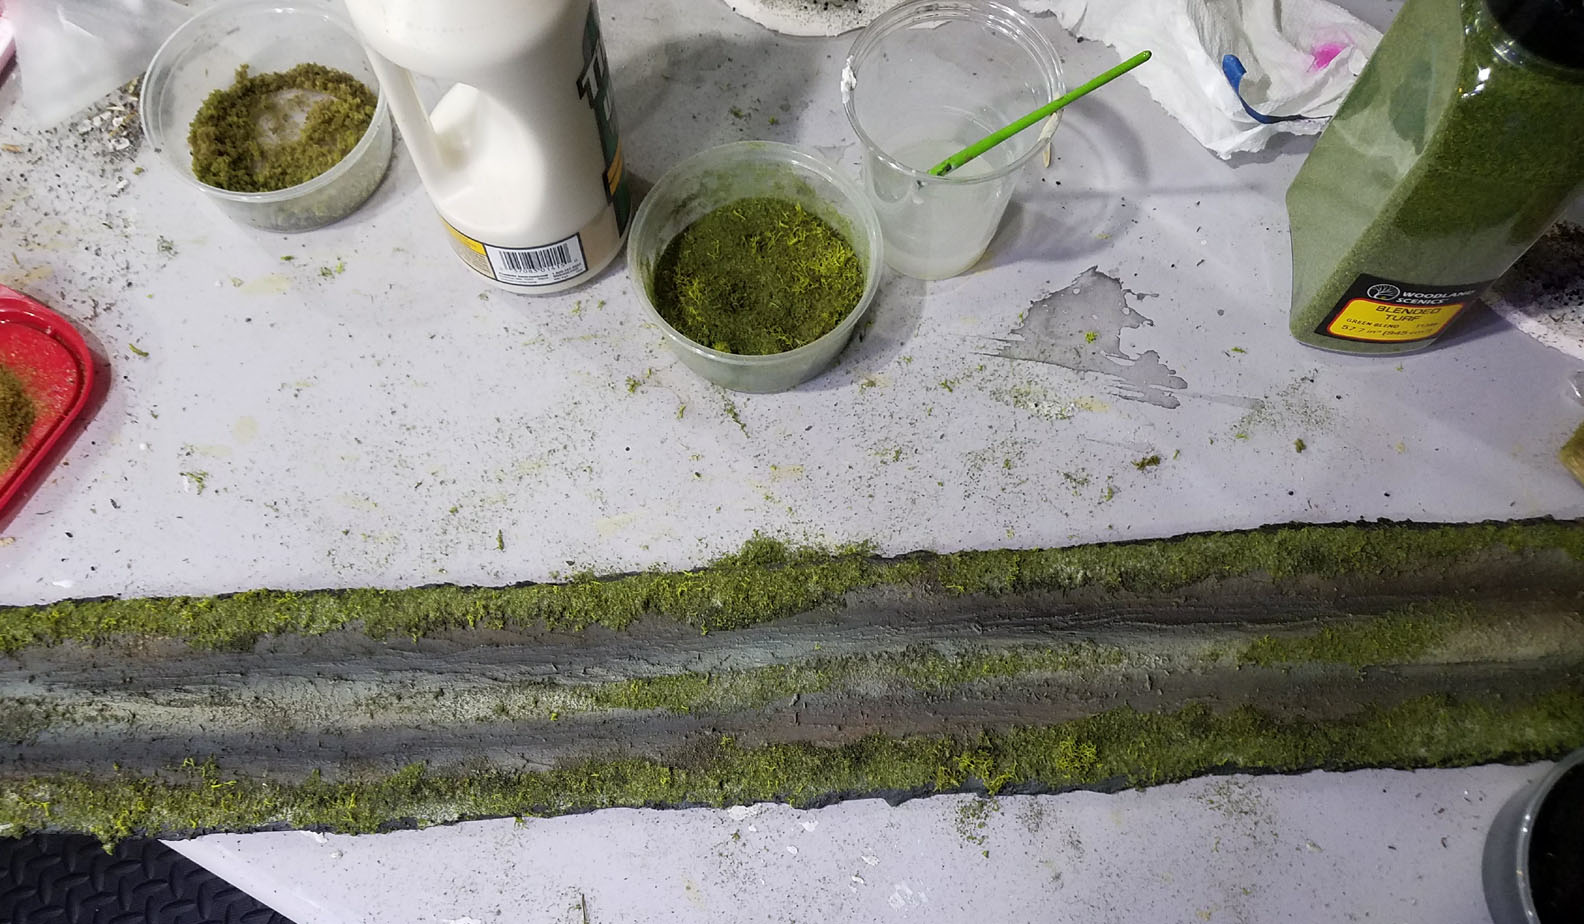
In fact, I used some of the leftover foliage from that display board on the road sections...


I painted them at the same time as the display board.  Here's a link to the first episode of the display board posts:


A watered down wood glue mix was used to attach that foliage to the road, in the same manner as the display board:


Originally I was going to put some bushes and shrubs on the sides of the road sections, but I need this batch to be easier to transport, so a lower profile is needed.


While I created the trees for the display board, I had another batch of tree stands under way.  These would range in all manner of sizes and shapes.  I needed a few large sections for the middle of the table, since the big hill and ridge line sections won't be used in this report.

I made some longer, narrower pieces to go alongside the roads, and also place in front of the painted backdrop.


Just as I did on the display board, the spray adhesive was use to adhere the flock to the moss.  I began with the fine, dark flock in order to "shade" these parts.


The coarse flock was used to get a bit more texture and color variety on the trees and bushes.


Once all that had been completed, I could go ahead with the final layers of greenish flock.  This is much finer than  the previous layers, so it sticks very well to all the texture that is in place.


I make sure to have newspapers all around the work area, since it makes it MUCH easier to scoop up what does not stick and put right back into my container.  This is a lesson that I learned the hard way.


Here we go!!!  New terrain pieces all set for the next batch of filming.  If you want to see what they look like on the table, you can check out my previous posts on the Ardennes board, or check out some of the battle reports on my YouTube channel:


Wednesday, May 9, 2018

The Goat Club


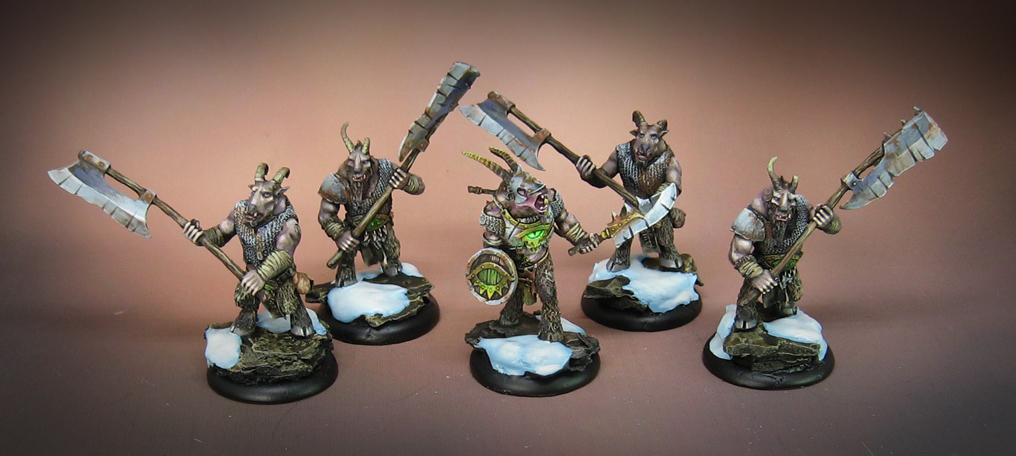
This unit of Beastmen is from Mierce Miniatures, and it was painted in a very similar way to another unit which was cast in metal.  I did a multi part series that took the group from primer to finished, starting with this episode:


Then we have episode two, getting into the painting itself:


All of these episodes were supposed to show how the Secret Weapon Weathering paints can be used for 'regular' painting or even weathering ;-)


This part dove into the weathering a bit more:


This post gives you a look at how the figures turned out:


One of the reasons I want to create more "unit painting" videos is to show the process of painting multiple figures in a format that is not broken into smaller pieces as I must do in blog posts.  You can only go around 10-15 images at most, and that usually means I must break things down into 2-4 posts.

People who don't follow this closely enough end up seeing only 1 or 2 episodes, and not always in the order meant to be viewed.

These are the types of videos I am furiously working on right now for the Patreon Page, using the new equipment and following a vast amount of testing.

Stay tuned for much more!


Tuesday, May 8, 2018

Home Made Tufts Step Two: Shrubs and Flowers


With the review concluded in the previous post on how to create the tufts themselves (link below), it is time to get to the really fun part!  I was able to find these leaves and flower material on MP Products website, but I am sure there are probably other manufacturers as well.


I wanted to have the strongest hold possible, so I used wood glue for adding the leaves and flowers.


I brushed over a tiny bit of that wood glue over the tops of the shrubs, and grabbed the "middle" tone green leaves.  Those were sprinkled immediately over the glue before those tiny dots began to dry...


The next row was the lightest "spring leaf" color, applied in the same way.


The final row was supposed to be darker, but I could not see much of a difference.  It's not a big deal, because they still looked exactly like the kinds of shrubs that I needed!


On to the flowers.  I did the same process here, brushing on some wood glue.  I made the "stems" as long as possible in the tuft making stage so that they would stand above the tufts.


I was really looking forward to the blue/purple mix!  Who knows, I might even put a few dots of glue on the shrubs and add some of this.


In the future, I will do entire sheets of just one color, which will make it a LOT easier to clean off the excess bits and get them back into the container.  I wanted you to be able to see the difference in fewer images, so I only did a few rows of each type.


The red and the pink worked just as well, and so did the yellow!


Here you go!  I was very happy with how all these worked out.  Aside from the huge cost savings, being able to make as many shrub and flower tufts at a moment's notice in whatever color or size that I need is crucial.

I can recall waiting almost 2 years for one type of flower color to come back in stock, but now I don't have to worry about that!

I will continue to experiment and find out what is possible with these tufts, of course.  Who knows what I might discover!

As I mentioned in the previous post, I will see if it is possible to make these tufts part of a pledge level on the Patreon Page.  Finding a packaging to keep them from getting smashed is the most important element there :-)

I hope this is useful for everyone!


Monday, May 7, 2018

Home Made Tufts Part One: Shrubs and Flowers


I recently made a step by step post showing how I used my new Static Grass Applicator from WWS, creating a bunch of brand new home made grass tufts.  

Since then, I had found a number of tutorials showing how to make your own shrub and flower tufts.  These are the most valued floral basing materials for me, and I have really wanted to make my own versions.

Not only can they be expensive, the colors and types that I need always seem to be out of stock.  Also, I can never find just the right color.  definitely time to take control of that situation myself!


As before, I cut up some sheets of Parchment paper to place my dots of glue.  The individual dots will be smaller than the first tests that I conducted.


These were taped down to a piece of cardboard so that they would not curl or move during the process and attach my nail.


Another added step to the original process is a bit of longer grass as a substitute for 6/8mm static grass.  I have plenty of 2/4mm, but I want the taller grass to "catch" the wood glue so I can attach the leaves and flowers to the stalks.


After mixing in a variety of heights and shades, I chopped up the tall grass.  I learned that you can't cut this too long, or it will get stuck in the applicator.  Usually 10mm is the limit.


I have been using the glue sent with the original set, but in the future I will be using Elmer's glue and possibly wood glue for additional strength.


The nail is placed in the sheet and through the cardboard backing.  This is what will provide the static charge to make the grass stand up straight.  You must tap on the applicator, and move across your sheet.


This image really shows how that static energy can manipulate the grass!


I was very happy with the way these tufts turned out.  I wanted to have a decent variety of colors and shades, as well as lengths of grass.  Those taller bits should be perfect for the tiny dots of wood glue!

At some point I will get myself some 6 and 8mm static grass so that the process goes even faster.


Unlike the previous batch, I kept most of the colors and tones in the greenish shades.  I did try to make some a little more brown than others, however.


The next episode will cover the addition of leaves and shredded foam to create those flower and shrubs!  I am hoping to do this in video form as well, but that will take considerably more time.  

That is something that I will try to do for the Patreon Page, in the new format that I made last week.  I might even be able to make the tufts themselves part of the new pledge structure, depending on how much of the supplies I can secure!


Sunday, May 6, 2018

Flower Garden


This Dark Sword figure was painted with oils during a recent live session, and finished off later on with additional details and foliage from Green Stuff World.  Here's a link to the live session:


In that broadcast, I was trying out a few new oil paints that I had gotten as an experiment.  These were much more saturated and intense colors, in ranges that were not really covered in my initial set that I had purchased on Amazon.  I added a very bight green, purple and magenta.


I was very happy with the results of those colors, and it was a very nice change from the more muted earth tones that I had been using most of the time with the oil paints!


I am looking forward to trying out the more intense oil colors on more Dark Sword minis, so stay tuned!!