Thursday, January 11, 2018

Saddle Up!


I have been working very hard to get a lot of new things ready for the Patreon Page... new styles of videos, more figures, and so on.

I have been looking into ways to create Patron only videos, which has meant loading new software, figuring out how to use that, getting the YouTube account approved and settled for these new applications.

My goal with these new types of videos is to record them like my Painting Pyramid videos and have them posted to my YouTube account.  This would mean better resolution than the facebook live sessions, and they would be easier to find.  These would be more frequent than the Facebook sessions, as the figures would be smaller too...

Finally, these figures would also be raffled off, and those pledges eligible to participate would have an even better chance of winning one of these amazing Dark Sword figures.

As I mentioned, I have been furiously prepping dozens of these figures, which will allow me to show all kinds of fun techniques in both acrylics and oils, as well as basing treatments.


I also want to utilize a few larger commission figures for some of the Facebook live sessions, such as this very interesting piece.  This one is calling out for some icy colors, so I will have a lot of fun painting this one live!  While it would be neat to try the oils on it, I think that the Reaper Clear paints might be the medium I will use.


Coming soon to a live session near you is this fantastic cowgirl will be the next oil painting live session, and she will also be the next raffle figure for the Patreon Page.  As always, any level of support gets you into the raffle!

She was a fundraising figure for AMPSA.  If you would like to get one of these for yourself, you can email Dallas at ampsayyc@gmail.com

I cant wait to work with the oil paints on this, as the leather surfaces are just calling for burnt siennas, umbers and ochres!

Here's the link to the page:


Wednesday, January 10, 2018

Skulltaker


This Enigma Miniatures figure was a very interesting piece to paint, as most of the figures from that series were.  They always had interesting details.


As this was part of that very large army commission, the basing and overall colors had to match a lot of the previously painted figures.  This meant a very compressed color range!  To top it off, the skin tones were requested to be a blueish black... taking away one more contrast element.


This meant trying to find contrast in those other areas that yea hear me mention so often, and that is warm vs cool, and saturated vs unsaturated.  You can have saturated colors in a limited palette exercise, as long as they are in line with the rest of the colors in that 'family'.  It is a very subtle way to establish contrast, but it is a lot of fun to try!


Monday, January 8, 2018

Wildlife Refuge


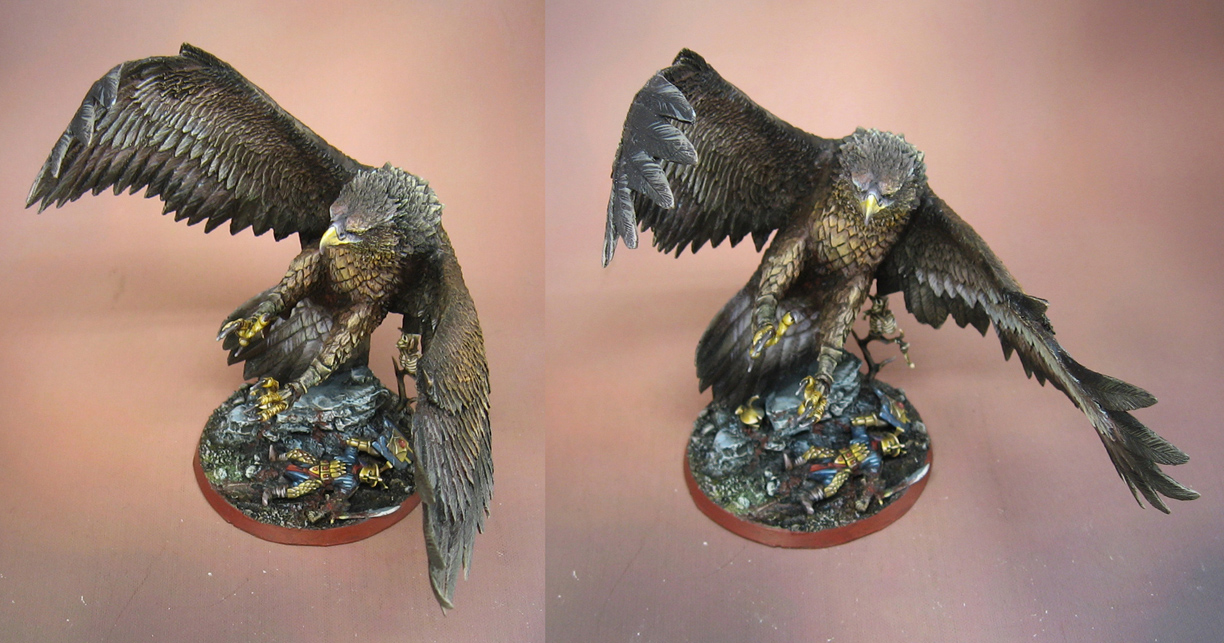
This Great Eagle was the centerpiece of my LOTR Galdhrim army.  The figure itself is no longer in print, but it was the perfect pose to represent a giant beast taking off after dispatching his prey!


I had a lot of fun painting the wings and the face.  There are a few other similar creatures that I painted as the subject for my Painting Pyramid tutorial videos, including the Griffon and Giant Owl.  Those are each 105 minutes long, and demonstrate how to paint these large monsters in a more efficient way.


When you have large wings such as these, it is important to get some variations in those brownish tones.  You can see that some are more saturated that other, while greyish browns compliment those brighter tones.  Some sections have more yellows, and other parts have some greenish shades.

While having lights and darks can be important, keeping these very broad surfaces interesting takes more than one kind of contrast!


I especially enjoyed painting the face, as it was very nicely sculpted.  After painting many birds of prey in 2D art, I was very familiar with how to approach that part.


The base was particularly important.  Given the position of the talons, I really wanted to have some dead Easterlings as fresh kills.  If you saw some of my previous Lord of the Rings posts, you know that I had a large Easterling/Khandish alliance army.

For the Bilbo's Bash tournament, I had to have one "good" and one "evil" army.  They had to show in some way that they were fighting each other, so the Khandish chariots had trophy heads, while the Gwaihir figure had it's Easterling victims!


A few plastic Easterling figures were cut in a few spots and repositioned.  I have a number of blog posts from that tournament, so you can check those out in the Bilbo's Bash section and see how they were used.  Given the unique way combat is resolved in LOTR, this kind of unit was a great compliment to the Cavalry and to the Stormcaller casters.

The general idea was to use the spell to knock down the enemy, which would be charged by the infantry from the front.  At the same time, the very fast cavalry would strike from the sides, and the Great Eagle would fly over the mass and pounce from behind.  It proved to be very deadly!!


He's also here:


Sunday, January 7, 2018

Eastern Blades


This is one of my favorite conversions for my Lord of the Rings armies, which used a variety of parts and bits.

There are a few Riders of Rohan horses, a few Khandish bits and a Tomb Kings chariot!


I had to cut down both the carriage section and the pole about 1/2 inch each to get it to fit on the 60mm base, but it was well worth it!  Here's a previous post that shows how this process looked:


The base was done to match my army display board, which I have shown in a series of posts:


This post shows the display board and both armies together, just before the Bilbo's Bash LOTR tournament!


Saturday, January 6, 2018

The Spectre


I remember when we first got these Barrow Wight figures many years ago.   It was part of an old boxed set from Lord of the Rings, which also contained Tom Bombadil, Goldberry and the captured Hobbits.

I think I made a diorama out of the Tom and Goldberry figures, but painted these separately for our Lord of the Rings games.  After giving them a few little updates a while back, I really enjoyed the look of them!

While we have been doing NMM since the very beginning over 17 years ago, it has been very fun to add these extra touches, such as greens and purples.  This creates a lot of extra depth to the metals, especially when the subject is supposed to be as ethereal as a Barrow Wight!

Even in the cloaks, some very bright greens were counterbalanced by more muted browns and umber tones.


He's also here:


Friday, January 5, 2018

Snow Patch


Part two of the winter terrain series begins with a much larger version of the piece that was created in part 1.  I will be using a much larger scrap piece from the Barbarossa board, and a piece of the thin underlayment foam.


You can see the progressive levels which were added with each section of thinner foam.  I also tried to vary the shape of the edges of the thinner pieces.  When I did the forest board, those tended to end in very neat arcs, and with this board, I want to have them be more irregular.

Note that each piece is cut with a beveled edge, and that I have left some room for adding trees, rocks, and other elements.


I always save my left over pieces!  The two sections on the left are going to be ideal for larger rivers which will need bridges for crossings.  

The image on the right shows that irregular edge I was talking about...


After gluing the pieces together, strips of painters tape were added to keep them from warping or separating during the subsequent steps.


Just as was done in part one, I took the shaved pieces of thicker foam and made 'steps' of rocky outcroppings to resemble slate, etc.


Plaster will be used to manipulate the shape of this hill section, and also provide some structural strength.  The idea is the make a sloping edge which will make it easier for miniatures to stand on the sloped parts.

The gentle slope should be fine for whole squads to march across or gun teams to set up.

If the plaster is mixed a little "drier", you can even sculpt a few additional shapes into the hill section.  However, the more plaster you add, the heavier your terrain piece will be!


The plaster mix is roughly applied to the entire hill section with a palette knife, making sure that I leave those rocky outcroppings exposed.  Adding this plaster mix will fill in all the gaps around them, and make it seem as if they really are part of the hill, and overgrown.


Pine trees are added, sticking the wire bottoms into the foam with some glue, making sure to leave room for infantry squads, gun teams and even vehicles.  Place them unevenly, pairing up a smaller tree with a bigger one, and then placing a mid size tree a little further away.

That is a better and more natural composition.


I set some logs into the wet plaster, which will both look more natural and provide a place for a smaller infantry squad or mortar team to be in hard cover.


Using a wet brush mixed with glue, I brushed over the plaster as I did in part 1 to smooth it over.  The glue now provided a bonding surface for the leaves and gravel which were added in this step.


Now it's time to let this all dry, so that it can be painted, flocked and get its snow texture!

I will show you some images of the new winter tundra battle mat which I am attempting to match as I put these finishing touches on these first terrain pieces.

This is just the beginning, as there are many more experiments that I want to conduct with this board!  I also want to make frozen rivers and ponds, blast craters and defensive bunkers/trenches.

If it is possible to support the Patreon Page, it will give me more time to work on more of these terrain pieces that are so much fun!  That will also allow me to purchase more new materials for these experiments:


Thursday, January 4, 2018

East of Eden


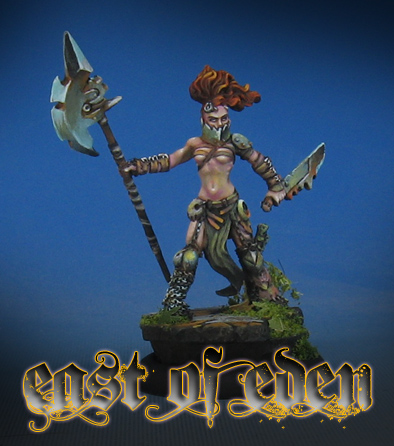
This was an interesting figure to paint, from Eden Miniatures.  They have some fun figures as part of the range, especially some of the bigger creatures and characters.


Obviously there are a lot of muted earth tones on this miniature, which meant that I had to work those into the skin tones as much as possible.  To counter all of the greens, grays and browns, I mixed a little of the Reaper Clear Red into the skin tones, which added a 'rosy' touch to the skin here and there.