Monday, February 6, 2017

Cutting Edge


This figure was an interesting challenge in that I had a few different types of metal surfaces to deal with.  I wanted the brassy/bronze armor to stand out from the shinier swords in order to have those stand out.


I tried to reflect as many colors as I could onto the swords from nearby surfaces, which helps to enhance that shiny effect.


In contrast, the armor surfaces were 'dulled' by fewer such reflections.


Sunday, February 5, 2017

Urban Warfare


Just as I was about to finish off the basing on the winter American army for Bolt Action, I thought that it would be nice to have a follow up to the original step by step article.

This was a more urban style of basing, with cobblestone roads and broken walls.

I rolled out some Sculpey sheets using Happy Seppuku Moulds and Green Stuff World texture rollers.

Here's a link to the original article:


I also made another set of bricks, which was just a sheet of Sculpey cut into rows.


The advantage of the Sculpey bricks is that I can break and chip them very easily.  Then I can build a wall, or make a pile of broken bricks.


The brick texture could be used for either a wall or sidewalk.  If I wanted extra texture on the wall, I could take some white stucco texture and place that over the bricks.


Here's and image that shows those little bits of bricks chipped away, and then made into piles.  Keep in mind, snow will be added later, so I didn't want to get too crazy with extra textures at this stage.


I thought it might be fun to introduce another element to get the village ruins look, so I tossed in a few "boards", in the form of coffee stirs.


It was a simple, rapid fire answer to introducing some variation across all the bases.


I liked the broken boards so much, I added them to the MMG team.  Again, it was one extra level of texture that was easy to add, but makes it seem like they have set up shop inside a shattered building.


All set for primer painting!!


These lads will join the Winter Germans in the Battle of the Bulge, so stay tuned!!!


Saturday, February 4, 2017

Line of Fire


I tried to make a number of different sci-fi style bases for the Isorians, using pretty much any material you can think of.  In this case, it was some leftover MDF bits from a wild west terrain piece!


Yes indeed, it was an extra wooden shutter, which also seemed to be a nice vent or something along those lines.


To add an extra touch, I used a sawed off bit of sprue and a few "coins" chopped away from thin polystyrene tubes.  I have a number of sci-fi basing articles on the blog, and I even have a number of basing videos that are helpful!  

This is a preview video (one of 12 basing videos that were part of the Painting Pyramid series.  You can tell that I have a bit of an obsession with basing!!!


Friday, February 3, 2017

Tea Time!!!


Next up for Bolt Action we take a look at the growing BEF, which are complimented by the fantastic dice from down under... Dice of War!


I was very glad that these were red, since they contrast nicely with the French flag dice that we also use in our Bolt Action France '40 scenarios.


As always, the insignia is on the "6".  The 'flag' dice such as these have a printed design.  The unit specific insignia are usually etched into the surface.


The Maxim machine gun team should get plenty of these dice to roll each game!


This army is getting more heavy support, in the form of vehicles and even a 25 pounder gun.  That will make quite a BANG! :-)


I used to use the blocks of 30 smaller dice, but I do enjoy the feel of the bigger dice.  Besides, you just don't roll that many all at once, even for Flames of War.

I don't think that I have managed to exceed the number of dice that I have for any one roll.  However, that British national rule of the extra shots might do that for the big squads that have a LMG tucked into them!


Here's a link to the site, where you can see that there are a large number of nations and units to choose from :


Thursday, February 2, 2017

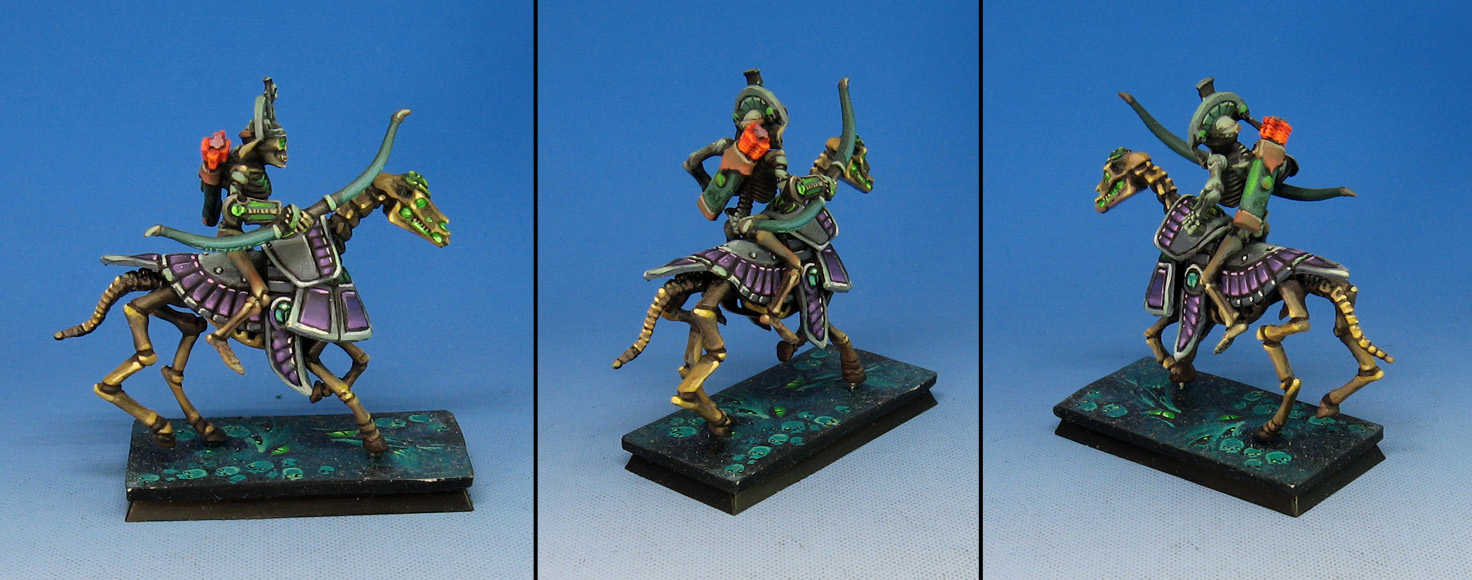
Terror Steeds


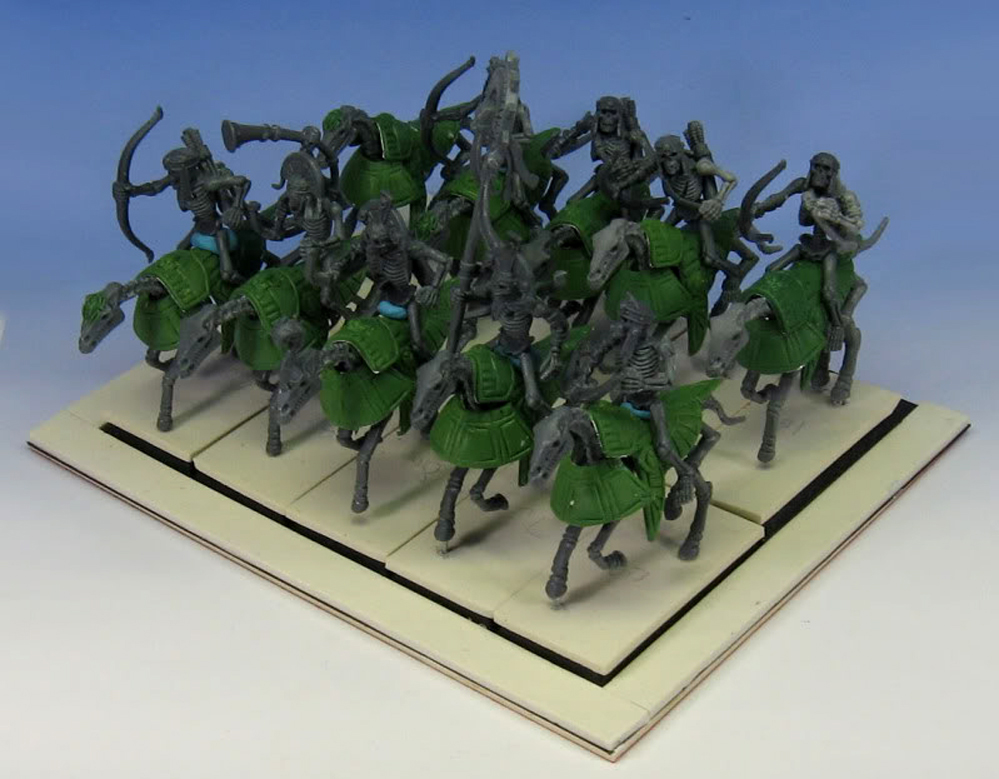
This is one of my favorite units of the old Tomb Kings army.  It's a converted skeleton cavalry unit that helped set the tone for everything else in the army.  Here's a look at the entire batch:


As you can see, each horse and rider is completely unique, in pose and in colors.  That was to reflect the Tzeentch taint of the entire army.  What was gold armor had turned to 'mercury', and was now every color of the rainbow.  

While you don't get bored painting every single figure differently, it can get a little crazy trying to make sure each one is unique, but yet maintain the same color set!

To learn more about the story of the army, I have this post:


He's also here:


Here's a peek at the green stuff work.


Wednesday, February 1, 2017

Blade and Fang


Here's one more from the wulfen series.  Just like the previous versions, I used a very limited set of colors.  Greens and purples were very very prominent, as well as burnt sienna.


Since green and purple make a very nice gray, that is handy for metals and fur alike!


Tossing in some lighter colors or dark blue, etc., alters this mix to widen the range of grays.  Mixing the lighter gray with the sienna helps to create a grayed down flesh color.  Using this tone helped to make the 'fur' have hints of a skin color.


He's also here:


Tuesday, January 31, 2017

A brand new Canvas


Following up on Episode Four, where I established the deepest shadow colors on the vehicles and shaded all sections of the camo pattern.  It is now time for the Great Experiment to begin!!


For the first time, I will use oil paints on a miniature and not a canvas.  In fact, it's been at least 20+ years since I worked with oils, so this will be quite interesting!

I purchased a basic set of ten colors, which is all I will ever need.  Paint mixing is something I am quite used to, so all I needed were the essential ochres, thalos and cadmiums.


Since the darker washes are still "active", all I need to do is apply some paint, and start mixing it with the still wet paint that is already on the figure!  One important note... this thicker paint will stick to the surface since the underlying layers are very thin.


I used some left over filters to thin down the oil paint.  Those are mostly white spirits anyway, so it makes a great paint thinner.


In this close up, you can see that I worked my way around the cables and other details, re-establishing lighter colors around them.


I was able to do some streaking on the mud guards, and all it took were straight line strokes moving downwards.  Also, I added some brownish grey metal colors to the spare tracks before moving on to rust.


I didn't want to get too crazy applying the oils, so I let them set up for a bit before I tried to add decals.  The Hungarian tanks will have much more use of the oil paints, since that pattern has a much harder edge.

It will take a while for these paints to completely dry, but the places where I am putting the decals were not where I was painting.


I think I might have to do a separate article on decals, since I have compiled a few key tools that make them much easier to deal with now.  For the moment, I will leave you with this image, and a tease that decal medium really does work!

Once these dried, they sank down into any crack or crevice, even the zimmerit.


This version of the chipping will be a faster, more basic method.  While I will eventually work with the Mig AMMO chipping fluid, I needed to get these vehicles done in a hurry.  Thus, I will use the sponge method.

I chopped up a few pieces of blister pack foam creating rough edges to make that chipping texture.  Some of the chipping paint (acrylic) is placed on the palette, and then the sponge is pressed in.  The excess paint is removed with a few test applications on a paper towel.


Here's a good example of the chipping along an edge.  I didn't want to get too crazy with this.


I have been looking forward to weathering these!  Keep in mind, additional weathering in the form of dust and mud will be done in later stages, so I have to make sure that I don't put too much of the chipping on there.

In the lower image, I used the smaller sponges to create scratch lines.


I also like to have the decals faded a bit by sponging on some of the background colors.


Once these processes were completed, I left the vehicles to dry and set.


They are now ready for a few more phases, such as painting the commanders, adding mud, dust, leaves and grass to the treads.  Stay tuned!