Monday, August 11, 2014

Stalking around the dealer's room


I guess I will be doing quite a bit of that this weekend at GenCon.  It's going to be very busy for me!

To make sure that I had some files on hand for blog posts when we are in transit tomorrow, I snapped tons of images on the new Hangar 1 backdrops.  Once again, images that were not possible until now!


I loved this unit of Stalkers for my Tomb Kings.  They are heavily converted, as you can see.  The pillars match those on the display board.


The unit was designed to go in a very specific spot on the display board, right underneath a recently dug hole into the Tomb Complex.


There are some WIP images of the conversions here:


Then I had to see what they would look like on the brown backdrop.  I knew that the greens and blues would be showcased a great deal :-)


For those not familiar with the theme of the army, it is essentially a Tzeentch tainted Tomb Kings army.  There is an entire story written for the army, which can also be found in the Tomb Kings section.


The bases and movement tray are all sculpey, of course.  Once again, many WIP images showing how all of it was made.


The Hieroglphs around the edge say "Those who enter the Tomb Cities of Pseusenes shall suffer a fate worse than death."


A pity that they were so awful in combat.  Well... that's just about all of the Tomb Kings units.


Next up... Necro Knights!


Pillars of time


There have been in incredible amount of things to try and get ready for GenCon.  Doubt if all of that is going to happen, but at least I will try!

This set of bases is supposed to be for the new Holy Orders faction from Wild West Exodus, which they are unleashing at GenCon!


This is pretty standard Sculpey stuff here.  Cork on the bottom, a layer of baked Sculpey on top!


Trying out a few different designs...


I want to try to create a lectern on one of them.  I will be sculpting a big book to go there!


I also want to have some marble columns.  I rolled out some tubes of sculpey, so that I could carve and weather them as needed.


While the clay was still soft, I cut some lines into them to create sections in the columns.


These smaller pieces are going to be the bases for the columns.  I will carve them after the clay is baked.


A whole set!!!


Another big tile with lots of Sculpey for baking.  Most of this is for use at GenCon.

This was also my first time using the new over to bake sculpey.  It seems like it sent well!  It's way easier to see what the temperature is, that's for sure.

Wish me luck getting to GenCon!!!


Sunday, August 10, 2014

Let's go raiding!


And to do that, we need a sweet ride!  We have one right here... sporting the Blood Star icon.


Of all the vehicles, I think I was looking forward to this one the most, as it had some of the best freehand opportunities.  


The large sail was obviously a perfect canvas.


Also, this has been the classic notion of a Dark Eldar army all along.  I could not wait to put my spin on this iconic vehicle!


It's not an easy thing to paint, that's for sure, as I had to paint a number of the parts before I could even think about putting it all together.  Some of them were deep interior pieces.


Getting the crew to be in just the right position was also more difficult than I expected.


There are certainly a number of things that could go horribly wrong with painting pieces first, but there was just no way I was getting my brush into some of those areas!


Front and back.  There are also a number of WIP images here, including all the work on the underside:


The next set of images will feature the guys who rode in this.  Kind of a surprise :-)


Cutting through the skies


Before I took the pictures of the Razorwing on the brown/gray backdrop, I wondered if the warm colors would be too close in hue to the reds and orange of the vehicle.


Fortunately, there was a enough cooler gray colors to present a tiny bit of subtle contrast.  The diffused lights and darks also reflected the nature of the freehand, which would brighten and fade across the surface of the Razorwing.


I forgot how much fun I had on the mosaic tile base!  Most of the other ones that I made for the army were very small.  Here's a link to some of those images:


More views from above... every time I see this view, I am reminded to just how broad the surface of the wings was!!


One last time... then on to the raider!


Saturday, August 9, 2014

The bark is better than the bite


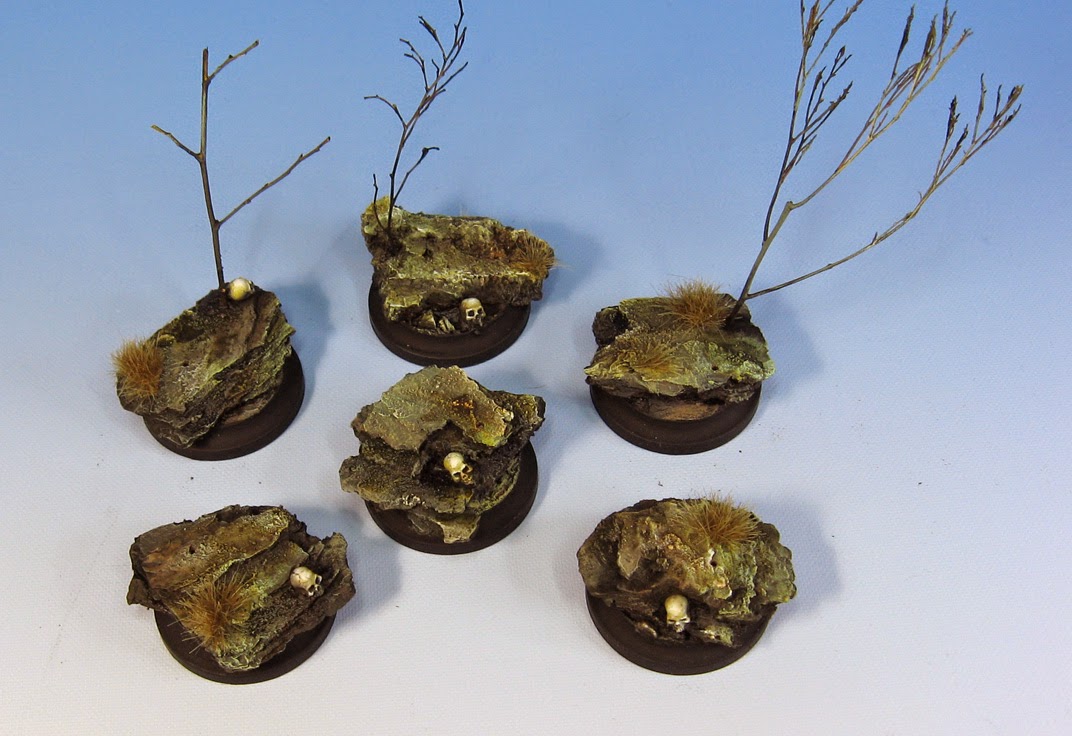
The bases are now fully painted!  I have also added a few strategically placed tufts of grass form Army Painter.


Now they are all set for GenCon and the Demonstration tables/Wild West Exodus booth!


Hopefully I will get a chance to paint some on these guys during that time.  I will also be getting lessons in playing the game.


I have some other unpainted bases that I will be bringing, along with basing materials to make more!


The newest set...


As I painted these, I tried to think about the colors that I would be using on the figures.  These will be a tad bit warmer, with more reddish browns.  That will contrast in a subtle way with the greenish grays and browns of the bases.


I do like how the dried foliage looks once painted!


Just starting to put together a simple costume for the Wild West Exodus booth.  Nothing fancy.


A checkered past...


To make this Castellax a little different from the first one, I thought it would be fun to do some tried and true checker patterns.


Nothing very difficult, but it does take a little bit of planning.  By making the lines the way I have here, it makes it far easier to ensure even spacing!


That was something I learned the hard way a few times :-)  You can see the basic patterns now, which will be highlighted and shaded, as well as weathered, later on.


Highlights done, so time for glazing!


Just like I did with the last piece, a variety of blue/black glazes were applied.


With the glazes finished, I set about working those midtone areas.


I will put the fluorescent glow on the back of this guy just like the first one.


Most of the middle tones in shape.  I still want to do some more tinting there, and then some final highlights.