
Some of you remember the posts from a while back that discussed methods for painting fur. This is about painting fur, but more painting in general. I like people to see set of images such as this, as it is the way I go about painting my miniatures.
Here were the colors that I used. As usual, my Filbert brush and the craft brushes were on hand, just like in the videos!
Miniature paint makes fine '2D' paintings, it turns out!!

This is the equivalent of the "Shaded Basecoat". You can see very broad strokes used with the filbert brush, setting the lights and darks in place very rapidly.

In these early steps, I am trying to 'set up' the final stages. I am also trying to balance where 'warm' and 'cool' colors are placed. Even now, the "center of interest" must be established.
That can be done by a variety of contrasts... opposing colors, light vs dark colors, and how 'hard' or soft the edge is, such as those on the face.
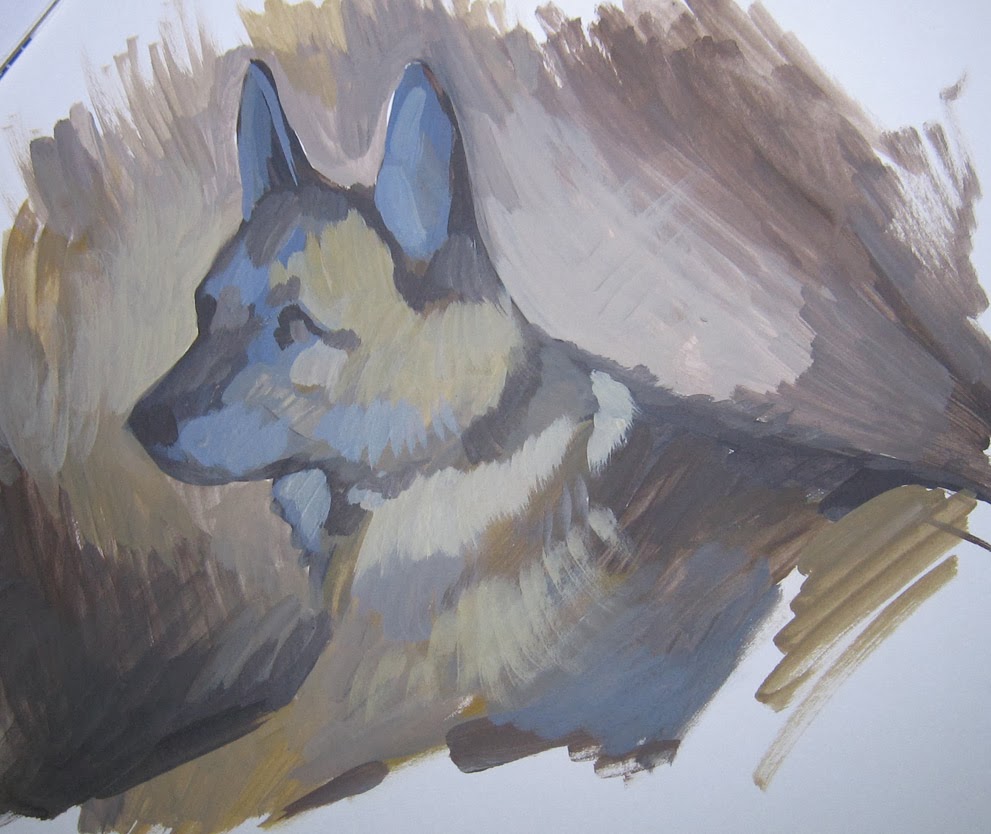
More dark shades are added, refining the drawing and setting up more details.

Not only are lighter colors added at this point, I am also thinking about directional brush strokes. These flow in the direction of the fur. However, you will also notice that I am letting those first layers show through a bit.
That is, I allow the 'underpainting' to show through in spots. This will provide more depth overall.

Still more details are added. Some edges are smoothed and faded, others are sharpened even more.
I am also using that opposition of warm and cool colors...

You can see more refinement around the nose and eyes. Obviously, this is the area that I want to feature in that 'center of interest'. Not restricted to paintings like this, a miniature also need one. The face is almost always that spot :-)

More edges have been enhanced with stark highlights and more directional brush strokes.

Final result! If miniature paint can do this on some matboard, just think what it can do to a miniature!
Trust me. painting this way on miniatures is a blast. This is what I try to bring across in the gentlest possible way on the videos.

This is a great picture! Very impressive.
ReplyDeleteDid you work from a live model, by any chance?
Thanks! It was from a photo that someone else had taken. Fortunately I had seen Herbie several times and played with him, so I knew what all the details looked like...
DeleteWell done. I do under-paint things more than I realize. I'm a pencil, pen and ink guy that loves line work when working in 2D. Opaque colors generally blind me at times and make that under-painting a bit hidden in the process. Your post and painting reminds me to pay more attention to that.
ReplyDeleteThanks! It is such a fun process :-)
DeleteOutstanding...I am doing my best to incorporate this into my painting. At this time I mostly choose an area, like let's say...the armor on a miniature and then do this on that specific part. I just can't seem to get the hang of it doing it on the entire miniature...
ReplyDeleteThat's a great plan! Start off with areas that you feel more comfortable with, and move on from there!
Delete