Friday, January 11, 2019

Giant News!


While the release of the new Free Folk army from Song of Ice and Fire is still in the future, I have been busy creating as many painting tutorials as I can so that you will be ready to work on yours!

This Savage Giant was the first tutorial of the Free Folk.


I begin in the usual way, with my initial glazes and Sgaded Basecoat technique.  Those who have seen my other tutorials are quite familiar with this :-)


Once those critical lights and darks have been determined, I can get into the "middle tones", or that vast range of shading between light and dark.  Believe it or not, most of the real action happens here.


With the figure itself completed, it was time to do some snow and ice effects!


I tried to show a few different methods for creating those effects.  They will feature very prominently in all my upcoming Free Folk and Night's Watch tutorials.


Here he is!  I have already completed the second Giant that comes with the starter box, and he will be made available to the patrons of my Patreon Page.  I already have a 5 part army painting series on my Lannister Halberds (series 4 of the five Army Painting series I have done so far!)  here is a quick review of that: https://wappellious.blogspot.com/2018/12/shiny-lannisters.html


Each army painting series guides you through the entire process of basing, initial shading, the midtones, finishing details, and so on.  A typical series is about 10-13 hours long, and helps you figure out how much of your "currency of time" that you might want to invest in a project.  

I will asses how much a given effect took to make, and then ask if that (multiplied by a given number of figures!) is worth it.  I have even started showing how you can paint your army "on the fly", that is making it look good enough to put on the table before it is actually done.

All of us are in the same boat... never enough time to paint all the minis we have.


I often see people get discouraged, as they are convinced that they won't be able to paint their armies to the standard that they would like, and end up not painting them at all.  My goal with the tutorials is to show you ways to get those nifty results, but not have to invest 3 lifetimes into painting one unit!

The armies that I paint for the Patreon Page are my own, and are featured in my battle reports (or what I take to tournaments, etc).  I do this because there is no better way to understand what a fellow army painter goes through than to be one yourself!

As I mentioned early on, I have 5 Army Painting series up on the Patreon Page now.  That pledge level is $15, and it gets you all of the video content, not just the series.  This means that you get some additional bonus techniques that you can try on your unit champions or special characters.  Here's a link to the page:  www.patreon.com/JamesWappel


Here's a link to the video, so you can check it out!  https://youtu.be/1LvJv3dyjEw


Wednesday, January 9, 2019

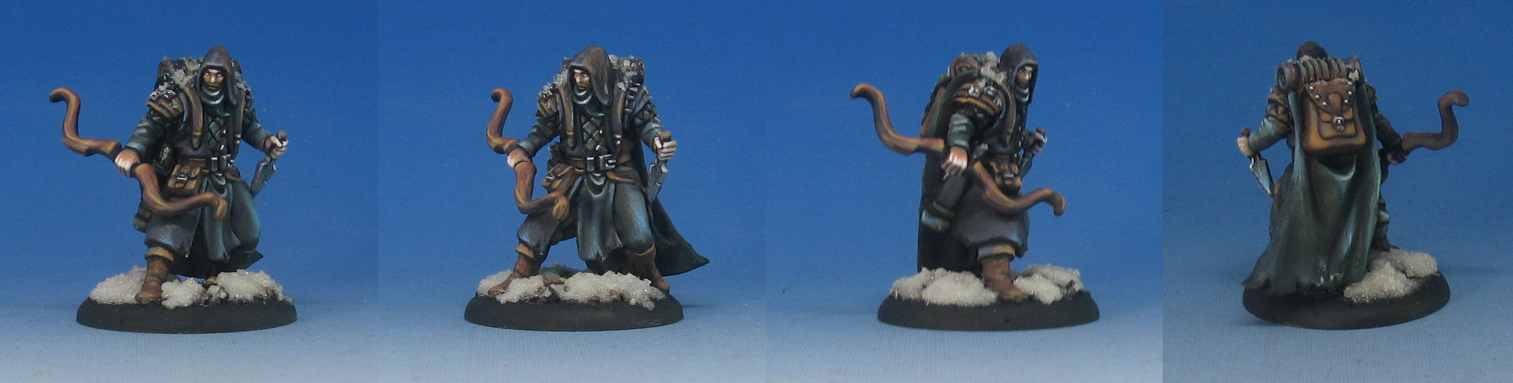
Night's watch: Color Test Figure


Here's a peek at the next Army Painting series which will feature the Night's Watch!  This is the "color test" figure which I always try out first when working on a new army.

I can get a sense of not just how it looks, but how long a given effect might take to create... especially when you are talking about an entire army! :-)  


Normally the Color Test figure is the second episode in the series (which is 4-5 episodes long), but I had not painted any Night's Watch figures yet, so I needed to get familiar with the figures themselves.  As I go about painting the rest of the unit, I will be working from these images.  Those are up on the screen, along with the palette camera.

While "black" is the color of the Night's Watch, very seldom is that color truly black.  It tends to be blueish, greenish, and every other color, as even non reflective surfaces such as cloth can still take on the ambient colors of the environment around it.  

Sky colors, ground colors, etc, can really influence the tone.

I try to have a lot of conversations about all this during the painting process.  Showing the "how" is not as important as the "why".  It is the primary reason that the unit painting series are broken down into these separate episodes.  The total running time is usually 10-13 hours.


The basing is the same type of Oxide Paste and tree bark which I have been using on the other units.  This is the next unit being featured on the Patreon Page.  The first episode always starts out with basing, so you will see plenty of it when you join in on the Army Painting pledge level!  Here's a link for you:  www.patreon.com/JamesWappel


Tuesday, January 8, 2019

Law of the Jungle


Here we have another interesting squad from Victoria Miniatures!  These are Van Deimen's World Devils.  This is a very typical 10 man squad, with all the normal weapon options you would need for your 40K games.


These figures are done in the good old style of head, torso, arms and legs being individual parts.  This is really important for creating more interesting and unique figures.  Each set is designed to be interchangeable with other sets, which means you can swap out a lot of pieces!


I added a little bit of paper jungle foliage to these guys...


While the color scheme is obviously "compressed" somewhat, I still managed to work in plenty of variations on the skin tones, clothes, packs, etc.


 I used the Vallejo Metal medium again to create the effects on the guns, mixing it with the blue and brown liner paints to create some very dark metals!


I am in the process of filming a tutorial series on another squad of Victoria Miniatures, most of which will be available only to the patrons on the Patreon Page.  It will be very similar to the existing "Army Painter" series 1 through 5, where I take you through the process of your initial shaded basecoat and glazes to the final details!

Those will be posted here very soon:  www.patreon.com/JamesWappel


Monday, January 7, 2019

Shopping Spree


Here's the newest building that I have added to the Nouvion terrain board.  Just like the rest of the buildings, it is made out of pink underlayment foam.  This is a quick review of how I go about making these: https://wappellious.blogspot.com/2016/06/houses-in-hurry.html


The pink foam has many advantages.  It is ultimately a lot cheaper than foam core, and easier to work with.  You can cut it very easily, and texture it as well.  Cutting it into thin 'detail' pieces such as those around the windows is very handy for adding more levels of that detail to your buildings.


It does not take much to make the "ruined" look on the buildings, and it is very easy to measure out the various sections.  Once I work out the measurements of a structure, I make a template of the different pieces so that I can make more of that same building.  


The biggest advantage of the pink foam is that I can paint them without having to worry about the walls warping.  Foam core has the paper backing, which absorbs the moisture and makes things warp.  The pink foam takes the Stynrlez primer quite nicely!  Here's an example:  https://wappellious.blogspot.com/2018/08/terrain-time.html


Here's the painted version, which is now featured in the town of Nouvion!  Battle reports on this new table are imminent :-)  https://wappellious.blogspot.com/2018/12/building-nouvion-part-2.html


Sunday, January 6, 2019

Prime Shading


I have been using the Badger Stynlrez primer for many years now, since it works on every surface... metal, resin, plastic, etc., with no problems at all!  I used to brush in on before I had an airbrush, and that worked fine as well.


Now that there are over a dozen different colors of the Stynlrez primer, you can do what I like to call "Primer Painting".   I'm sure you have seen people do some pre shading of their figures with combinations of black and white primer... but there is even more that you can do with the Stynlrez.


I usually start off with one of the brownish colors.  This one is more of a raw umber color, with a touch of red.  There is also an ebony color which is a little darker and more muted.  That is not a bad one to start off with either.  There are some Mierce Miniatures bog monsters in this image.


I am not necessarily trying to cover the entire miniature with this layer.  Most of the focus is on the lower two thirds of the figure.


Now it is time to get some extra colors into our primer painting.  By spraying this lighter green over the reddish brown, I am already getting some interesting  colors on the skin tones and cloth of these Free Folk characters and Savage Giants.


The key is not to wipe out the underlying layers of reddish brown, but to dust the green over the top.  This creates a blend of colors, which makes a fantastic under painting for later on!


I did the same with the Bog Monsters and some converted Starks from Song of Ice and Fire.  I actually used Bolt Action winter Soviet arms to replace the swords and shields.


Next, I will do an even lighter dusting of this sandy yellow primer, which will lighten the greenish tones a little, and create yet another layer of mixed colors that I can play off of while painting.


Since my first several layers of paint tend to be glazes, I usually make my last layer of primer be a gentle spray of white.  This creates a full value scale, and it means that my glazes won't darken the figure too much.


Here we have that nice value pattern from light to dark, set up in a matter of minutes.  When I prime miniatures, I normally do several dozen at once.  This means prepping and basing a lot of figures, but it really does maximize your work time, and make the process more efficient. 


On figures that have a very visible base (or movement trays in the case of SoIaF miniatures), I go over the lower third of the figures with that dark ebony color or even a black.  If you compare the two images, you can really see the difference that it makes!


I did the same with my converted Stark weapon crew and the Bog Monsters.


As I mentioned before, this kind of pre shading sets up my subsequent glazes quite well,  I will still add more highlights and middle tones, but the framework is already in place.  Sometimes you notice things in terms of shapes when you do the pre shading that you might not have noticed while prepping the figures.


Now I have a number of Free Folk miniatures ready for video tutorials!  These will be available to my patrons on the Patreon Page here:  www.patreon.com/JamesWappel


Friday, January 4, 2019

The Magenta Mage


The first Painting Dark Sword tutorial is now available to the Patreon Patrons!  This is something I had wanted to do for a while, once I realized it had been a very very long time since I had last used the Vallejo Magenta Fluorescent paint!


This was the perfect miniature to feature the Object Source Lighting as well.  I wanted to continue the "color theory" painting episodes too, such as the emphasis on exploring the full range of greens on the last 2 Dark Sword videos.


I even managed to sneak in some marble basing as well!


Just like there are more to 'greens' than the basic green that immediately comes to mind, Magenta encompasses a massive array of warmer and cooler colors, along with saturated and unsaturated tones.  Yet another reason why I wanted to combine this with the OSL effect and the Fluorescent paints!


Here is something else that I am going to do on more of the videos... and that is turning off the saturation completely, and turning the screen to black and white!  It was very handy to show how important the "value scale" is, and also the various forms of contrast.

It is possible to get a lot of contrast simply by the type of color you place next to another, even though it is the exact same level of light or dark!


In these final images you can see some of that contrast at work.  There are some areas where the "purple" is almost blue... and that is just the thing that is needed to make the much warmer and saturated magenta reflections stand out.


You can only make a color so bright, so that means that you need to employ other methods of creating that contrast.  This means adding enough shadow areas, but also using "opposite" colors, as well as those muted/unsaturated colors that I have mentioned.


This is Episode 8 in my Painting Dark Sword video series, and #9 is already under way!  In addition to the Dark Sword tutorials I have been filming for the Patreon Page subscribers, I have been creating tutorials on Black Heart Models busts.  Each of these episode is about 100-120 minutes long, and takes you through the entire process of painting the miniature or bust.


The Dark Sword pledge level is $10, and it gets you much more than just Dark Sword tutorials!  You can also view the 'regular' episodes that feature various types of basing, terrain, etc.  That is all on the Patreon Page here:  www.patreon.com/JamesWappel