Tuesday, October 2, 2018

Lord of Slaughter


Another new series of videos are about to be added to the list of tutorials... Creature Caster!

These large beasties are highly detailed and that makes them perfect for creating how to videos.


Here's an example of a test video that was done in a Facebook Live session:


Since the parts are very interchangeable, it allows me to paint these in smaller sections, so I can still get them on camera despite their overall size.


This is one of several that are under way right now.  In this instance, I am working with acrylic paints.  I have a few others in progress that focus on oil painting.


Obviously I made good use of my Vallejo Fluorescent paints, injecting them into each color that was added, which enhances the saturation by quite a bit.


There will be a few different levels for the Creature Caster pledges, including one for the miniature itself!  You will be able to see those here on the Patreon Page:


Monday, October 1, 2018

Law of the Jungle


Next up from Victoria Miniatures we have the Arcadian Guard.  As usual, they are available in both male and female squads:


There are plenty of spare bits to go along with every squad, so you can make unique individual figures.  You see fewer and fewer of the "build your own" multi piece figures these days, where you can mix and match torsos, heads, arms, etc.


When I created my Highland guard army, I was utilizing pieces from several different squad types.  There are even sets of kneeling and sitting legs, which were wonderful to create tank commanders and tank riders.


I especially enjoy the command and NCO options.  Lots of personality and character!


Let's see what they look like as a whole unit...


And as a massive horde! :-)  I have two more forces of this size under way.  They will be painted with oils, as these figures were.  I will be making some painting videos of the process.

There are also plenty of videos showing how to approach painting and army on the Patreon Page.  Some of the Victoria Miniatures armies will be shown in tutorials available here:


Sunday, September 30, 2018

Tutorial Series 2: Painting Soviets


Series Two of my Army Painter tutorials was a very different set of videos for me to film.  It was the first time I tried doing a unit painting exercise on camera with oils, and it was the most bases that I filmed under construction!

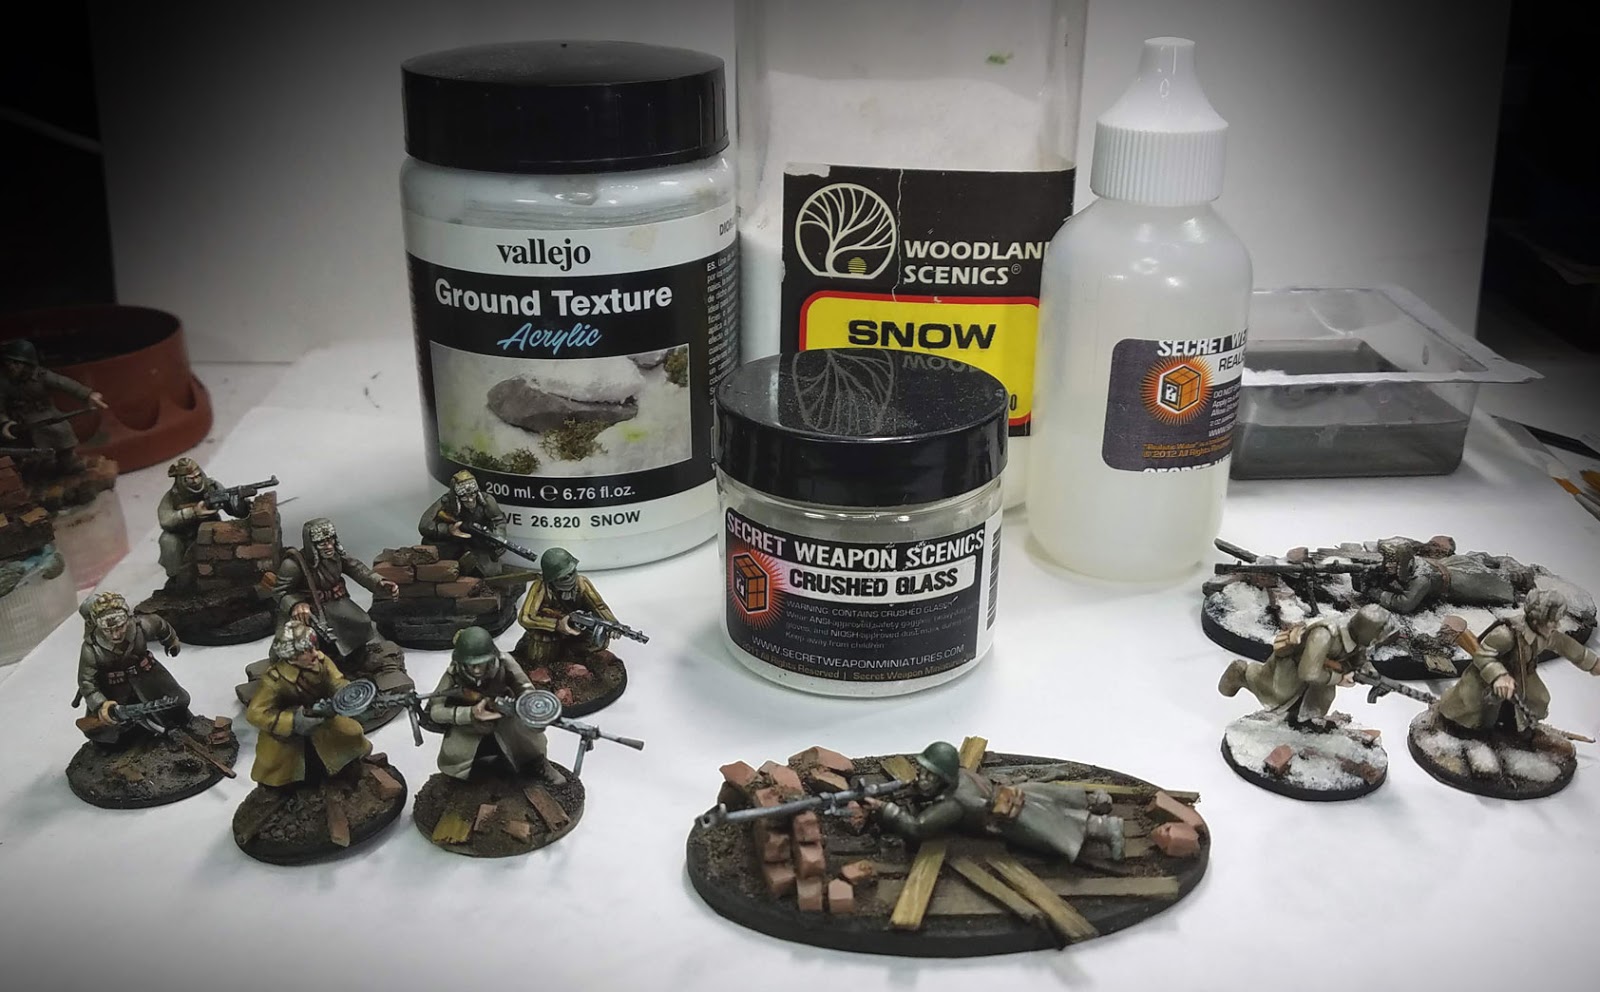
This was a four part set of tutorials, which has a running time of about 11 hours.  It covers the entire process from basing to painting to snow effects.


I try to show you how I go about making the bases, but also having a conversation about the thought process, and how it relates to the game system, available time and materials cost.


The idea is to present as many options as possible, instead of a "here's the one way you can get this done" approach.  I often experiment with new materials and techniques in each episode along the way to reinforce the multiple option idea.


Painting the unit with primarily the Mig Ammo Oilbrushers was a lot of fun!  I have been using the oils on many of my figures over the last few years, and not only historical minis like these.


As usual, I try to show more ways to get the same result.  For me, the oil paints are a huge time saver, as I am painting a host of other figures at the same time... vehicles, monsters, etc.


This is what the figures looked like after the third episode.  You could stop right here if you wanted, but I just had to do a number of snow techniques!


My goal in the final episode was to demonstrate two primary methods using 2 different sets of materials, and then test out various combinations of them on screen.


I do have an example of this in one of my Facebook Live sessions:


Each time I show a different method, I point out differences in the relative advantages and disadvantages.  In the end, my choice was the combination of techniques/materials.


I am now on Series 3, which is taking on a few more new concepts.  This latest series focuses on "rebuilding" an army from scratch, matching a previously painted army.  It also covers a few techniques in "army painting" form that are normally reserved for single figures.


You can get on the Army Painter pledge for $15, which will get you all the current episodes, as well as other tutorials each month not related to the specific unit painting lessons!  Here's a link to the page:


Saturday, September 29, 2018

Basing the East: Lord of the Rings


The first step in rebuilding my old Easterling army is to create the bases!  Of course, I love basing, so that was going to be very fun.  Since I did the original army, new techniques have been added... especially the "Bark and Branch" method.


As I make the bases, I make sure to point out how the bases must be constructed to match the 'footprint' of the figure, and also be a playable piece based on the rules system as well.

I was really looking forward to seeing what they would look like on the dramatic tree bark bases.


I also wanted to keep the look of the original broken marble/stone bases, so we break out the Sculpey sheets and the carving tools to create them.


A very unique aspect of the Lord of the Rings system is that you need both mounted and unmounted versions of your characters and cavalry.  They can be unhorsed in a few different ways, but they usually survive!

This means mimicking whatever was done with the primary cavalry figure.  I made sure to have a few examples of this, including the Dragon Knight/Captain.


I wanted to do the same for the banner bearer, but in sculpey!  The original pairing was done on broken marble bases, so it seemed quite appropriate to reprise that once more.

Here's a post on those minis from the old army:


Whenever possible, I try to do a few marble painting demonstrations.  This was a perfect opportunity to do so!  It does not take a complicated process to create something amazing, and easy to replicate across an army or unit.


Once the filming of Part 1 was complete, I had a number of figures ready for the subsequent painting episodes.  Just like the first two series, I try to have a conversation about the "currency" of time, and how each choice that you make in basing and painting the army makes it more costly in those terms.

Hopefully these methods give you some ideas, and also allow you to add some extra zest to your units and armies, but leaving you more of that currency to spend on other projects. :-)

With each Army Painter set of videos (about 12 hours of tutorials each), I try to delve into things like Object Source Lighting, Non Metallic Metals, Freehand and other techniques not usually associated with army painting.


Here's a complete view of what was created during the 2+ hours of filming!  The next several episodes will cover all aspects of painting the unit, focusing on matching the color scheme of the original army!

Subscribing to the Patreon Page at the $15 Army Painter level will provide access to all of the new videos, as well as previous series.  That is here on the Patreon Page:


Friday, September 28, 2018

Painting Dark Sword: Anti-Paladin


It has been a lot of fun painting the Dark Sword miniatures for tutorial videos, since they are packed with a lot of fine details which show up on camera quite nicely!

I've been working hard to get a second "palette camera" in place, and this was the first video where I tested it!


That worked out pretty well, and I have made more modifications to it since.  Now, the figure is in a more natural painting position for me, and it takes up a far larger portion of the screen.  Since I am using XSplit to record the videos, I can change the size of the palette screen when necessary, right as I am recording!  That is very cool!


For this episode, I was working with the Reaper Clear and Liner paints, doing a number of glazes.  For the second Dark Sword painting episode, I will do the same figure in oil paints.  I want to do this each month, because I think it could really provide some additional perspective on both mediums.

People can't tell which of my figures are painted in oils or acrylics when they look at them.  Heck, most of the time I can't even remember myself!  It really has more to do with time saving and efficiency.


The Dark Sword pledge is $10, but there are also a few other levels available.  These offer "hard copy" versions of the videos on USB drive, and even the miniatures themselves!!

You can find that on the Patreon Page here:


Thursday, September 27, 2018

Nocturna Begins!


I was very happy to add a Nocturna Miniatures pledge to the Patreon Page last month!  I love those miniatures, and they are my favorite large scale figures to work with.

For the first Nocturna miniature that was officially part of the Patreon pledge structure, I needed to create a decent base.  This would create more of an "environment" around the figure, like a vignette diorama.

I decided on a Bark and Branch method base, which I have done many times here on the blog and in Facebook Live sessions:


I chose the bark as my primary material due to the way it matched the "slate" look of the stones on the resin base.  It was a faster way to extend that partial base than using apoxy sculpt to physically sculpt it all.  I will probably do that on a future piece, just to show how that works.

I was able to shave down a few pieces of the bark to create some upright and angled pieces to mirror those on the resin base.  It took a few layers placed around it to make it match a bit better.


As usual, oxide paste (in this case a brownish version of it) was used as "mortar" between the layers, and as a way to build up some texture as well.  If you add some wood glue into the mix, you can place larger rocks and rough gravel too.


This gives you a better view of that upright section of bark.  You can see that I made a "cascade" or progressively smaller rocks and boulders moving down the the wooden plaque.  I could drop in my finer gravel and sand after those heavier elements were in place.


Those finer layers of sand and gravel help the bigger sections of bark and rock to stand out, but keeps them settled into the environment, as opposed to simply sitting on top.


Using the Oxide paste, glue, sand and gravel in this way helps to blend that smaller resin base into the entire larger base.


Ready for priming!  She now has a very solid base, and I look forward to dressing that up with several different kinds of flock, tufts, fallen leaves and maybe even a few vines!!


Here's the shaded primer, done in Stynlrez with the Badger Airbrush.  I will be using oils to paint this, so it will be a lot of fun!

This will be available to a few pledge levels.  The painted miniature itself is also available at a special level... you can check that out here:


Wednesday, September 26, 2018

Storm From the East: A new Tutorial Series


Whenever you begin a new army, there is always that first "color test" figure.  Not only does this give you a better idea of how your color scheme vision plays out, but it can give you a hint of how long it might take to execute that plan.

In this case, the color scheme was established long ago for my beloved Lord of the Rings Easterling army, which is about to be reborn!  Unfortunately, I had to sell off my original army, and with the relaunch of the Lord of the Rings system, it seemed to be just the right time to bring them back to life!

That first army was painted over 6 years ago, and I have learned many things since.  Even the materials I use have changed dramatically.


Now I have plastic minis for the most part, and I use the Reaper Clear and Liner paints, along with the Secret Weapon Miniatures weathering paints.  Even my basing has changed, as the "bark and branch" method came about 3-4 years ago.

Since I am creating the Army Painting video series for the Patreon Page, I thought it might be very useful for people to see the process of re-creating an army first hand.  I have already gathered up images of the old army, and I have prepped a brand new batch of figures!  

As with the first two army painting series, this will start off with basing, and then move to the Shaded Basecoat and Glazing phases.  I will even sneak in some freehand designs as well.


I also try to include conversations about making the figures as 'playable' as possible, and the realities of time constraints.  The "currency" of time is quite valuable, and there's usually only so much of it available for a given army.  My goal is to help you maximize that currency, and make your armies look as good as possible.

Unlike the first two series that focused on infantry, this will be a mix of cavalry and infantry.  Part of this has to do with the nature of the LOTR game system, which is part of that conversation I mentioned earlier.

You can get caught up on those first two series, and be ready for the third installment... with even more interesting goodies yet to come!  I will be recreating my Army of the Dead and Galadhrim elf armies in future series.

The Army Painter pledge is $15, and that is on the Patreon Page here: