Wednesday, July 5, 2017

Centurion


One more Junkers Centurion for you!  This is from the Urban Mammoth line of miniatures, and is one of several figures that I used for the Raging Reds Painting Pyramid instructional video.


These were very good subject matter, since I needed a full range of reds on these figures to define the shapes and surfaces.  This meant cooler reds in some places, but much warmer reds in others.  The base is a good example of the cooler, more muted reds.


I made the video because the sheer volume of questions that I had about how  to paint red... and specifically how to make it lighter without getting a chalky pink!


The simple key is to never use white.  I generally use warmer colors such as yellow to lighten red, but using seafoam green and other such tones will actually create a Burgundy shade.  This way you get a cooler red, but it is not quite pink, as the tiny bit of green alters that somewhat.

The how to paint Red video was one of five colors.  I made videos for Greens, Blues, Yellows and even Gray!  They are all available directly from me on USB drives.


Monday, July 3, 2017

War Begins! The Attack on the Meuse


Here we go!  Miniatures on the new terrain board at last.  The first thing that strikes me is how much bigger the board suddenly became!  After staring at the same shapes for so long, it felt like the board was tiny, and shrinking all the time.

When the figures were placed on the board, it seemed to grow exponentially.


The French troops make a desperate advance to the river to meet an oncoming attack, will they be in time to thwart it?  With no time to make prepared defenses, they may be overrun!


A sniper team attempts to neutralize the German artillery threat at the watermill, hiding in the reeds...


An artillery duel begins with the French 75mm vs the German light howitzer team.


The first German troops attempt a crossing at the river, but are met head on with machine gun and rifle fire.


The rumble of tanks can be heard as German armor advances to the river.  Will the slower French tanks and Anti Tank guns be able to prevent the Panzers from establishing a beachhead?


The machine gun team and the howitzer take aim at the troops splashing through the river.


A wave of light armor and troop transports arrive to overwhelm the French positions...


More troops emerge from the Hanomag and Opel Blitz, supporting the initial attack on the river, advancing over the dead bodies of their fallen comrades...


German machine gun teams take positions in fire support, while a German sharpshooter attempts to deal with that hidden French sniper!


Major Poirot orders an all out counterattack!!!


The hard pressed defenders rush into the waters which are now turning red with the blood of many casualties...


The Somua and Panhard take aim at the thinly armored Panzers.  More than one will burst into flame!


But there are more where those came from, and the massed formations of armor present too many targets for the French gunners.


If they are allowed to cross the river, the sickle stroke to the Channel coast will soon follow.  This position must be defended to the last man.


There are no more reserves to commit to the defense.  Fight to the last round!

Stay tuned for some early war battle reports, featuring the Armies of France, the BEF, and the Heer!


Saturday, July 1, 2017

Open for business


I managed to get a few quick images of the cured water effects, hoping to show how a few rapid applications worked out.


The idea was to make this board as multi purpose as possible, which meant leaving more open spaces for buildings, forests, jungle foliage, gun emplacements, etc.


The textural differences between the water and the rock/foliage were just what I was hoping for, and the shimmering water was a lot of fun to see once everything had cured!


The carved channel for the watermill also worked out nicely, and flowed logically from the rest of the river.


I had left some of the riverbeds the original brownish color, with some hints of the flock.  This also created a decent amount of variation from the rest of the ground.


The original intent for this part of the terrain was to have a boardwalk/catwalk crossing over both of these streams, connecting to the water mill.  Since we won't be playing that game, I'm very glad that we didn't position the supporting pylons into the river beds!


The watermill itself sits comfortably in place, with the churning waves beneath it!


We wanted to have a few parts of the river be as wide as possible, to create a potential obstacle for advance.  The island in the center had another purpose, but now it makes parts of the river more passable for advance, which means that it is similar to a road intersection or rail head, which were frequently contested in many battles.


The little square piece of foliage is an experiment to see if it looked more like jungle undergrowth or farm fields.


The view from above shows some of the foliage that lines the river.  I didn't want to go too crazy with this, lining the river completely from end to end.  I am making pieces of scatter terrain to place along the edges if we want it to be there.


I do love the wave action that was created at these angled points.  Part of it was due to the water effects paste, and the rest of the wave action was made by the texture of the river bed itself.  

If I had done more layers of poured water effects, this would have been lessened, but I only had so much, and time was the main issue.  Each pour required a few days to dry, so every chance I had, I tried to get a bit more on the board!


The next post will show what this looks like with minis on it, followed by some more posts on how the scatter terrain will be fashioned.

And then... battles!  Yes, actually using the terrain board!!!!!

Stay tuned.


Friday, June 30, 2017

Getting your feet wet


OK... one of the main points of this board was to experiment with several types of water, and see if they would fit within those time constraints that I keep talking about!

If you have not seen the two previous articles that showed the board under construction, I will put in some links later in the post.  I wanted to have some splashing water, especially up against natural obstacles, such as this point where several rocks and logs had piled up.


I had some Vallejo water effects left over, which works well for this task.  However, I have discovered that the Liquitex Heavy Glass Gel works even better, and costs a bit less!


This material is applied wherever I want those splashing waves to appear, with the knowledge that I will probably be doing a few additional layers on top after this dries.  Depending on humidity and other factors, it can take a few days for it to completely dry.

You can tint this is you like, using a variety of transparent colors.  Secret Weapon washes, as well as the Badger Airbrush Ghost tints work great, as they are very transparent, and somewhat glossy.


We worked our way around the board, conserving on the water effects to make sure I could at least have one layer in places before I had to use my more current heavy gel material.


While I would have liked to let this dry before applying the Woodland Scenics effects, time was not on my side.  I would have to go ahead and make some pours and hope for the best!


You don't want to apply too much at once.  I could be a little more generous with the application here, since there was a lot of absorbent flock everywhere!

Right away, I could see it react to the dry flock, turning it into "wet" underwater foliage.  This would also give me a little more depth even though the water itself would not be terribly thick.


The easier areas to pour would be the smaller 'pools' which were in one of the corners.  As I mentioned in earlier posts, this board was originally intended to be a swamp board for a Western game.  We did want it to work for Pacific War too, but then this was expanded to many areas of Europe, both east and west!


This image is a good example of how the water pour looked, and altered the flock.  I was able to get it to slip into the foliage around the rim of each pool, which made it look like it belonged on the edge.

A few more pours would be needed, as well as more applications of heavy gel.  Those would be needed most in the water mill channel, to make it look like churned up water.

Stay tuned for the next post, which will have some images of what the dried water effects looked like, and maybe even some figures on there too!

Links to the earlier posts:


Thursday, June 29, 2017

The Forest for the Trees...foliage in a snap.


In part two of the rapid terrain board build, I have some images of how I tried to make some swamp style trees with the few materials on hand, and in the shortest amount of time possible!

These terrain pieces would be very important for Bolt Action, and they would serve a further function... covering seams between boards!


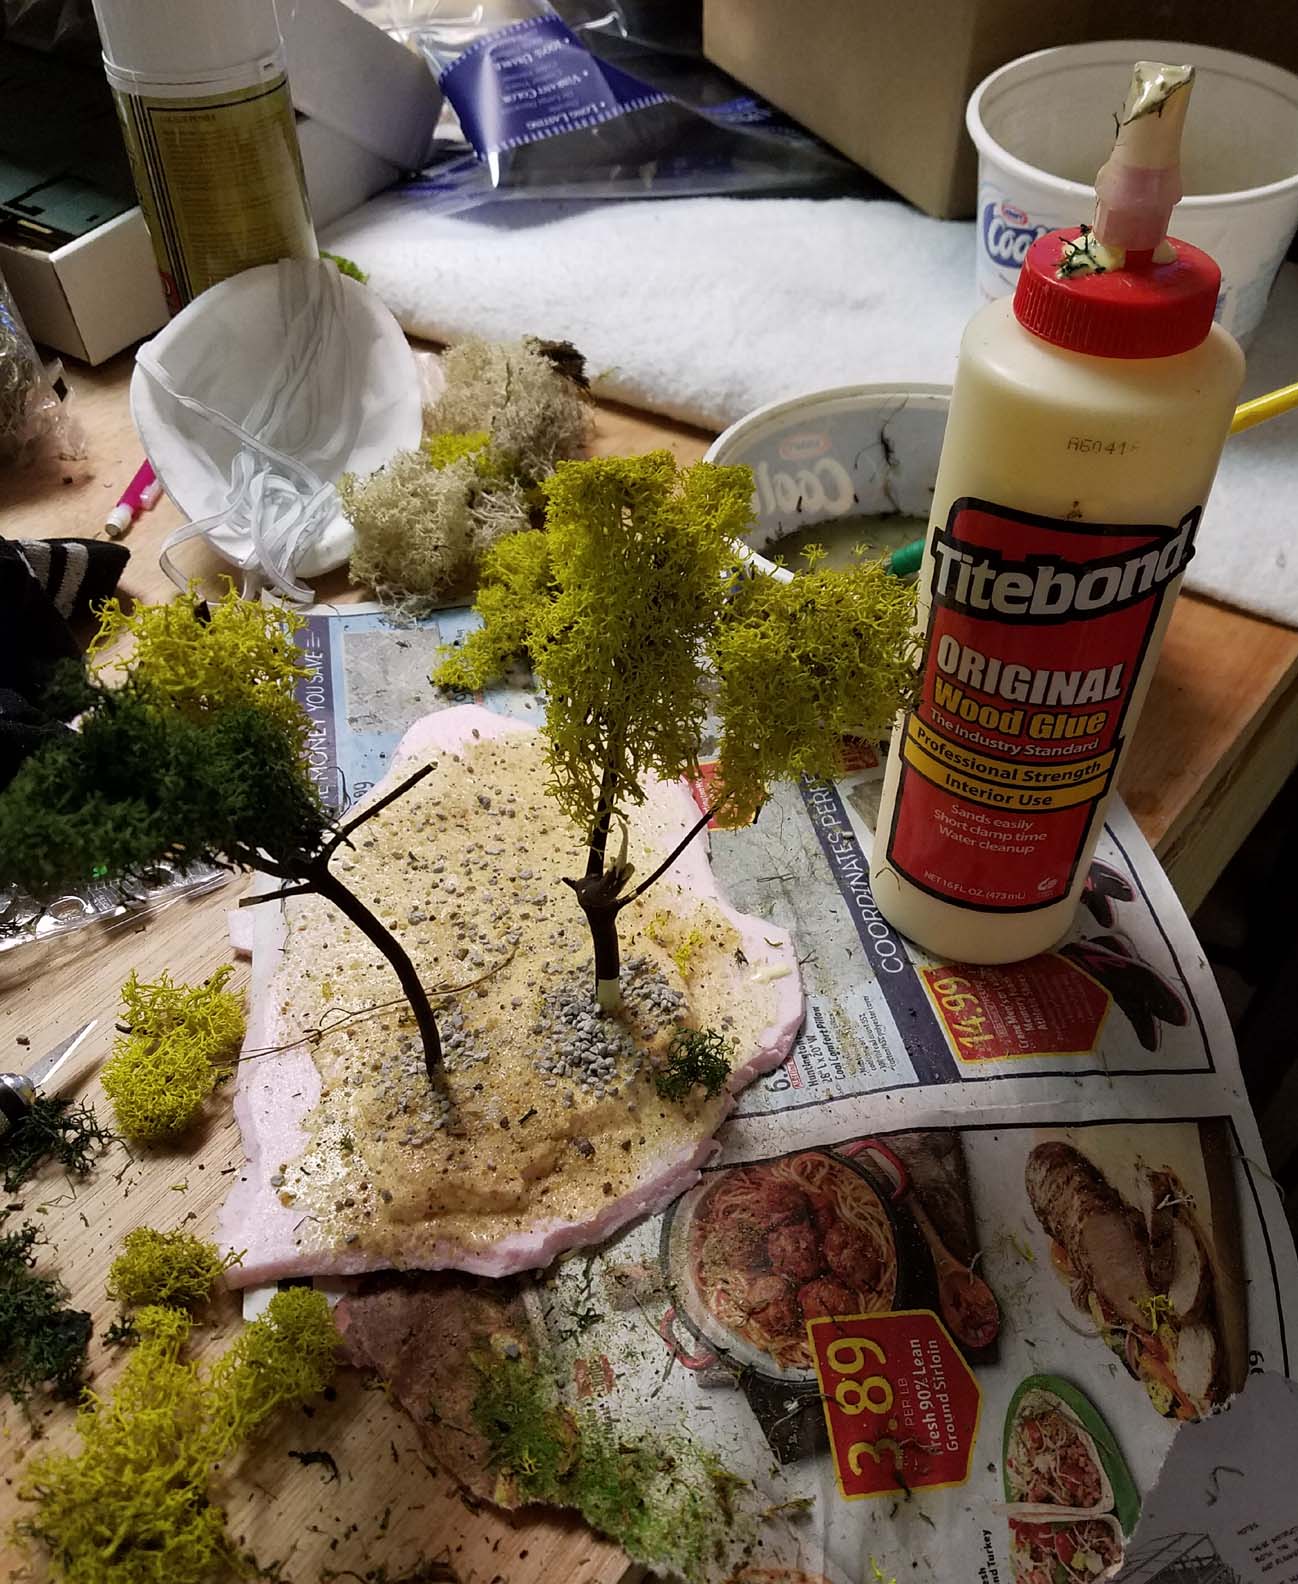
I cut some pieces of the thin pink foam to create the "area terrain" of the forest, as this line needs to be defined for game purposes.  However, I wanted it to match the floor of the forest, so that it would not be obtrusive to the eye.

You can see the wood glue, the sand and gravel, etc. along with a few tree branches that we gathered from outside.  I shaved down the base of the tree into a point, which was speared into the foam.  Rocks and gravel were added to make the texture.


This variety pack from a craft store was perfect, with all kinds of reeds, and most importantly moss!!


The moss was added to the branch with wood glue and the spray too.


The spray glue proved to be vital to the process.  This would allow me to add all kinds of great color and texture to the moss, which is not very tree like, and some of the colors would not match what we wanted either.


As I added the reeds and bushes to the board, I could add the flock on top of the moss, which would make it look more realistic for the little time invested!


You can see how just a few tree stands and some scattered bushes make this board look much more 3 dimensional, and also give you minis plenty of things to hid behind, and rough terrain for vehicles to struggle through.


For now, the water mill dominates the landscape.


The original plan was to have a Wild West shanty town around this mill, but this will soon be taken over by Eastern Front villages and other marshland areas in France/Belgium... Russian and even England!  Sea Lion here we come ;-)


These views give a sense of how the tree stands can be moved around from game to game, and also cover those seams.


In this image, you can see the process of the swamp tree develop, starting with the application of the glue and moss.  I took the strands of dried moss and soaked them in glue/water for a while, and then hung them from the batches of sponge moss.  

This was sprayed with the 3M glue, and further layers of flock and foliage added over the top to blend these textures together.  I sprayed the base, and added more flock there to match the board itself.


I painted in a trail leading to the island in the center, because the original intent was to have a structure there. We may still do this at some point in the future, but that will wait until after we have done many games of Bolt Action first!

Stay tuned, because we still have to show those water effects!!