Monday, April 17, 2017

Joining the Guild


I thought that you might like to see a few images from a glazing session that was done on a Guild Ball Masons team.  Vallejo and Secret Weapon miniatures glazes are my favorites, although each has different properties.


I put a few of the washes into water jar lids, getting ready to glaze both the bases and the figures.


The colors are very simple, mostly mixing the sepia and black washes together, or keeping them separate where I needed a tint to be more sepia or or dark brown.


By adding some of the green into areas of the marble, there is a chemical reaction that 'pushes' some of these other washes aside, and creates interesting random patterns.  These can be further modified and refined into veins for the marble. 

The same makeup sponges that use for moving my oil paints around are prefect for wiping away excess wash, and also help with making those random color patterns.


Additional layers can be applied to darken the veins as well.  The lower view shows what the base looks like once the excess wash has been wiped away.


This view shows a variety of bases both before and after excess pigments have been wiped away.


Here's the team mascot, with the same sort of glazes.  Each of these had been pre shaded with some white and grey primer to set up the lights and darks beforehand.  Now I can accentuate those tones by shading and tinting them with these glazes. 


This base was made with a broken column piece from Secret Weapon miniatures, with a Dwarf hammer added for the "masons" look!


Here's a very nice view of that chemical reaction.  The Vallejo washes are much thicker, and some are almost opaque, such as the green.

It's an old watercolor trick that I used to do.  By the way, the bases are made from sheets of baked sculpey, which have been added to cork.


After the initial glazes have dried, I can start to be a little more precise, and put more definition into those veins.  


Once I get a solid idea of how I want  those veins to look, I start to mix in opaque lighter colors with my glazes.  This makes a very nice semi-opaque lighter shade that I can use to create more transitions.


More additions of these lighter colors made light veins inside the larger dark versions.


A quick look at the team gives you an idea of what the finished product looked like!


Sunday, April 16, 2017

Rhino Charge


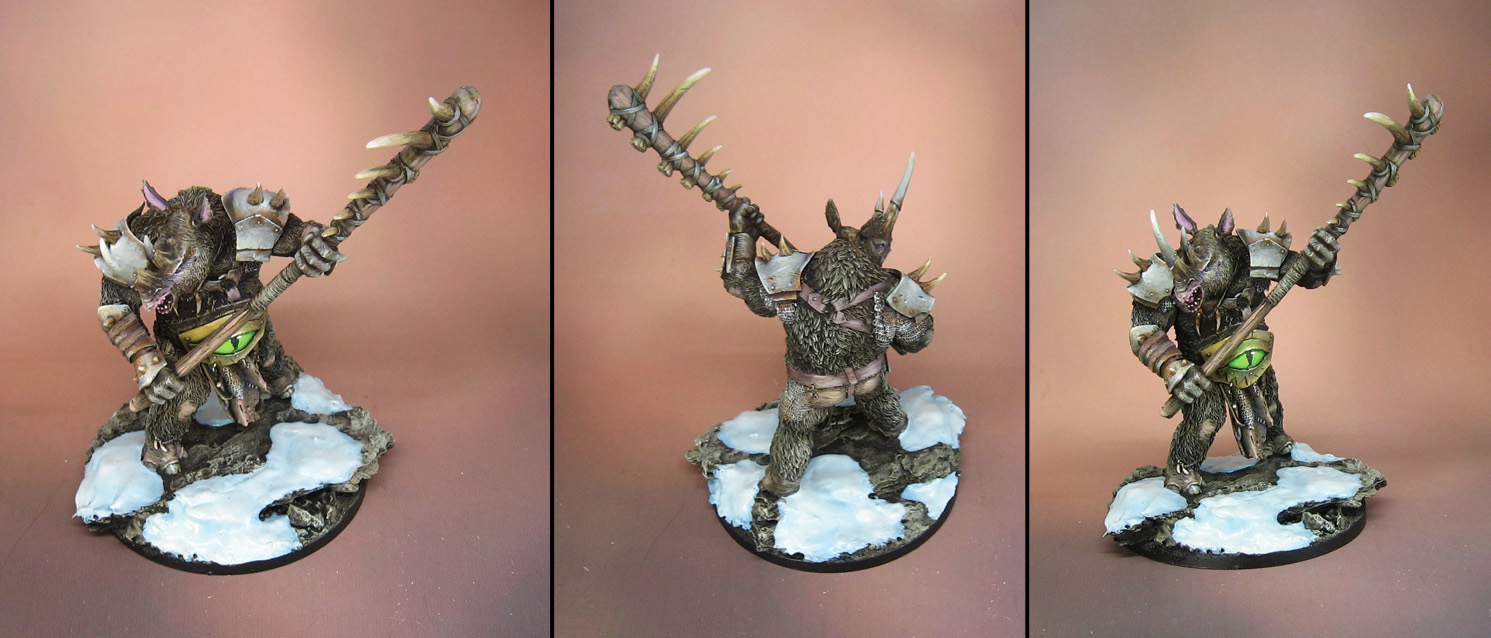
Here's yet another big beastie from Mierce Miniatures!


These monstrous infantry are always unique and interesting critters, like elephant men and even walking Octopus!


As with  most of the Mierce figures, all of them have been blended in to the massive winter theme commission, with figures from several different companies.


I have the large Snakemen, Birdmen and Dragonmen, so stay tuned for those big boys!


Saturday, April 15, 2017

Lavender Sorceress


This figure was a sample from the Demigods Evolution line.  It was certainly an interesting subject.  I enjoyed painting the face, which had a lot of nice sharp details.


At first I thought I might try some freehand on there, but I chose to render it more "straight up", so that I could play around with a few different shades of purple.  Some were almost burgundy, while others were closer to blue.


I do enjoy these "flowing" miniatures, where the sculpt tends to run along a sweeping line, leading towards one focal point.  It was nice that the body movement and the face all led to the end of the staff.


She's also here:


Thursday, April 13, 2017

A Close Watch


We return to the fjords of Norway in the Early War period with this observer.  He can serve a number of roles, as an Artillery Observer, a spotter for a mortar crew or even part of a sniper team.


This is another great miniature from the Gorgon Studio line of figures, which are sculpted by the same talented artists who do the Artizan Designs figures.

Here's a link:


I am really looking forward to the Narvik campaign, so stay tuned!!


Wednesday, April 12, 2017

Stand your Ground!


A few weeks ago, I did a facebook live broadcast to show people how I create the "Bark and Branch" method of basing.  The concept is pretty simple... gather up some pieces of tree bark, some branches, and have at it!


There's a few tidbits of advice and knowledge that are handy to pass along, so I tried to do a number of different bases, some of them quite large!


You can see what a mess is usually left behind.  Again, the materials are not very expensive... in fact, a large portion of them are completely free.

Another goal was to show how this basing style can cross over many genres.  I based sci-fi, steampunk, fantasy and historical figures all in this batch.


To augment the sci-fi look, I added some Secret Weapon Barrels to the Gates of Antares bases.  Once these were painted, it made a fast and easy way to create a convincing sci-fi scene.


You have already seen the painted versions of these:


Now take a look at the whole group!  Some of these figures have already been painted in various demonstrations, including facebook live sessions.  The large creatures from Mierce Miniatures will also be shown live, such as the bird and the large troll on the right.


The blueish Counterblast figures on the left were used as oil painting demonstrations at Adepticon a few weeks ago.


Here's a link to the facebook live basing session:


Tuesday, April 11, 2017

Ice Caster


This wonderful mini from Bombshell Miniatures was so much fun to paint, and it certainly had a strong central theme to follow! :-)


To reflect the Celtic knotwork from the base, I put a quick little design on the cloak, which I also thought would tie into the ice theme.


I used a little bit of the Secret Weapon crushed glass method on the base, which was made with one of the Green Stuff World texture rollers.  Subtle variations in the blues were needed to get separation on the various surfaces.

Some areas had more reddish blues, others tinted more towards teal.  I also tried to balance more grayed down blues with those that were more pure and saturated.


She's also here:


Monday, April 10, 2017

All the King's Horses


One of my favorite aspects of the Tomb Kings was converting all the skeletal horses, including those pulling the chariots.  I believe it was either the cover of the new army book or one of the interior illustrations that showed the horses with these scale mail 'blankets'.


I could not resist trying to make those myself!  I even had to create an entire theme/story to go with them :-)


I used tin foil as a base for the green stuff, which could be pressed into a mould (made from the original piece that I sculpted) and then wrapped over the miniature.  This tin foil gave the green stuff critical support as it cured, so I could put the blankets into any position that I wanted, and it would not sag!


I also had a lot of fun with the "demon marble"... so much fun that I even made one of my kickstarter painting videos featuring this technique.  The entire army was painted with this marble effect.


You can get a better view of that here:


Here's an example of converting the Hierophant on skeletal horse:


One last view of an old favorite!