Sunday, January 29, 2017

Tank AMMO


With the "primer painting" and initial shading complete, it is time to move on to a more complex phase, and that is the shading and glazing.

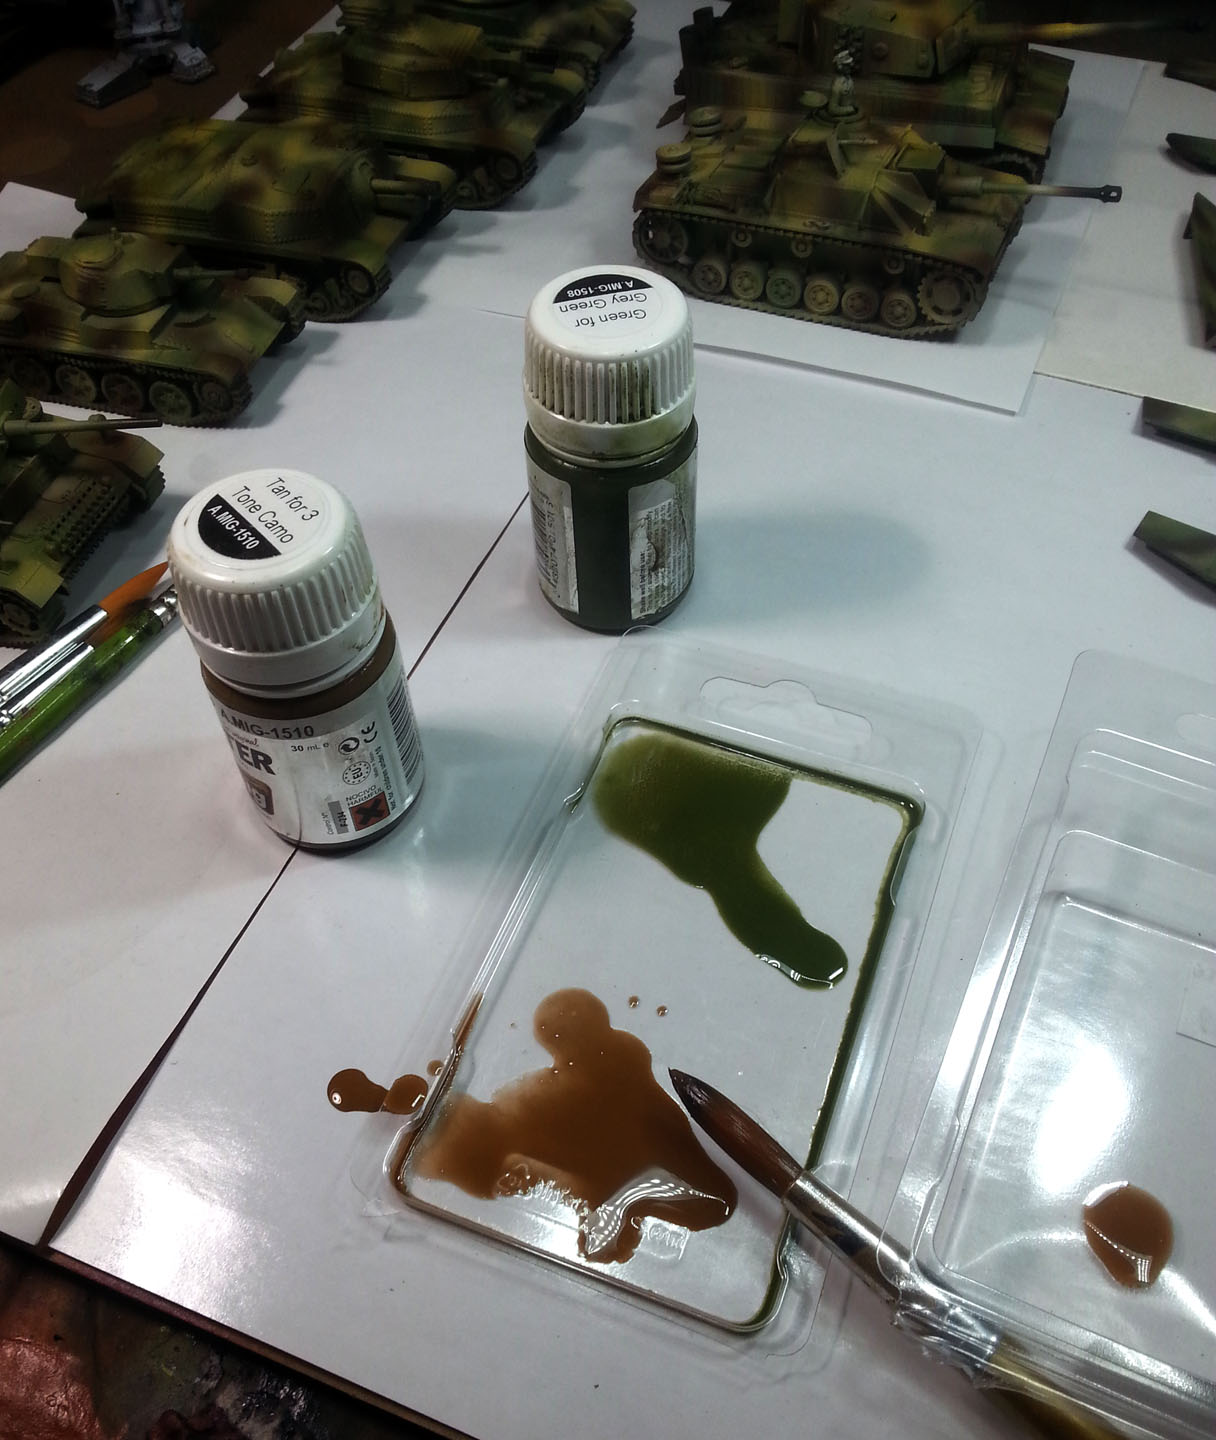
You can see that I have a line up of oil based products by Mig AMMO.  I have been enjoying these so much the last 6 months!


If you recall part two of this series, I had left some of the colors a bit lighter, in order to leave some room for me to make them darker.  In addition to that, I have learned that the AMMO filters are quite good at tinting and tying together your colors, especially when doing this kind of tri-color camo scheme.

These are supposed to be applied evenly across the entire surface, and not allowed to pool.  The idea is not to make things darker, but the help blend the camo colors together slightly, making them less "factory fresh".


You can see how they give a slight tint, which is easiest to see in the yellow range.  However, they also make a difference in the darker brown and green.  Again, it is a bit like leveling off extra mortar that's been placed between a layer of bricks.


The tanks on the left have this treatment, those on the right do not.  You can really see how the yellow part of the camo has turned warmer, and more like Dunkelgelb.


The excess can be sponged or wiped away in a few methods.  I often use a larger, soft brush, but these makeup sponges are also handy.  You can go through a lot of them when you are doing this many tanks!


One last reminder, this is not a wash that will shade things or make them darker.  It is more about tinting and softening edges.


One last look at the "filtered" vehicles... not it's on to that darker shading!


I chose a few washes that echoed the camo... a dark green and a brown.  Those will shade the other two parts of the camo, while a third filter will be used to blend those as well.


The green and brown washes will be applied over the corresponding color of the camo.  Beware, this will get a tiny bit messy, so don't panic!


This Filter color will be used to blend these and shade the yellow part of the pattern.


The messy part!  Letting all these things mix together on the tank.

Again, you have to keep your wits about you, but the extended drying time means that you don't have to rush into anything.  I have to remind myself that these are not acrylics, and will not set up in a few seconds or minutes.

The insert shows how easily the excess can be removed, which leaves behind a nicely shaded set of camo colors!


A quick comparison of the tanks in the top image is an example of how much more depth has been gained in the shadow areas without the need for laborious shading.

The lower image gives you a peek at how the process of removing that excess keeps the lightest colors intact, but now gives you a good foundation on which to build the darkest shading and even your weathering.


Stage Four of this series will cover the additional shading and initial weathering, focusing on the Tiger 1 and the Stug.  There's a lot of complex procedures happening, and it thought it would be too confusing to have all of the vehicle horde shown all at once.

Separate articles will be done on those too, so stay tuned!


Saturday, January 28, 2017

Denethor


I think we only used Denethor in one game, but it was certainly interesting!  If I remember correctly, he had a tendency to switch sides during the game.

While the sculpt itself is relatively simple, the face does have a number of nice details.  Perhaps because GW was trying to get an actual likeness...


Many of the colors of the cloak were also used on the face, hoping to give it more of an aged, care worn look.  That of a custodian who has been in place far too long!


He's also here:


Friday, January 27, 2017

Highlanders hold the line!


As I was moving things around in the studio the other day, I ran across a several units of Imperial Guard that I had painted for the 2014 Adepticon 40k tourney.  I painted a number of Highland Moss Guard from Victoria Miniatures, which had a great look.

Each unit had its own unique tartan.


I really like working with the Victoria figures, since the heads, torsos, arms and legs are all individual pieces.  There is a tremendous amount of flexibility in posing and building your figures, along with a complete choice of weapon load outs!


The base was made with pieces of baked Sculpey clay, with a few Secret Weapon shell casings for added effect!


As I dust off more of these guys, I will post more images, so stay tuned! 


Thursday, January 26, 2017

Fishy BONES


Welcome to Davey Jone's Locker, and another Reaper BONES mini.

He was originally made for a few different classes at Reapercon 2 years ago, showing some basing techniques and how to work with the Reaper clear paints.


Most of this was done with several series of glazes, which are perfect for those Reaper clear paints.  They have a lot of pigment in them, but when thinned with water, they make a fantastic glaze... like inks in intensity, but no water marks, and no shiny stuff either!

When mixed with lighter colors, they are now a wonderful bright middle tone, which is perfect for getting interesting colors in that "between light and dark" zone.


The base has an experiment, and that is chopping up some aquarium plants and sticking them into the cork, etc., and painting them.  It's the first time I have tried to slice up the plastic aquarium plants into something so tiny.  It was an experiment for other current projects!


He's also here:


Wednesday, January 25, 2017

Panzer Zug


Picking up where we left off in the previous episode, it's time to add in the final part of the camo pattern.  This will be done will the yellow primer and a touch of deeper yellow airbrush paint (all fro Badger).


Just like the applications of the greenish colors, this will be lighter than the final result.  That leaves enough space to allow for subsequent glazes and weathering.

It makes an immediate difference.  Also, I try to have this lightest part of the camo strategically placed in areas where I wanted to have more chipping and rust effects.


By reducing the pressure in the compressor (sometimes down to 10-15 PSI) and using the Badger Extreme Patriot brush, it is possible to get some nice tight runs of the airbrush into the spots I wanted.


This picture focuses on the Hungarian vehicles.  The specific kits, such as the Nimrod, Toldi, Turan and Zryinyi kits are from Mad Bob's Miniatures, while the PZ 3 in the back is from Rubicon.


Let's reverse the process, putting the green part of the camo pattern on the Warlord Games Tiger and Stug.  Similar to the yellow, I will mix in a few deeper, darker greens with the green primer to do this color.

The primer not only adds extra stability to the paint as the vehicle is handled over and over again, but helps to thin the color down and allow it to flow more freely.


A comparison shot of the Stug, with green applied and the waiting Tiger.


While I could have approached all the tanks in the same way, I wanted to give the German vehicles that extra touch of yellow.  This is why I stuck with using a yellow base for the Tiger and Stug.

The Hungarian tanks needed to be more greenish, even though most of the camo was of a similar color set to the German versions.

So, I started with a green base to push the entire camo set in that direction.


Experimentation time!  I wanted to see what a very light application of the Badger Ghost tints might do to the lighter colors, specifically the yellows.

While various Mig AMMO filters will be applied in stage 3, I was very curious to see if the Ghost Tints could darken and intensify the yellow part of the camo pattern.


It only took a few shots of the Tints through the brush to know this was a good idea.  While having a marginal effect on the brown and green sections, the yellow parts really came to life!


I did this to all of the tanks, and called that particular experiment a great success.

In Part Three, I will get into the initial application of the oil based products, such as the filters.  Darker washes and glazes will be used to establish the shading in full.

Part Four will feature the decals, weathering and other special effects, so stay tuned!


Tuesday, January 24, 2017

Tank Wars


You have seen me post a few articles before about the use of Badger airbrush products over the last 10 months, mostly in the form of trial and error to see what might be possible.

In the intervening months, I have been testing, prodding, testing again, various materials and methods to see how I might be use this new set of tools.  I have also been changing the physical setup of the work area over and over again to see what works best, to figure out how to deal with the spray dust, and all the things that go along with airbrush use.

At this point, I have determined that the Airbush is ideal for mass application of Shaded Basecoat on figures and vehicles alike.  There is almost no difference in how I would do the Shaded Basecoat with a 'regular' brush, except that I can now work on 100 figures at a time instead of 20!


In fact, I work on so many simultaneous objects at once, that more time is spent figuring out ways to stage it all around the actual work area!!


In this post series, there will be a number of different vehicles and manufacturers.  There are Warlord Games tanks, Rubicon and Mad Bob's included.  There's even a Konflict '47 mech in there!

Starting with the black/orange primer blends, I did my darks and "pre weathering" as I normally do.  Since Badger makes so many different colors of primer, the vast majority of my painting is done with these primers.  You can check out those other articles in the airbrush section.

Over those darker tones (you can see those in the image above), I spray the green primer mixed with a slightly darker olive green paint.

Those initial layers of dark brown colors instantly create a perfect shadow color for tracks, treads and drive wheels.


The light yellow primer color is mixed in with the green to begin establishing some lighter colored areas.  The inset shows a Stug and Tiger which got the yellow treatment.  This is another reason why I need such a large staging area, because I am trying to maximize the use of every color.

Starting and stopping again while working on just one or two tanks at a time would not be a very good use of such a powerful system!


As more yellow is added to the mix, the lights keep getting brighter.  Keep in mind that you have to make the colors lighter than you want them to be in the end, just like the regular Shaded Basecoat!  You will be adding darker glazes and washes, plus weathering.  This means you need as light of a base as possible.

I even managed to sneak a French truck into the mass of vehicles!  You can really see the brighter yellow at this point.  Since I am not washing out the cup between layers, it maintains a grayish appearance.


You are not limited to working lighter only!  If needed, you can go back in with darker tones if you need to reestablish a shaded area, or tint something a bit.

I think this shows up most on the aft deck of the Tiger, where I wanted to see what kind of exhaust soot I could create by lightly spraying black over that zone.


To create the camo pattern, I started with the brown, and that's a mix of the orange and black primers (from Badger).  Like I mentioned in the beginning, I want as many layers to be primer as possible, since there is no base to grab onto these vehicles!  It will make the paint much sturdier in the process.


The mixed paint is placed in the cup, and I start spraying that part of the camo as needed.  If I want a sharp edge, I could apply some blue tac or other masking agent.


Quite a difference already!  I have carefully set up all the other vehicles in this set to be ready for painting this stage.  The Stug is ready for it's camo...


I tried to leave zones for the green part of the pattern.  Also, I was trying to leave the "leading edges", or other parts that would get chipped, scraped, etc., with the lighter parts of the pattern.  It's a lot easier to have your chipping and rust show up on the lighter colors, so isolating those zones lets you get a lot of chipping bang for very few bucks :-)


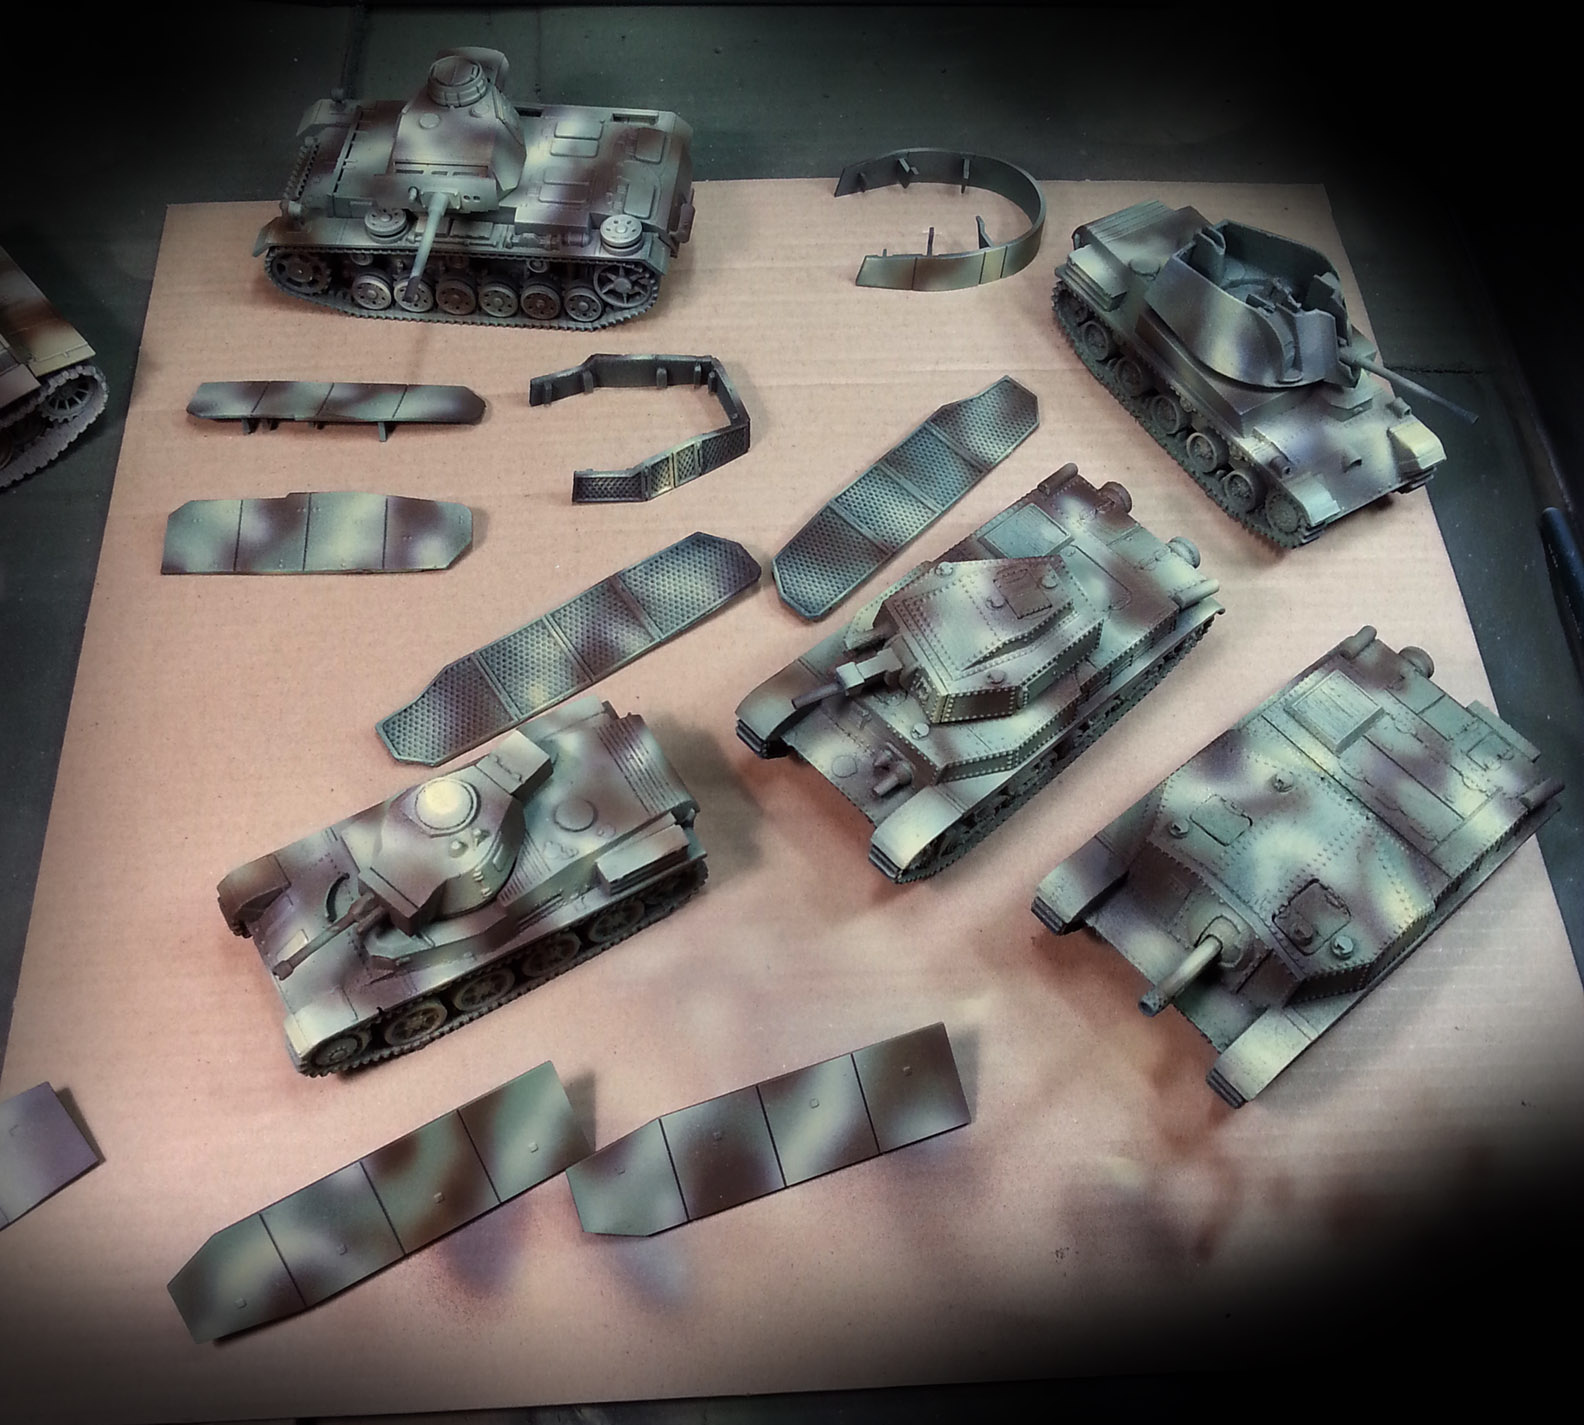
And now for the green vehicles.  By the way these are for my Hungarian army.  Most of them are from Mad Bob's Miniatures, but the PZ III is from Rubicon.


This view starts to give you a sense of how many things are finding their way in front of the nozzle!  Not only is this very efficient at getting a lot of things done rapidly, there will be a lot more consistency across the entire army.


At this stage, all of the vehicles and the extra armor have the brown part of the camo applied.


I will close out this first article with a peek at the next stage.  I will add the yellow bits of the pattern to all the Hungarian vehicles, so stay tuned!!