Tuesday, September 6, 2016

Red Dawn


While most of the Red Box Games figures are typically male, there are a few interesting female miniatures that sneak in now and then.


As it's been a little while since I last posted any figures from this project, so a reminder that all the figures with this kind of winter basing are all from the same long term massive project.


This phase of the project is actually drawing to a close, with a few isolated units and characters yet to come.


So, stay tune for more from Red Box Games!!


Monday, September 5, 2016

Samurai Blitz!


It's time to start working through a few other key roster spots for the Samurai Orcs, beginning with the all important Blitzers!  These guys were the most important players on my own Orc team, since there was a significant offensive role for them.


My favorite tactic on defense (especially around kickoffs) was to toss a goblin with block at the opponent's thrower.  If I could also get him +1 strength, all the better :-)  Anyway, the Blitzers were positioned on the flanks of my formation, and their job was to pincer move towards this toss.

Even if the goblin ended up in an area to put the ball in a tackle zone, I was happy, as the opponent would be going backwards, starting with their own blitz move.  Heck, even if the goblin scattered or bounced onto the ball... or the thrower, runner, etc., it would create more chaos, which is the main idea.


They were also turned into catchers if I could ever get them a +1 agility.  If the opponent focused too much on the offensive gobbo toss, I could always have my thrower toss the ball to a waiting Blitzer (probably with catch and dodge as well) that was capable of blitzing his own path into the end zone.


Sunday, September 4, 2016

Beauty and the Blades


Here's a Dark Eldar figure that had never actually been completed for the original army years ago.  She just needed a base and a few other finishing touches.


I decided to continue the same set of colors as I had done with the rest of the army.  There was a temptation to try a new color set, but I'm glad that I can see how this would have looked with the rest of the minis!


And of course, the Green Stuff World mosaic texture turned out to be just the right treatment.  I'm looking forward to the new rollers that are on their way right now!  They might be here in the next 7 days or so, so stay tuned!


Saturday, September 3, 2016

More Mud!


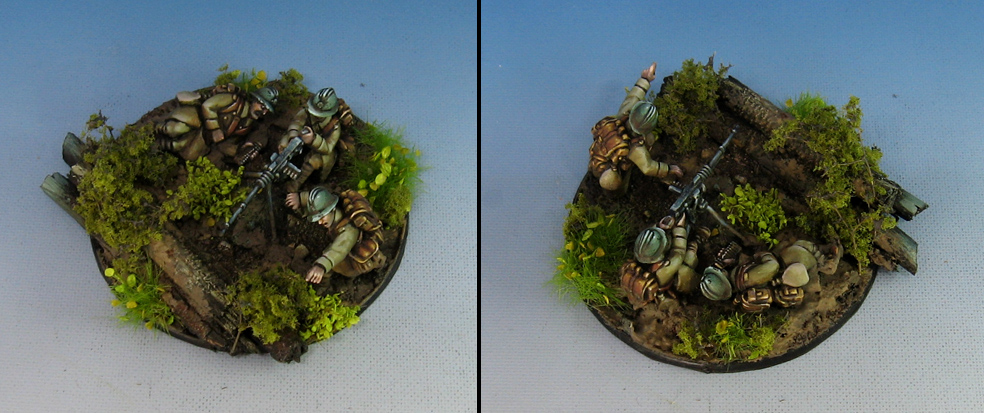
Here's an experiment which I have wanted to try with the AMMO heavy mud products... putting them on 'regular' miniatures and their bases.

While the typical use for powders, pigments and other similar materials are considered ideal for vehicles, I wanted to see what would happen with these same products on one of my Bolt Action weapon teams.


Just as I did with the half track vehicle in the last AMMO article, I started out with the moist ground heavy mud.  Since these are supposed to be more of a forest base in late spring and early summer, a bit of wet mud around the gun emplacement would make sense.


It wasn't just the color I was after, but the texture as well.  Once this material dries, it actually feels like mud when you touch it.  This can be applied very thickly, which saves a lot of time... no need to build up layers.


I also wanted to see how this would work and look on miniatures.  The bottom edges of the coats and the boots were definitely a well suited location to test this out.  Since it is an oil based material, I could go back in later and manipulate it with another brush... softening an edge here and there.


I even sprinkled and brushed on some powdered pigments while the heavy mud was still fresh to see what would happen!


Once I mixed that in with the heavy mud, I got some very nice clumps of semi-dried dirt.


I was very happy with how a quick application of the AMMO muds changed the entire look of the base! It is important to note that the base had already been painted and darkened down to set up these lighter colors.

This is all part of the pre-planning and chess match that is needed with multi-step materials and techniques such as weathering.


Here are a few shots in the photo booth prior to the addition of foliage.


Voila!  Shrubs and such added, which now play off the warm but neutral mud colors nicely!


Friday, September 2, 2016

Sneaky Skinks


There were Skinks of every color in the Lizardman army... turquoise, tan, red, purple, blue, and green.  They always had a very interesting look on their faces!


The scales along the back were always fun to paint, while the Skinks with head crests were great to make stripes or other patterns.


Again, I have lost track of how many that I painted for the army.  It had to be over 200!


That means that lots more are on the way, so stay tuned!

A link to what this unit looked like:


Thursday, September 1, 2016

Arial Attack


Here's another thrower from the newest Samurai Orc Blood Bowl team.  I have been putting final details on them, and now I can also do the photography on the team.  I'm really looking forward to some pictures of this team in the Stadium!


This element of the team was a little more difficult than the earlier figures, since these required much more armor to be sculpted on.  As I mentioned with the first Lineman, with each time I make one of the teams, I get better and more efficient with that part of the sculpting.


I figured out some much easier ways to sculpt these armor sections, which not only follow the flow of the arms better... they are also easier to paint.  The key was being able to get all the 'ridges' in each plate more regular and even.  On other attempts, these got a little out of whack, and that made painting clean lines a real challenge.


Stay tuned for some Blitzers coming your way!!


Wednesday, August 31, 2016

Let's Get Happy!


It's been a while since I have used the Happy Seppuku moulds for non-sci-fi basing, but my current projects made these two moulds just perfect for the task at hand!

This is the brick and cobblestone texture, pressed into the usual white sculpey.


I want to make a few different village/urban style bases for the winter Americans stuck in Bastone during the Battle of the Bulge.

These textures are nice and easy to 'break', as they have so many natural fault lines!

Here I broke off the edges to roughly fit the base.  I'm leaving a little extra space for broken bricks and even snow piles.


Once I have the overall shape, I cut out a few of the bricks with my wood carving tool.


This is repeated on a few other bases... but I want to save the brick texture for something else...


Most of the bases are going to be made from the cobblestone texture, so that the brick sheets can be used for the remains of upright walls.


Just as I did with the bricks, I tried to cut out a few missing stones, especially around the corners.


This U.S. MG team will be taking some cover behind the remains of a brick wall.  Broken bricks and some snow will also be placed on the periphery of the base.


Whenever I bake sculpey sheets, I always take my exacto knife and cut out some rows of bricks.  I make a variety of sizes, all the way up to large stones of cinder blocks.


I chipped away at the brick wall section, using my large bricks as a curb.  It's best to chip away at the corners of the bricks to make them look a little less fresh.


The basic setup of the base is now ready for the final touches, such as the piles of broken bricks around the edges.


This Vallejo paste will be a perfect medium in which to set those bricks.


As I mentioned previously, it's best to chip off the corners of the bricks before you place them.  If you are building an entire wall from them, you could do that once all the bricks have been glued in place.

Some lights sand and gravel is added to help keep them where I want them.  It's important to remember that snow will be put on top of most of this.


I kept working around the edges of the base, putting bricks in as random a pattern as possible.


A little sand and gravel over the top, and this is just about ready for painting!


I will be adding the same kind of broken brick textures to the other small bases too.  Once these are painted and the snow added, I will do another post to show you how those look!  Stay tuned...