Tuesday, March 15, 2016

Tiger Tiger, burning bright


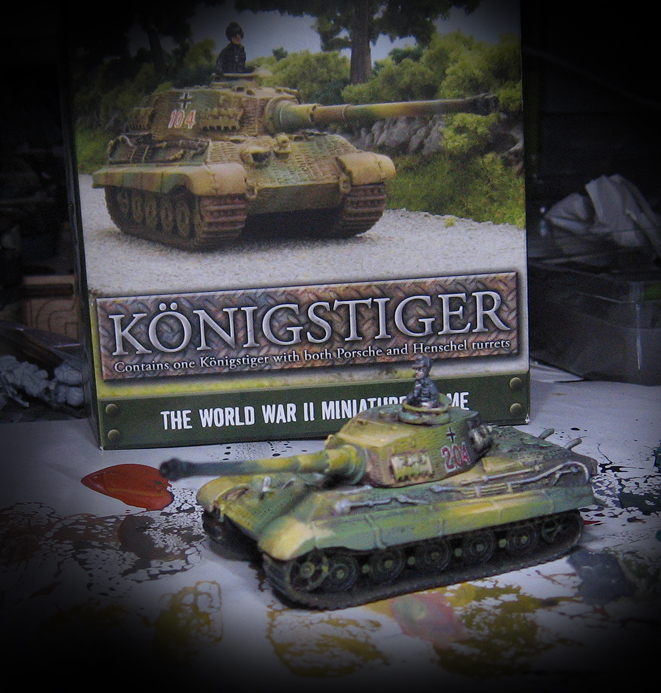
The first views of the completed Tiger!  I had a lot of fun painting this one. :-)


I would definitely like to try another one and test out some foliage to give it even more sense of scale.  The tiny leaves should make appear more massive, despite the fact that it's a teeny little 15mm vehicle!


Having more broad, open surfaces here was a nice change from the more cluttered, small tankettes that I have painted previously.


Next up, some group comparison shots with much older French tanks!  Stay tuned...


The Phoenix Rises


Tonight we have a few miniatures from the land Down Under, the brainchild of Kevin Goh.  These are very finely cast, and offer some unique characters for your role playing or skirmish games.

This sorceress is among my favorites!


She stands on a 32mm base.  The pose is dynamic, but yet relaxed.  I am trying to come up with a Phoenix theme for her, since she is created by Phoenix Miniatures.


This character is quite unusual.  Many of the armor sections of these figures have a Samurai feel to them.  I will have to come up with some interesting color tones on the skin.  I suppose that the outer "shell" should be treated more like fur, or a beastman.


I will incorporate as much purple as possible into both the beastman shell and the more regular color on the interior skin tones to provide some color unity.


Stay tuned as I paint not only these pieces, but several more which have arrived on the Wappellian shores!


Monday, March 14, 2016

The Blood Star Rising


I painted a number of Venoms for the Dark Eldar army, continuing all the same freehand pattern along the way.

This one also included a banner, which I had also done on one of the Reaver jetbikes.  Not only was it fun to paint, but it also helped to make each vehicle unique!


Here's the other side of the banner...


The base was made from baked sculpey, and as usual, it served as a great counter weight to the Venom.


These views give you a better look at the base and the hull freehand pattern.


A Bronze Age slave girl figure was added to emphasize the torturous nature of the Dark Eldar.


This is not all folks, since more vehicles are coming!


Rusted and Ready


With the glazing and tinting complete, it's time to work back into those middle tones, and put a touch of weathering as well.


I like to take the new Secret Weapon Rust color and mix that with the Vallejo Flesh Shade wash.  This has a natural "sedimentation" effect that is perfect for rust effects, as that sinks down into the crevices.


To take advantage of this property, I focused my attention on areas where I felt that rain water or such things would tend to accumulate.


I also tried to get this mixture into joints between panels, and as rust streaks down the sides of the armor.


At the same time, I was taking some lighter shades of green and yellow to lighten certain parts of the camo pattern.  Not only would this create a better sense of shape and shading, it would make it easier to show off streaks and paint chips.

So, I attempted to concentrate these areas of lightest light colors in strategic places where I wanted to feature streaks and chipping.  There are usually obvious places on every vehicle where you would want to do this.


This image might show that effort more clearly, as you contrast how the green looks in this image as opposed to the previous picture.


And you can see how the rust and streaking can stand out much more.  That's important on something which is such a tiny scale.  Were this a 28mm scale vehicle, I might not have to push the extremes of contrast quite as much.


Getting there!

To enhance something like this vehicle, placing some kind of foliage on the upper surfaces of the hull and turret could truly make it seem real.  I will be adding such effects on future projects.


And now for a sneak peek at the finished results.  I will do a few posts on the finished images  as well as some comparison shots with a few other French early war tanks.

Stay tuned!


Sunday, March 13, 2016

Time for Glazing!


Once I was done with the shaded basecoat phase, utilizing the "Primer Painting" technique, I had both sections of the Tiger ready for glazing.

Several different glaze colors are out on the palette... black, blue, green sepia and a few others.  These will be mixed together both on the palette and the miniature itself.

Another note: when I am glazing vehicles I don't exert as much control over the glazes, since I want more random color mixes to occur.  This creates some interesting variations that I can then turn into some kind of weathering.


Over the greenish areas of the camo pattern, some darker green glaze is applied.  I'm using the larger #8 round brushes, so it all happens very quickly.


In this image, you can see that an umber/sepia mix has been applied into the tan sections, but is allowed to mix in randomly with the previously applied greens.


The same concept works on the turret.  There were a few times where more black was mixed in with the green, which is as much of a tint as it is a shade.  It's an easy way to get some variety in the greens, instead of having to paint endless layers of lighter and lighter colors.


Just as I did with the hull, the glazes on the tan sections of the pattern are mixing with the greens.


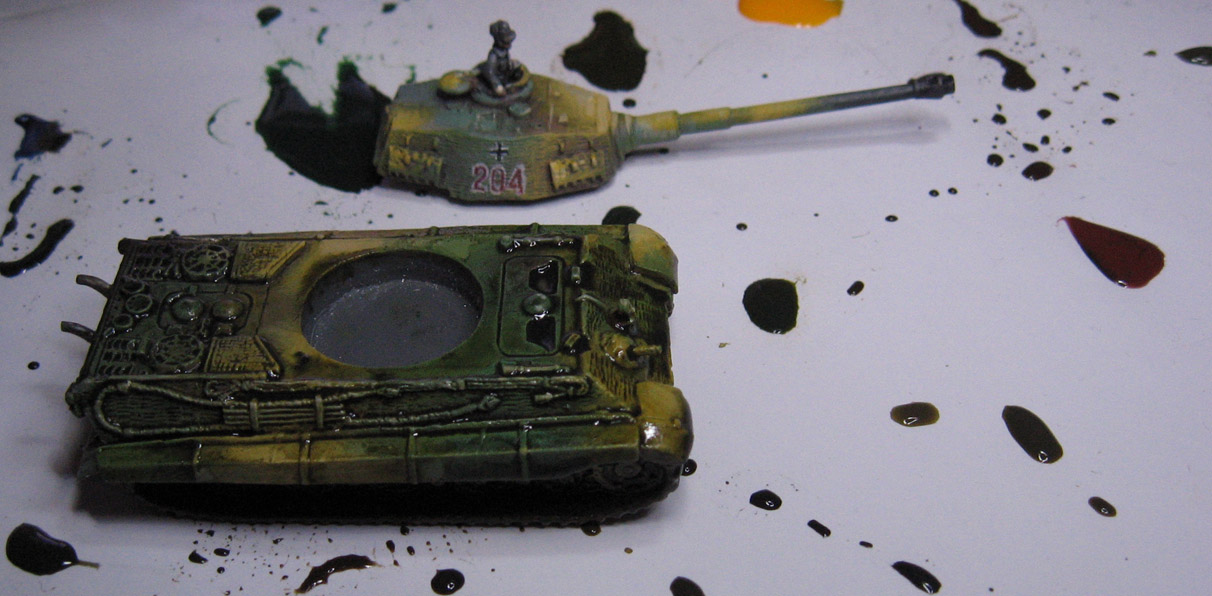
Here's a quick view of the first layer of glazes.  More can be added to make deeper darks, or tint colors further.  This all takes a lot less time than all those layers of opaque colors, and there is less to remember in terms of "recipes".


I used one of the new Secret Weapon colors to apply some very dark shades, and begin to indicate where there might be paint chipping, stains, soot, and so forth.


I think you can see a lot of this on the rear of the hull, where I wanted oil stains and exhaust scorching.


I did the same process on the turret, using some of the pooled glazing colors as an indicator of where to 'build' on the staining and chipping.


I also added more dark shades to the commander figure.  This image shows how painting the insignia and number prior to glazing darkened those down nicely.


The view from above.  From here, I will work those middle tones that I mentioned earlier.  

I will also be adding some rust and other weathering effects.  In fact, all that will be covered in the final exciting episode, so stay tuned!!!


Painting With Primer


I think it's been a while since I showed you an example of "Primer Painting" as I like to call it.

Normally, I would be mixing in regular paint with my primers, but that's starting to change as more companies produce primers that have a color to them.

In this instance, I will show how you could use the new Badger Airbrush series of primers to do this will all primer.


There are many additional benefits to this, as all primer on the first few layers of your painting will make metal figures in particular more resistant to the dreaded Silver Curse!


I had already painted on a layer of red and black primer mixed together for the "Red Lead" primer.


I started mixing some of the green and black together for the underside of the main hull...


Since this is not seen all that often, these layers of "Primer Paint" would be the sole application in this area.


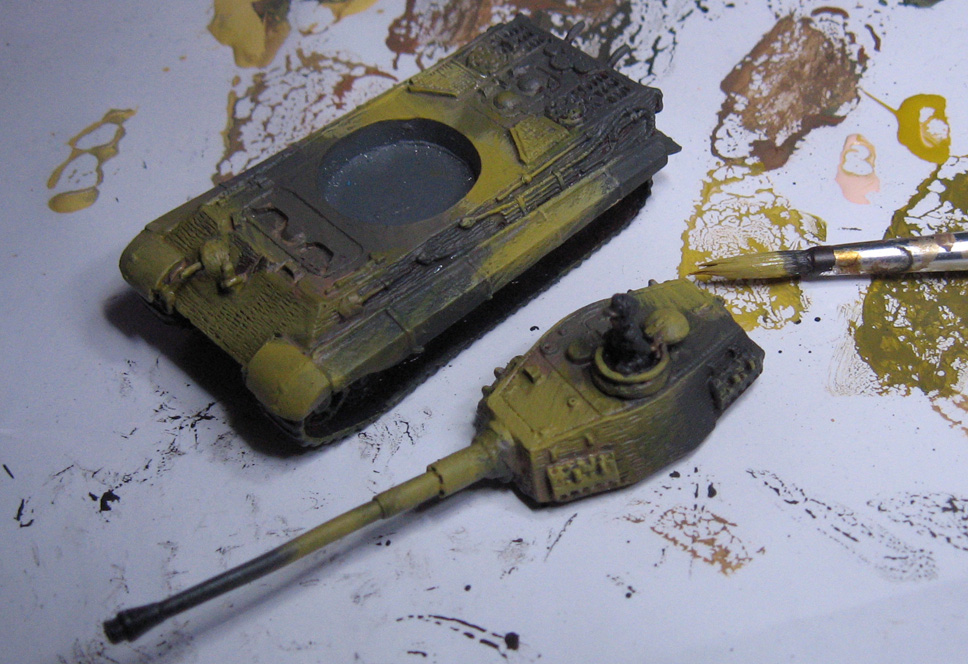
For the various camo shades, I mixed in some of the red and yellow.


Keep in mind that this is all part of the Shaded Basecoat technique, starting with middle tones and working lighter.  As you can see, I am focusing in on the tan/yellow part of the pattern.


Some of the green/black primer mix is now placed in between those layers of yellow.


At this stage, I began to mix in regular paint, which will start to beef up the saturation of the colors.


Most of the primer areas are still wet, so the 'real' paint is mixing in with it.


There is already a big difference in the tan areas, so the same concept was applied to the greens.


The green sections of the camo pattern are now brought up to the lightest lights.  From here, all these colors will be glazed, tinted and shaded to get some nice dark tones.


When I'm working on vehicles that have markings, I will add them in at this time so that they will also be tinted and shaded along with the rest of the vehicle.


A simple number and insignia will do the trick!


Stage one is complete!  This is the introduction to Primer Painting, made easier by the new waves of primer colors which are emerging.  I have also used Vallejo colored primers, which mix in very nicely with the Badger versions.

Next up, the glazing stage!  Stay tuned.