Tuesday, April 28, 2015

Gone fishing... time for Reapercon 2015!


It's that time again... time for all good little kiddies to get their filberts and craft brushes ready to do some fun painting at Reapercon!!

As you saw in the last post. I was hashing out the colors on the Reaper Fishman.  It's at this stage that I start to mix other dark colors with the washes.  In this case, Reaper Blue liner paint.

Those who frequent the blog know how much I love that stuff!  It's got a lot of pigment, but it is still somewhat translucent, and very thin.  This makes it an ideal addition to the darkest glazes.


With those dark glazes completed, it's time to move on to that fun mixture of regular light paint colors and the washes.


I mixed a small amount of light flesh color with the green and with the blue washes as well.  This created a few middle tones that were both opaque and transparent.  They are excellent for evening out any rough areas left by the glazes, and add some depth to the overall color.


I worked my way around the figure very quickly to build in more definition and detail.  Another factor to keep in mind is that all of this has to take place in about 25 minutes maximum.


This is what approximately 30 minutes of total glazing can yield.  Not too shabby :-)


This is fun.  When I worked with watercolors, I used to take a few special colors that had an odd chemical property and "drop" them into existing washes on the paper.

The colors would react to each other, often repelling each other, and creating very nice random effects.  I took a few drops of Vallejo Sepia was and added them to the storm cloud Secret Weapon wash.

Now it has a very corroded look in about 3 seconds of work!  Life is so hard sometimes...

A little stage by stage setup.


The three figures to the left are the figures I will be using during the initial demo.

Since I don't have time for washes to dry, I wanted to have one that was all set to go, so that I could grab it and keep up the rapid pace, leaving more time for the students to try this out for themselves.

As always, the goal here is not to create a masterpiece, but rather to bring out the essence of the technique, and make it something that is easier to absorb in a short period of time.

Eventually, I want to do this sort of thing via Google Hangouts.


Monday, April 27, 2015

All the fishies in the deep blue sea.


All right!  Some fun with glazing, just in time for Reapercon classes!

Let's get things started with some fish dudes...


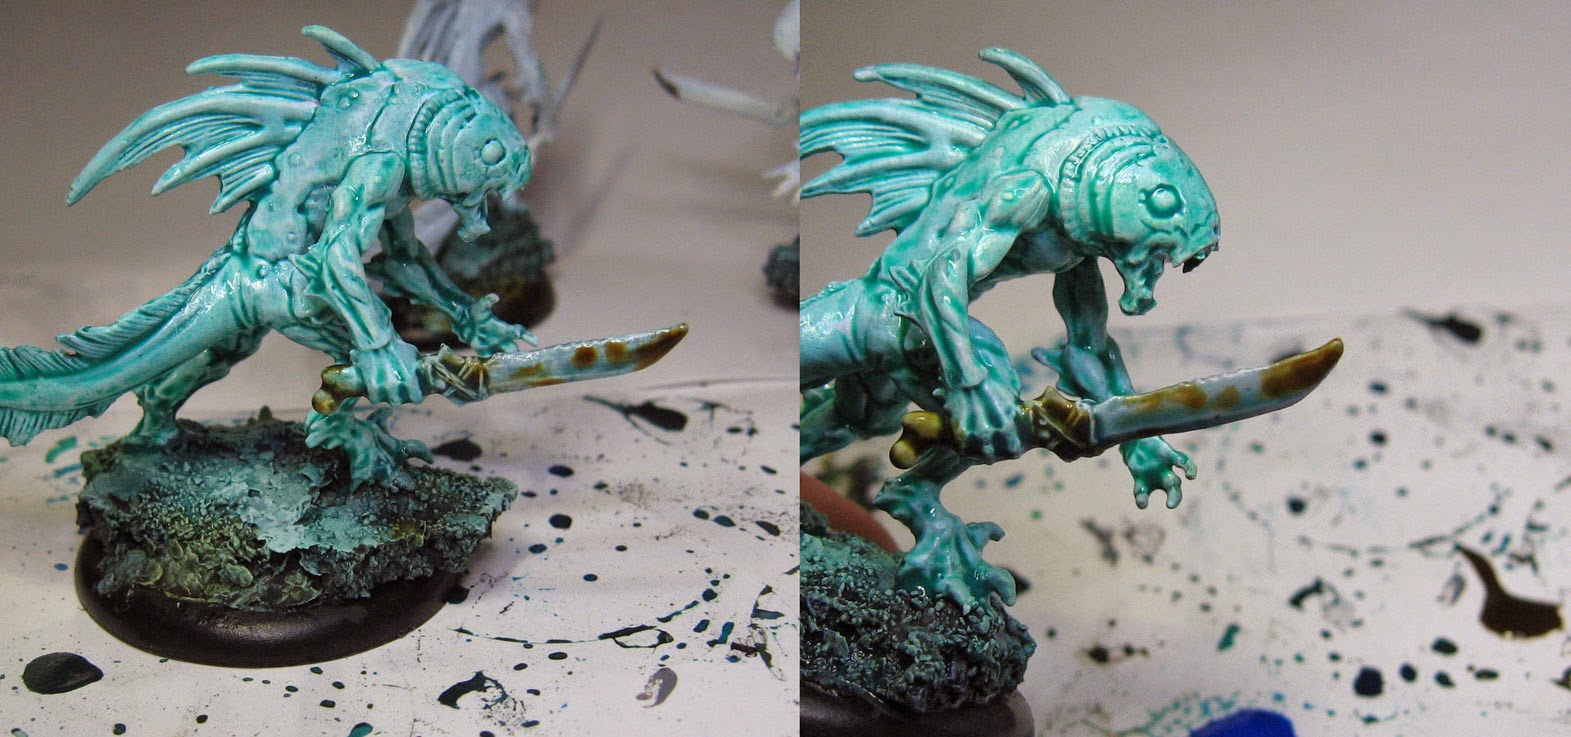
And bring out some handy wash colors.  We have a fun selection of Secret Weapon washes on the right, and a few Vallejo washes on the left.

The miniature is not completely white, but I did much less action with the shaded basecoat.  I wanted to do as much with glazing as possible.  Since this is all about the glazing class, I need to get much deeper into the various elements right away!


The colors arrayed on the palette.


I started adding glazes to the base, darkening the edges a little more, and using sepia around the bottom section...


Here's another base.  I am trying to create a bit of a spotlight effect, almost as if a diver is shining a light on the sea floor.


I took some of the green Secret Weapon wash... adding a touch of the cool grey.  This is just an initial layer, one that will be built upon several times with additional glazes.


Some of the very bright blue was mixed with the cool grey, and I started to darken the carapice and fins.


Keep in mind, I am pushing this much more than normal.  Typically the color would already by here via the Shaded Basecoat.


Another darker layer is added...


Looking at the other side of the figure, prior to these darker shades, illustrates the difference.

In the next series, I will be working in 'regular' paint colors into the dark areas, plus mixing light colors together with the glazes.

I want to demonstrate that semi-transparent light color scenario which you see me use so often on my own minis.  Stay tuned!


Ready for a dive...


Every time I look at these guys, all I can think of is a Jules Verne diving helmet... can't help it!


This is the proverbial 'cracker' in between terrain meals.  Enjoy!


You can't keep a good zombie down...


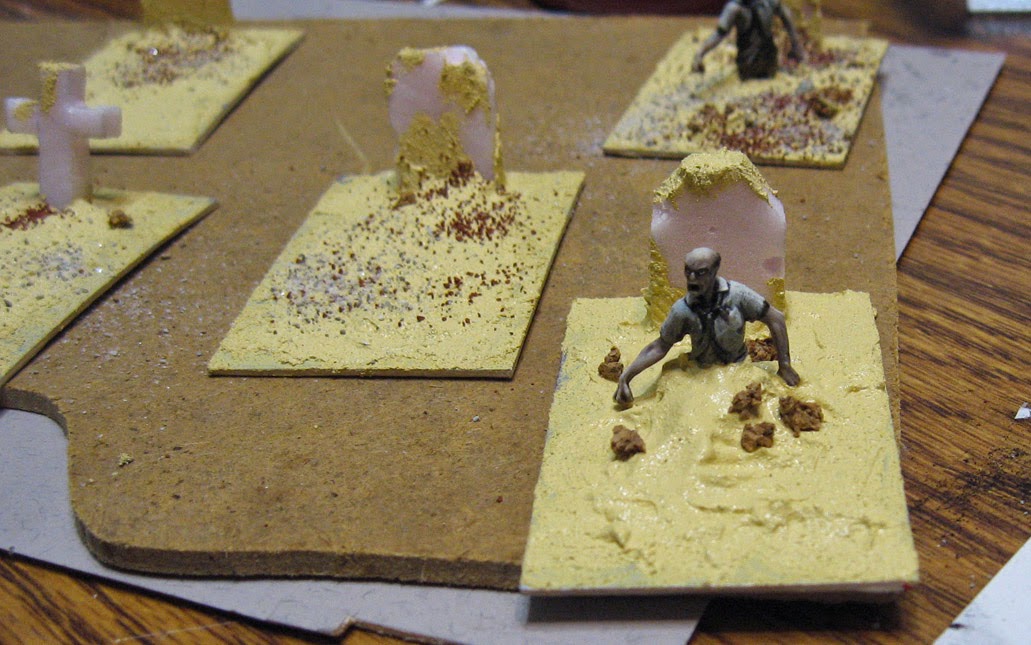
Time to show some step by step images of those graves you have seen 'popping up' in the various posts about the town of Wappelville.

These pieces are not just for decoration.  They are specifically meant for games in which the Enlightened are involved.

In effect, Carpathian and his gang are trying to get as many fresh bodies as they can... relative as that term may be.

The graves serve as markers.  If one of Carpathians's living crew gets within 2 inches, they can spend an action point to "open up" a grave, which is then removed from the board and replaced by a zombie.


I began with some textured matboad, and a few quickly carved pink headstones.  A few Zombicide figures were cut in half to make them look more interesting.


My new Desert Sand paste from Vallejo was perfect for adding a bit of piled dirt in front of the headstones.


Some of it was also carried onto the headstones for additional texture and strength.


A little bit of rock and ballast was added...


The two open graves were given some more chunks of rock and gravel.

My next episode will show how these were painted and finished off with flock and static grass.  Stay tuned!!


The Forest for the Trees: Part Two


As I mentioned in the first post, I had thought about adding more mid range and small trees to these stands.

This was not only about some added realism or aesthetic, it was also about additional cover and line of sight blocking.

For the time being, I only added a few.  I wanted to actually use them in some games first.  This small tree was set into some cork, and held in place with my new Vallejo sand paste.  That's the sandy colored material, by the way.


This is how they looked prior to painting.


I put out a variety of tan colors, as well as a larger vat of black brush on primer.  Mixing that in would not just darken the colors, it would give me a chance to create a number of grey and even greenish colors!


The initial layers are comprised of the mixture of black and reddish brown.


As these got lighter, I wanted to move the shades towards tan, as that's what our gaming mats are colored.


A peek at the palette shows you the direction of the colors.

Once the paint dried, I added some flock and static grass.


This is what they looked like out on the table!


This image gives you a better sense of the actual colors and shading.  Much more will be added in the future, but as I said earlier, I will be testing these out in some games to see if there is any room for additions.

There will be some more definition painted onto the trees when I have a few moments.


This is not simply a final view of the trees, but just a sneak peek into many more posts!  I have a series on the way showing the construction of the graves that you see to the right of the church.

There's going to be a very interesting battle fought there, so stay tuned!!!


Sunday, April 26, 2015

The forest for the trees, part one


After using the much smaller trees that I created for Warhammer and such with our Wild West Exodus games, it had become clear that I would need something entirely different.

To this point, most of the terrain had been either buildings or mesas, so that was not a big issue.  We used the trees more as decoration or atmosphere than cover.

However, there are a number of scenarios that we want to do in the future that will require a more 'rustic' setting, and that means trees!

After a week of very high winds, there were plenty of nice big branches sitting there on the sidewalk for collecting!  After I had a nice bundle in my collection, I set down to work.

The branches were cut and glued to some plastic dvd protector disks, and then a little Vallejo Water effects gel was applied to create some tree roots.  I used blue, so that I could actually see where I was putting it!


Next, the Mica flakes and Lava paste were mixed together to create a heavy texture,  mix of dried mud and leaves.  This would also serve to strengthen the attachment of the branch to the plastic disk.


A little Elmer's glue was also added to this, so that any gravel or ballast would stick more efficiently.


You can see how this material was built up in places, especially where there were big gaps around the fallen log, etc.  The whole idea behind this is to give 20-32mm figures something they can hide behind, so these branches are almost an inch thick in places.


I added some thick cork here to cover the hole in the center of the disk.


As usual, the three types of ballast.


Ballast added.  Not too much though, as I want these to be as flat as possible.  I am trying to avoid the effect created by the GW tree stands, where half of your figures would tend to fall over.


Looking good!  I was not sure how many smaller tree branches (like the ones I typically use on my bases) that I wanted to add.  For the moment, I only added one or two smaller branches.

Stay tuned for the finale of The Forest For the Trees!!


Saturday, April 25, 2015

Yay for the red team!


Well... one of the red teams at least.

C-Red Nation has to wait another game, but at least the Blackhawks are advancing!  The series could certainly gone the other way, but I am very glad to have the possibility of coming home from Reapercon to the final stages of that series.


It won't be too easy to keep tabs on it out in Texas, but I will do what I can!


In the meantime, the final Thallax before a set of Three Amigoes shots.