Friday, November 7, 2014

Meet Cool Hand Luke


Today we meet Cool Hand Luke.  As cool under fire as a lizard in an icebox.

Anyway, this figure is left over from our days playing Deadlands, which is my favorite of all RPG games!  Loved that system (pre- D20, of course!).

We have started using these to add some flavor to the Wild West Exodus games.  Since the civilians running around on the table has made such an interesting impact on the games, we are trying to expand that with even more characters (essentially NPC's).


A few of them (like the Mysterious Stranger), are designed to hang out with the Lawmen, while some others have affinity for Rich's Wild Bunch Gang , or Jesse's Girls as I call them.


Here's Luke and the Mysterious Stranger.


Talk about a power couple!


This definitely ain't no bull


Here's a few images of the whole Minotaur set!


We start things off with a neat trio...


Let's go Bulls!  Well, partly bulls.  The whole set of five for your viewing pleasure.


I had a lot of fun intermixing the greenish shades into the metals, which I wanted to use as a slight contrast to the warmer pinks of the skin tones.


The final very warm accents of the bone surfaces and leather straps were the final tidbits to unify all five together.


As you can see in these next few shots, I did try to get some variations in those skin tones.  


I went with the lighter skin tones on the two minotaurs which had less armor.  The three darker skin tones were used to make some value contrast against the lighter armor.


The rust on the armor was one more way to bring in a bit of the warmer colors into those sections.  I didn't want that to get too isolated.


Thursday, November 6, 2014

Something in the oven...


There's a ton of stuff baking in the oven right now, folks!  I can't even list all the various projects, experiments, and so much more.  Some are even secret.... :-)

No secrets in the kitchen for Chef Babo!

Here he is making some Cranberry Pecan muffins.

Very basic ingredients, as you can see.


All mixed together.  You can just feel the fiber!!!


Ready for baking, sprinkled with some melted butter.


Done!  Each one of these bad boys contains nearly 50% of your daily fiber requirement.  Yes indeed, a tasty way to keep any miniature painter regular.


Another job well done by Chef Babo.

Next up for him, some cheddar biscuits.  Those will be very welcome as the overnight lows drop into the teens later this week!!


Here's a few images of Reaper Bones minis.  This crew has already been joined by the Mysterious Stranger.  There are many more sitting on the table, as they are parts of other experiments.


I still marvel at what you can do with the BONES minis.  Those fire elementals will be part of another set of step by step images.


You will be seeing more of the Zombicide crew when I post the images of the Secret weapon construction cones and jersey barriers.


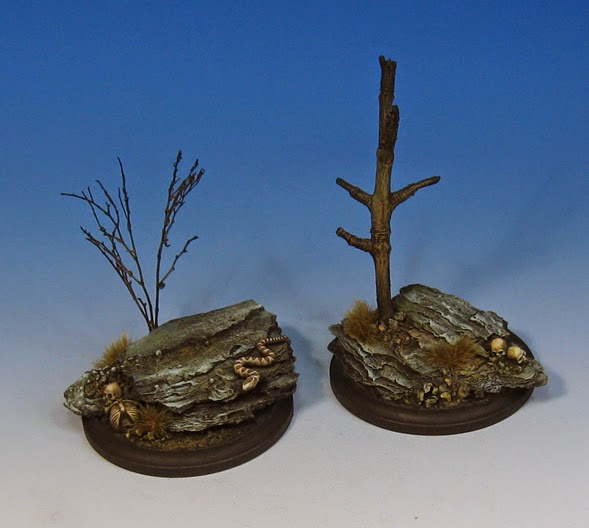
Bark and Bikes


More fun with bark!  As you have seen, this stuff yields amazing results, but does not require tons of work.

I added another rattlesnake to this base.  It's a fun design to paint!


Larger bases such as these really call out for these kinds of added details... it enhances the theme and story of the base immensely.


The view from above.  Many subtle color differences here... playing grayed down greens, browns and tans against each other.


The second base, also ready for an Interceptor.


Side by side...


Each one will get an interceptor, just like the original version.


Wednesday, November 5, 2014

How to get out of hot water... gap filling and more.


Most of you probably remember last week's post about using Vallejo Water Effects to create really nice flames.

Here are a few more examples.  We have a few Reaper BONES fire elementals.  Normally, I would have to spend hours sculpting with green stuff around the base to make them blend in.


Water Effects to the rescue!!!


I don't just apply it to the section where the figure meets the base... I even work my way up the side, adding more texture and covering mould lines.


In just a few minutes, the base is completely covered.  I do suggest working in layers if you want it to be super thick on the base itself.  This way, the material has a chance to dry and set all the way through.


Flames in a jiffy!  Once the primer is on these, no one will be the wiser.  Except you guys, of course :-)


And another use.  Filling those pesky gaps on figures that have lots of fur texture.  Instead of dealing with little tubes of green stuff that want to stick to you, the tools, and so on.  Just a few quick hits with the brush can work wonders.

Green stuff does not add all that much strength to a joint if you are only putting in a little bit to fill a gap.  The Water Effects is more like glue, so I think you also get that added benefit of more holding power.

In any case, it was a much more pleasant way to deal with huge gaps!


Ride 'em, cowboy. Well, sort of.


Back with Mierce Miniatures and a Beastman on a Boar.


The base that it is dwarfing is a 60mm dreadnought base, so that gives you an idea of size!


I'm looking forward to taking some shots of this guy together with the Polar Bear rider... two huge critters!


The Monster Mash continues, long after Halloween.


Tuesday, November 4, 2014

Completing the Contrast Hat Trick


So, for the moment, we see stage #1 of the Contrast Hat Trick... value contrast.  It's the easiest one to achieve.  All it takes is really dark against really light colors.  Simple.  Sort of.


This is the second stage, color contrast... via color temperature.  This means making the cooled lava a cooler color.  I am mixing a subtle light blue into the black in order to do this.


Layer number one.  Comparing the value next to the outer ring shows that it's getting slightly lighter as well.


A little more.  For this point forward on subsequent layers, I will focus only on certain 'zones'.


With this next layer, you can see the direction I am moving in adding the extra lights to the cooled lava sections.


This shows that pattern, and the series of colors mixed.


Notice how the lighter parts are not 100% coverage on the cooled lava sections... just in certain places.


Now that I know how light the cooled lava is, I can go back into the lava itself to bring out the lightest lights.  This means fluorescent yellow, regular yellow, and even a touch of ivory.

I used flow improver to thin the mix, as the fluorescent paints tend to be quite thick.


Brightest lights added!


I went back in with the amber and fluorescent orange mix to take down any weird drybrush textures that may had cropped up.


I took this a little darker, especially along the edges of the lava...


I mixed up a black glaze to darken a few key areas on the cooled lava.  This was to accentuate contrast #1, but also contribute to contrast #3, which is the most tricky.

That is hue and saturation.  Obviously, the lava is super saturated, high chroma color.  Very pure and bright.  The cooled lava sections are, by their nature, grayed down (or toned down).

This is the most subtle way to achieve contrast.  It was one of the last things I ever mastered in my 2D painting.  Lots of practice.


Final result!  Regular studio style shots coming tomorrow!