Thursday, December 26, 2013

One more set...


Here's a fun set of images using the newly printed backdrop.


I love seeing all the minis together!


From the back...


Chorus line!


Now the side...


Gather 'round the icon!


A little view of the bases as well...


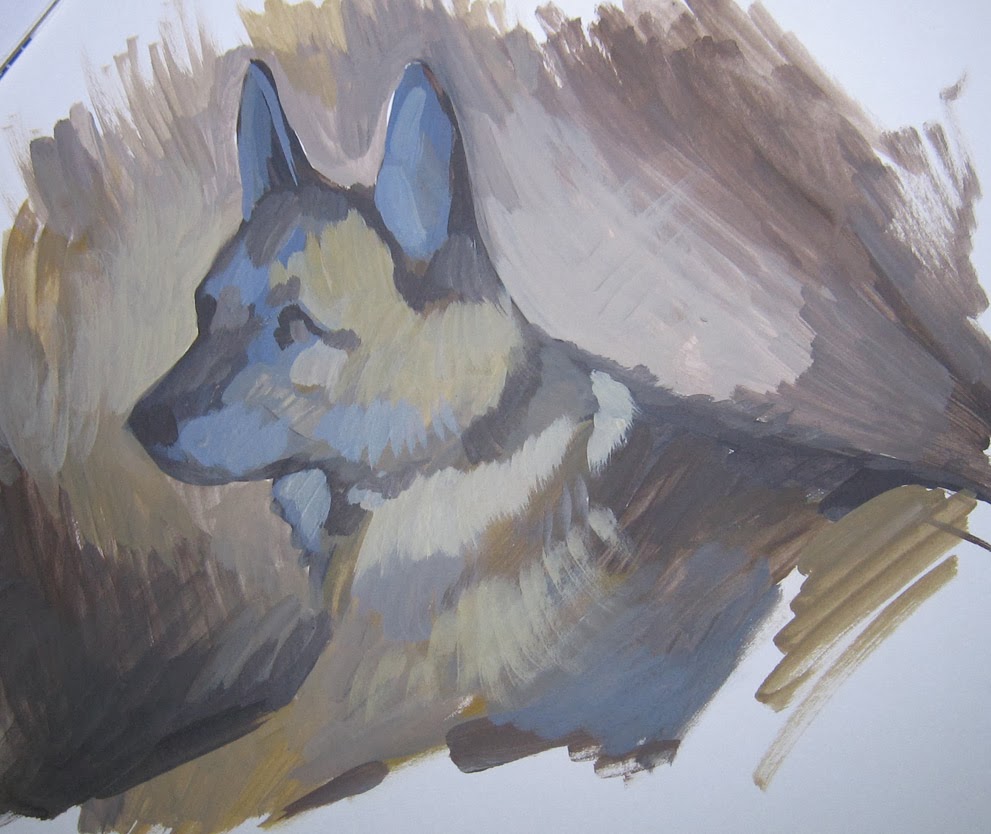
Painting fur... this time in 2D


Some of you remember the posts from a while back that discussed methods for painting fur.  This is about painting fur, but more painting in general.  I like people to see set of images such as this, as it is the way I go about painting my miniatures.

Here were the colors that I used.  As usual, my Filbert brush and the craft brushes were on hand, just like in the videos!

Miniature paint makes fine '2D' paintings, it turns out!!


This is the equivalent of the "Shaded Basecoat".  You can see very broad strokes used with the filbert brush, setting the lights and darks in place very rapidly.


In these early steps, I am trying to 'set up' the final stages.  I am also trying to balance where 'warm' and 'cool' colors are placed.  Even now, the "center of interest" must be established.  

That can be done by a variety of contrasts... opposing colors, light vs dark colors, and how 'hard' or soft the edge is, such as those on the face.


More dark shades are added, refining the drawing and setting up more details.


Not only are lighter colors added at this point, I am also thinking about directional brush strokes.  These flow in the direction of the fur.  However, you will also notice that I am letting those first layers show through a bit.

That is, I allow the 'underpainting' to show through in spots.  This will provide more depth overall.


Still more details are added.  Some edges are smoothed and faded, others are sharpened even more.

I am also using that opposition of warm and cool colors...


You can see more refinement around the nose and eyes.  Obviously, this is the area that I want to feature in that 'center of interest'.  Not restricted to paintings like this, a miniature also need one.  The face is almost always that spot :-)


More edges have been enhanced with stark highlights and more directional brush strokes.


Final result!  If miniature paint can do this on some matboard, just think what it can do to a miniature!

Trust me. painting this way on miniatures is a blast.  This is what I try to bring across in the gentlest possible way on the videos.


Wednesday, December 25, 2013

Yule Tide workshop


OK folks, something even more festive than miniatures!

That means cookies!  Gingerbread style.

Kimberly and Cathy baked the cookies, and left them to me.


I had never mixed the frosting before.  Many years I had decorated the cookies, but this would be a first.  Time to gather up the ingredients...


Definitely a tad thicker than my miniature paint!  But, I can mix any color I need...


Don't blink!  Weeping angles hiding amongst them!!


Skeleton gingerbread men!  And some Imperial Guard...
Don't forget the Christmas sharks!


And the Ninja Bread men!

My job was done.  Time to eat them!!!!

Merry Christmas everyone!!!


Tuesday, December 24, 2013

Who says you can't take it with you?


It's just about that time again!  It took a while, but the remote studio was set up once again so that work could continue on several fronts.

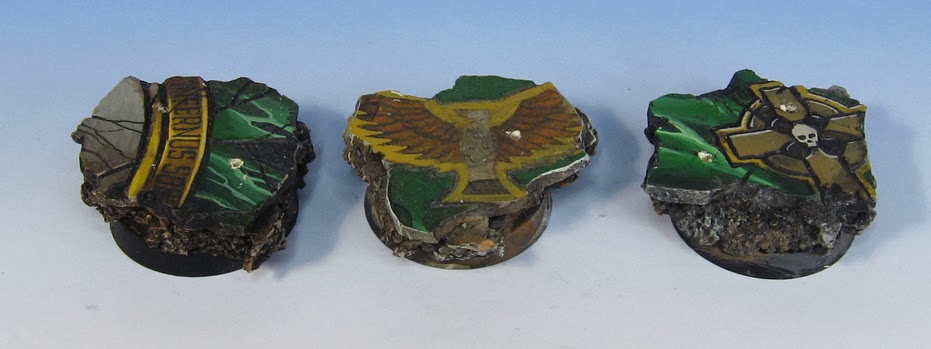
Since many questions have been asked about the bases in the last few weeks, I thought I would snap a few images of bases in various states of completion.  Here is one base that is almost done... you can even see the holes drilled into it for the figure.


This base is in a very early stage.  You can see that the basic design was drawn out first in pencil.  Normally I would use one of my finer carving tools to create texture around the outer portions of the design.  I didn't do that on this one, since the miniature is going to cover a good portion of that.


These next few images show 3 bases in 3 different stages.


The one on the right is about 75% complete.  More work will be done in the cross area, including some additional text, etc.


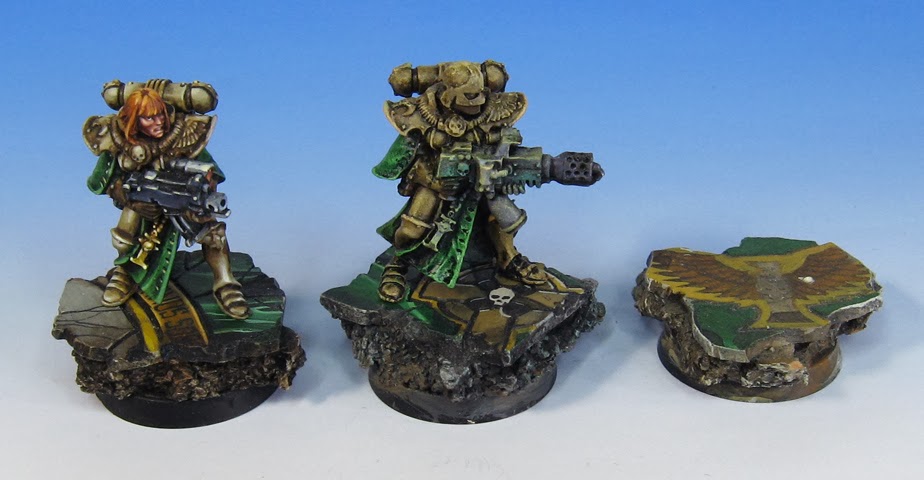
This view shows a few of the figures placed on the bases.  They can be removed, since all that is holding them on are the pins in the feet.  The figure in the middle is also in early stages of painting.


Putting the minis on the bases is almost always the final stage.  It is a very satisfying moment!


This image has a 4th figure on a taller base.  That cork is bulletin board cork, which is thicker but more fragile.  I typically put leaders and characters on the taller bases...


And the road studio at work.  This is the 'small' version.  The full version is about 200 pounds worth of equipment ;-)  As I have learned over the years, that fireplace can get mighty toasty on the bum!  Even though it was -11 outside, that stove was at 600...

It is set up for prepping, painting and a dozen different computer tasks that need to be done on a daily basis.  One more PAL Dvd masetr being burned.


One last image for you!


Monday, December 23, 2013

Back up and running...


OK, I am just starting to get everything unpacked... Time for one quick set of images.


Canonness and Icon bearer.  Fun with hunks of metal!


I had been looking forward to seeing these two together, especially since I was able to print out a new backdrop at long last!


Yea to not having to clone brush a million white scratches and black skid marks from each image!


They sure look scary!


The platform...


Yes, another day, another base :-)


You will recognize this base from a previous post.  Eventually there will be a miniature to go with it!


Sunday, December 22, 2013

Why does this thing have to be so heavy?


This is a figure that I have waited years to paint.  It is definitely very different from the typical banner bearer!


As I mentioned a few days ago in one of the basing posts, I made the base a little bigger so that I could offset the weight of the icon.  Good thing I did!


A very interesting figure...