Wednesday, March 20, 2013

Getting there is half the fun?


Here are a few images of part of the Dark Eldar army that is emerging.  Here we have Ashara's venom, which carries her Incubus retinue.  I had put this one together at the same time that I was converting the jetbikes, hence the extra fins made of plasticard :-)


Gotta have those recent captives!


Here's another venom.  These are still in pieces right now for ease of painting.  That's why the banner is backwards :-)  The ventral splinter cannons have all been magnetized.


The last week, as I have been making bases for dozens of other minis, I worked in the bases for the vehicles.  Three venoms, a raider, the Razorwing jet fighter, the Chronos pain engine, etc...


I put the severed heads on the venoms to represent the grisly trophies.


Much more to come!


The building process is essentially over with these guys, with the exception of the objective markers.  Initial painting has been going on here and there where possible.  One of the squads of Wyches that travel in these venoms is almost painted... stay tuned!!!


More fun with bases!


Here's a few bases that I was working on for the Raging Heroes Kurgonavas.  I wanted to experiment with an old watercolor technique... one where you try to use the chemical content of the paint itself to create interesting effects.


The idea is to put down a layer of transparent glaze, and then toss in some opaque calthan brown.  These things don't want to mix naurally, so they 'resist' each other, almost like two magnets with the wrong polarity.  You can get some interesting swirls and strange patterns as a result.


I did this on a few other bases as well...


I let that dry...


...and did the rest of the normal work.


Some more views...


From above!


Close ups.


How the Uglies play Scrabble


The finished Nurgle base...


Here;s the images of the Nurgle base after completion.  I had some fun putting the cracks on the helmet.  Normally I have some kind of bullet holes there or mostly rust.


The view from above...


The impaled skulls on the chaos vehicle sprues really are fantastic.  I wish I could just get bags and bags of those :-)


So, that's it for this base.  I have some other ones for you tomorrow!


Tuesday, March 19, 2013

All the fishes in the sea...


Here's one last set of Eastern Front Studios miniatures.  For a while, they had a whole sea thing going on.  You had the sea hag...


This squid/octopus guy...


And the seahorse riders.  I am sure these were sculpted by Gael Goumon.  Definitely his style!


Those seahorse riders were definitely fun to paint!


You're soaking in it...


OK, not many people will get that Palmolive reference, but here we go.  Another Nurgly base!

This was another experiment with the super light colors and crazy ink/glaze later.

Starting with the lighter colors...


Setting out the inks and glazes.  Some black, some green, sepia and the Secret Weapon Concrete on the far left of the palette.


You can see that I have started watering down the inks and mixing stuff together.  Mixing the sepia and black made a very nice warm dark!


I did a few layers of this, focusing the darkest inks and such in the crevices, while I used some of the sepia and concrete mix on the stained marble section.


I painted in the Nurgle design.  The idea here was to have the darker, cooler color underneath the lighter, warmer colored skull.  You must have dark to have light, and vice-versa!


Now it was time to make sure the liquid swampy areas had some shading and color...


Once I have my colors set on the swampy part, I put a layer of gloss varnish over that.


While that initial layer of gloss coat was still dry, I mixed in the fluorescent yellow with it and made things look really toxic!!!


Almost done!  Finished pics later...


Pilot to tower...


Given the large amount of Venoms that are also included in the army, it was time to figure out what I was going to do with all the pilots.  I could have saved time by just painting the canopies as I did with some regular Eldar vehicles a few years ago, but I wanted to do something more with these.


Also, having established the glowy look with both the jetbikes and the Grotesques, I wanted to maintain a consistency from one set of figures to the next.

The other tricky part to all of these vehicles was going to be painting the cockpits and other engine elements that would be almost impossible to reach if I did not paint them before gluing the two halves together.  So, I painted the intakes and exhaust sections of the engines, and started painting the cockpit as well.

I used some deep reds to paint the pilot and most of the cockpit, and then used the filbert brush to 'damp brush' the glowing colors, working all the way up to the brightest lights.


Then I used a series of glazes to shade everything darker.  By using a blue green mix, the reds were also shaded, and cooled down in the shadow areas quite a bit.  That helped to tie all the colors together.


Then I went back in and worked the middle tones a bit, cleaning up some areas and adding a bit of variation in the lighter colors in terms of hues.


So, task complete!  All set to glue together.

Just 3 more to go...


Monday, March 18, 2013

Stuck on you... missiles and magnets


After trying out the Razorwing a few times, I am not really sure it helps me a whole lot.  It's off the board a lot, and space marine armies can have dozens of skyfire shots for pretty much nothing.

However, this is the only thing I have that has SF, so I guess it stays.  It can drop some nastiness on an enemy scoring unit late in an objective type game, although it seems like the newer fliers also do that a lot better.

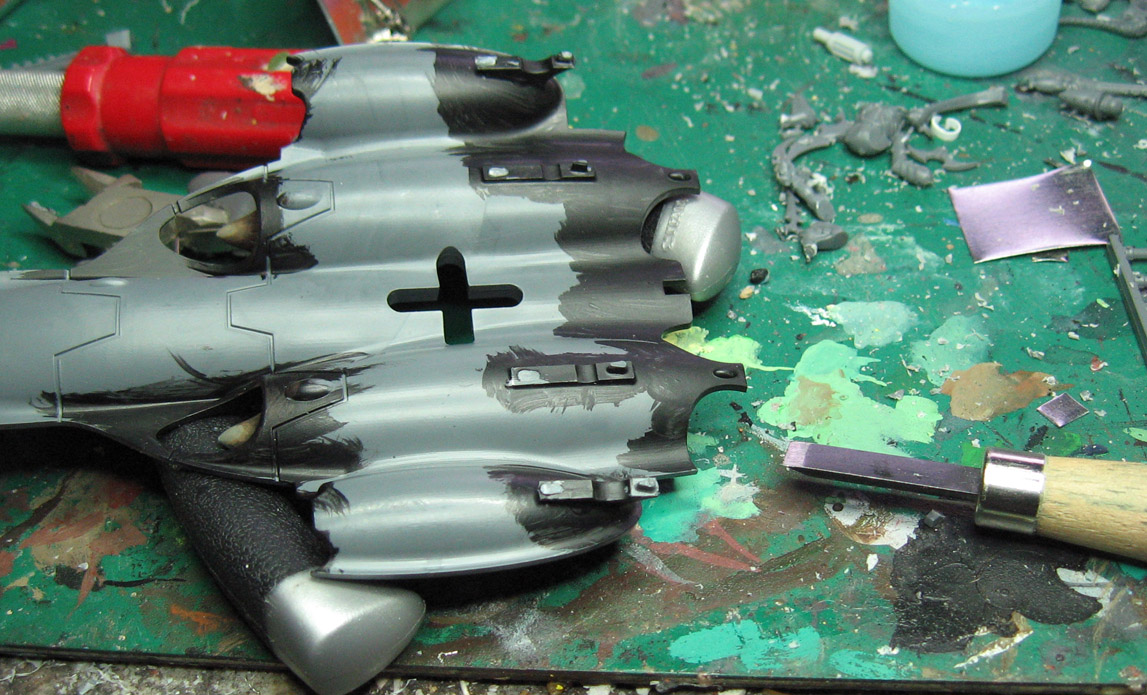
I figured that I should magnetize the missiles, since I may not always want the same type of armament.  


I am going with the standard Monosythe to save on points, since they are free.

I started out by putting a magnet on the underside that was the same height as the missile pins that are on the fuselage. 


I chopped off the leading edge pins, so that I could put the metal sheet in its place...


I cut out tiny pieces of sheet metal (always make sure your magnets will stick to it when you buy it...  I found this out the hard way!) and placed them on the sponsons.


I double checked to see if the magnet was the correct height, and in a good place for balance.  Once confirmed, I did all the sponsons.


Getting there!


A quick "shake check" to see if they would stay on, which they did.


Finis!!  This was pretty basic to save time, since I don't know how often I will use this guy.  I think it would be better in multiples.  Again, I am not sure just how much this will help at Adepticon.  At least it counts as a scoring unit in one scenario ;-)