Saturday, October 6, 2018

Color Testing


The latest series of Army Painting tutorials for the Patreon Page is near and dear to my heart, as I replace my old Easterling army which had been sold off over the last few years!

It feels great to be working on them again, but now armed with knowledge that I did not have at the time.  Here are a few snapshots of the second episode of the series, where I paint a color test figure.


I had a few new things to try out as well, including the new Reaper Miniatures Clear Orange prototype!  Anne knows how much I love the clear paints, and she is trying to create some more additions to that line.  In conjunction with the Sepia Liner that she made last year, I was well equipped for painting my Easterlings!


As always, I try to go much deeper into the concepts than the painting alone.  I discuss the use and expenditure of time, which is a valuable currency for all of us!  The point of a color test figure is to see if all the special things you had visualized in your head are actually possible to execute on the figures in a reasonable time.


Each little "extra" costs you more time currency, which includes things like freehand and NMM.  However, doing a color test figure (or two!) can prepare you for the mass painting of the unit.  You can start to figure out a few shortcuts and ways to save some of that time...


I attempted to show simple methods to making your army look more unique and special, but keeping that time expenditure as low as possible!


Each of these Army Painting series is typically 11-13 hours of tutorials which span 4-6 episodes.  These videos are available on the $15 Army Painter pledge level.  By the way, that also lets you view "stand alone" episodes which are filmed each month on other topics, genres and materials.

So far, I have done some Age of Sigmar Daughters of Khaine, a unit of Bolt Action Winter Soviets, and now the Easterlings.  I am adding the Song of Ice and Fire units to this as well!


The second episode of Series 3 is now up for viewing to the patrons!  You can join in on the Army Painting series on the Patreon Page here:


Thursday, October 4, 2018

A Mountain that Moves


This massive hunk of resin is from Puppets War.  To give you an idea of scale, the base is the size of a DVD!


He was a good choice for an experiment using the Army Painter Strong Tone, which I had tried out a few months ago as I was helping someone paint a Bolt Action army.


It seemed like it could be useful, especially for my bark and branch bases, which have lots of craggy surfaces similar to this.  While the Reaper Liner and Secret Weapon Weathering paints work well, I thought having the Strong Tone working with them could be an interesting combination.

I was very pleased at how it dried, which was very matte, and it left no water marks!  It was very similar to the Vallejo washes that I loved so much.  

The mushrooms were sculpted out of green stuff... done to match many other bases from the same "faction".


It is a perfect tone of sepia, and it has worked well with historical figures and many other genres as well.  It says 'ink' on the jar, but it is not shiny or runny at all.  The formulation  is quite similar to those Vallejo products that I mentioned. 

Out of the jar, it is actually thicker than you would expect... but it really gets down into crevices!  This is something I will certainly be working into the newest painting videos, so stay tuned...


Wednesday, October 3, 2018

Ground Attack


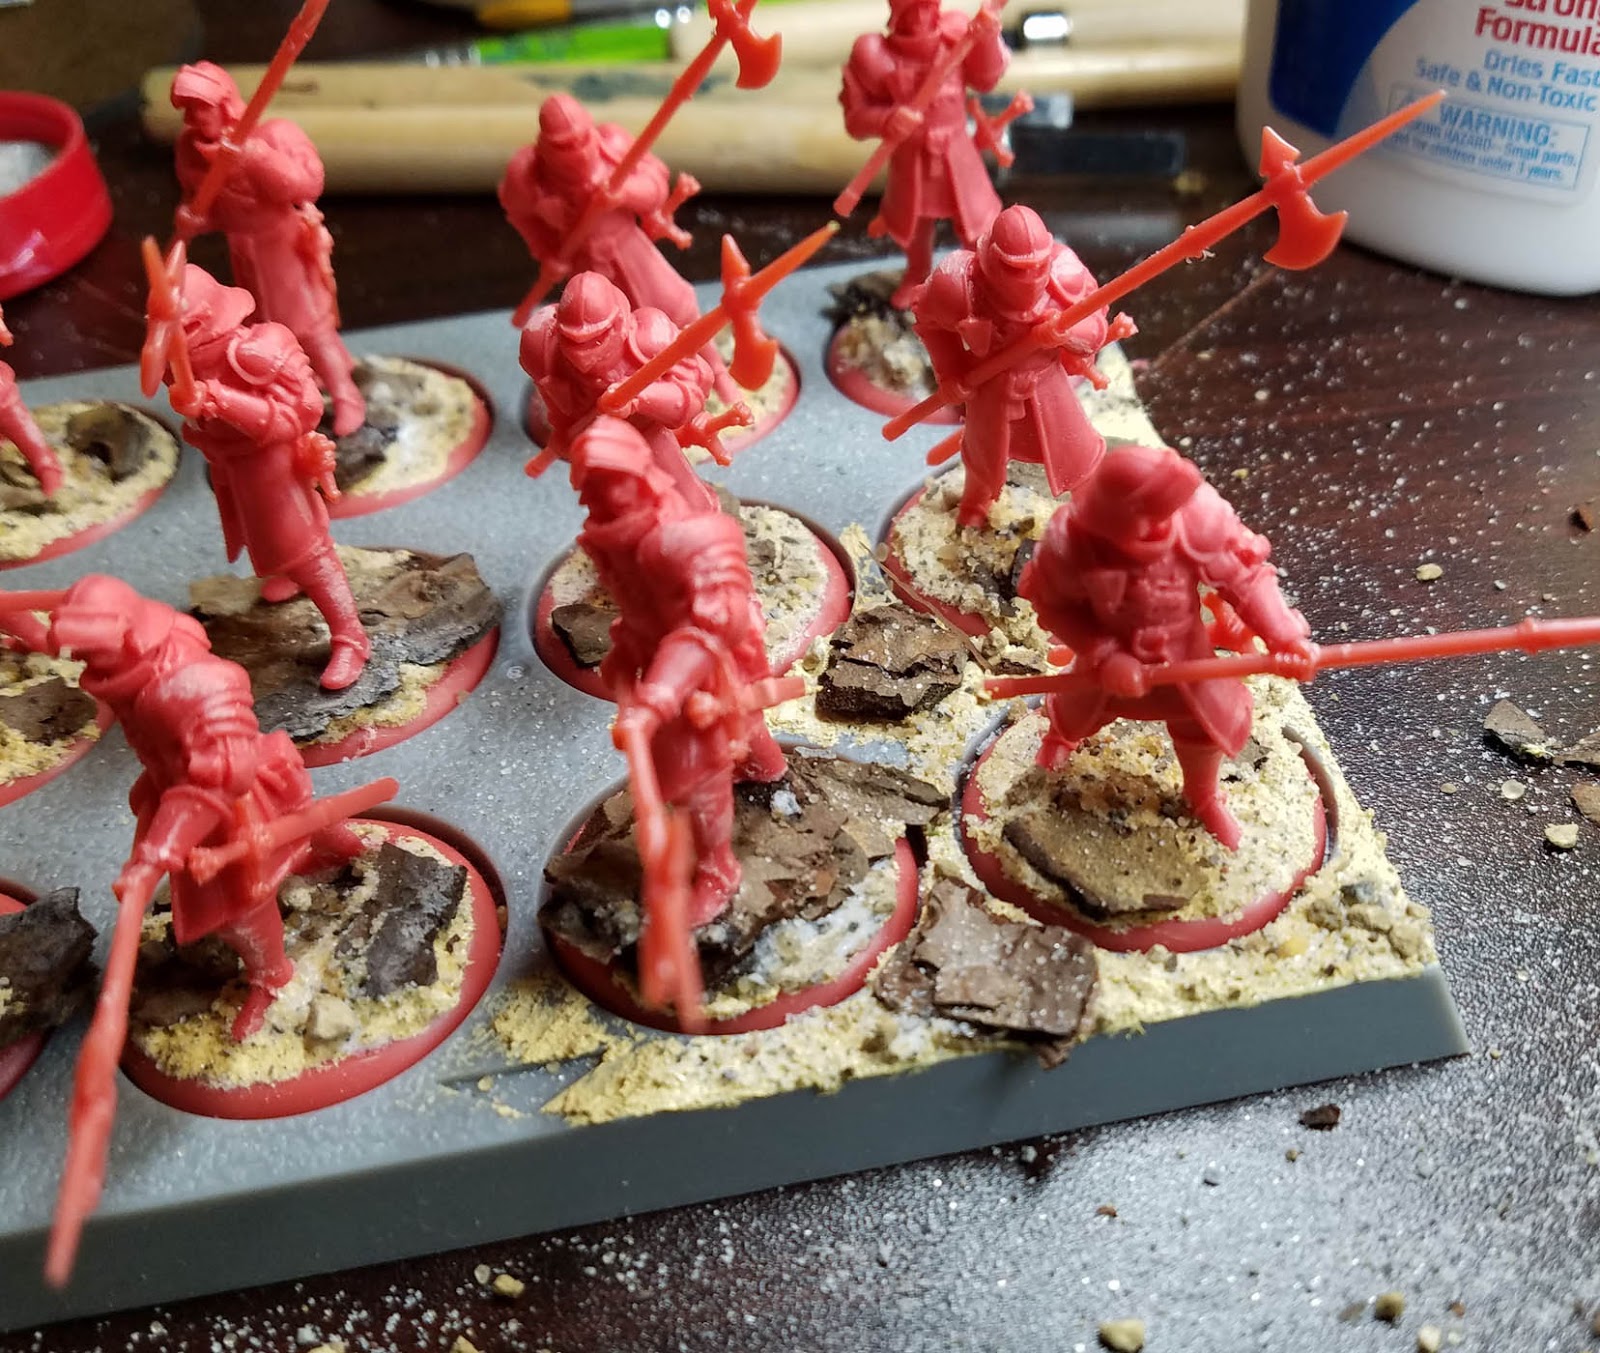
As soon as I saw the Song of Ice and Fire game (and how the figures interacted with the movement trays), I knew that it would give me a chance to try my "Bark and Branch" basing method on something completely new!

In the past I have either multi based units for Kings of War, or made decorative square bases for Warhammer armies that fit side by side on a tray.  This would be very unique, as I would have to match individual round bases to fit in an overall tray.  An added challenge is to make it possible to 'drop in' the heroes or banners as well.

I started out with some of those characters here...


Once I knew I wanted to have that look, it was time for the unit itself.  I positioned the figures into the tray, and started to get pieces of tree bark ready.


Just as I did for the special characters, I sliced off a few figures from their round bases with a razor saw.  I always use a rubber Jeweler's block to make that process easier and safer.

A hole is drilled in the foot, and a pin in place.  The oxide paste is used as mortar, like usual, and a drop of super glue as well to press the flat tree bark in place.


A bit of glue and oxide paste is placed on top of the bark so that I can add a few pieces of gravel and some fine sand.


The pin holds the figure in place on the base, and he is set back into the tray.  I few more figures are also taken off their bases, but not too many.  First, this will save some time, but it also gives each figure a slightly different height, instead of each one finding a convenient rocky outcrop to stand on!


To get the different levels, I used just the Oxide paste and some glue to place smaller bits of bark (usually what was broken away from the larger pieces) into that mortar.


I worked my way around the tray, sometimes putting almost no tree bark on a given base.  The idea was to make it seem like there is a pattern to the rocks, instead of those perfectly even spaces out crops!


With all the figure bases complete, the next challenge begins, and that is matching the tray to the bases.  It can be very easy to "lock" your figures in place, so you will need to be very careful as you apply your glue and paste.


As the paste can start to set up quickly, I mix a bit of white glue with it, and that extends the work time of the material slightly.  You also don't want to get too much glue, gravel and bark into the slots, etc.


Where there are base that have a figure standing on a piece of bark, I try to arrange some bark around that surrounding area.  Also, as the special characters tend to be standing on out crops, I try to have more pieces of bark on the front row of the tray.


You can see that I am working my way through the unit, until the entire tray is covered.  There are some areas that have very little bark or even gravel.  This is where I can either add snow or some kind of flock.


The completed tray!!  I will be doing many more of these as I get the figures ready for playing.  Tutorial videos will be created of this process as part of the Army Painter pledge level on the Patreon Page.  In fact, next month's video series (about 12-14 hours of lessons!) will feature an Ice and Fire unit.

Each series begins with basing, as you see here.  I will then take you through the process of creating color test figure, and then the rest of the unit.

My goal is to show you several ways of painting your figures, some in NMM and others using Metal Medium to create a TMM effect.  Then I will paint other units in oils!

That is all available on the Patreon Page at the $15 level:


Tuesday, October 2, 2018

Lord of Slaughter


Another new series of videos are about to be added to the list of tutorials... Creature Caster!

These large beasties are highly detailed and that makes them perfect for creating how to videos.


Here's an example of a test video that was done in a Facebook Live session:


Since the parts are very interchangeable, it allows me to paint these in smaller sections, so I can still get them on camera despite their overall size.


This is one of several that are under way right now.  In this instance, I am working with acrylic paints.  I have a few others in progress that focus on oil painting.


Obviously I made good use of my Vallejo Fluorescent paints, injecting them into each color that was added, which enhances the saturation by quite a bit.


There will be a few different levels for the Creature Caster pledges, including one for the miniature itself!  You will be able to see those here on the Patreon Page:


Monday, October 1, 2018

Law of the Jungle


Next up from Victoria Miniatures we have the Arcadian Guard.  As usual, they are available in both male and female squads:


There are plenty of spare bits to go along with every squad, so you can make unique individual figures.  You see fewer and fewer of the "build your own" multi piece figures these days, where you can mix and match torsos, heads, arms, etc.


When I created my Highland guard army, I was utilizing pieces from several different squad types.  There are even sets of kneeling and sitting legs, which were wonderful to create tank commanders and tank riders.


I especially enjoy the command and NCO options.  Lots of personality and character!


Let's see what they look like as a whole unit...


And as a massive horde! :-)  I have two more forces of this size under way.  They will be painted with oils, as these figures were.  I will be making some painting videos of the process.

There are also plenty of videos showing how to approach painting and army on the Patreon Page.  Some of the Victoria Miniatures armies will be shown in tutorials available here:


Sunday, September 30, 2018

Tutorial Series 2: Painting Soviets


Series Two of my Army Painter tutorials was a very different set of videos for me to film.  It was the first time I tried doing a unit painting exercise on camera with oils, and it was the most bases that I filmed under construction!

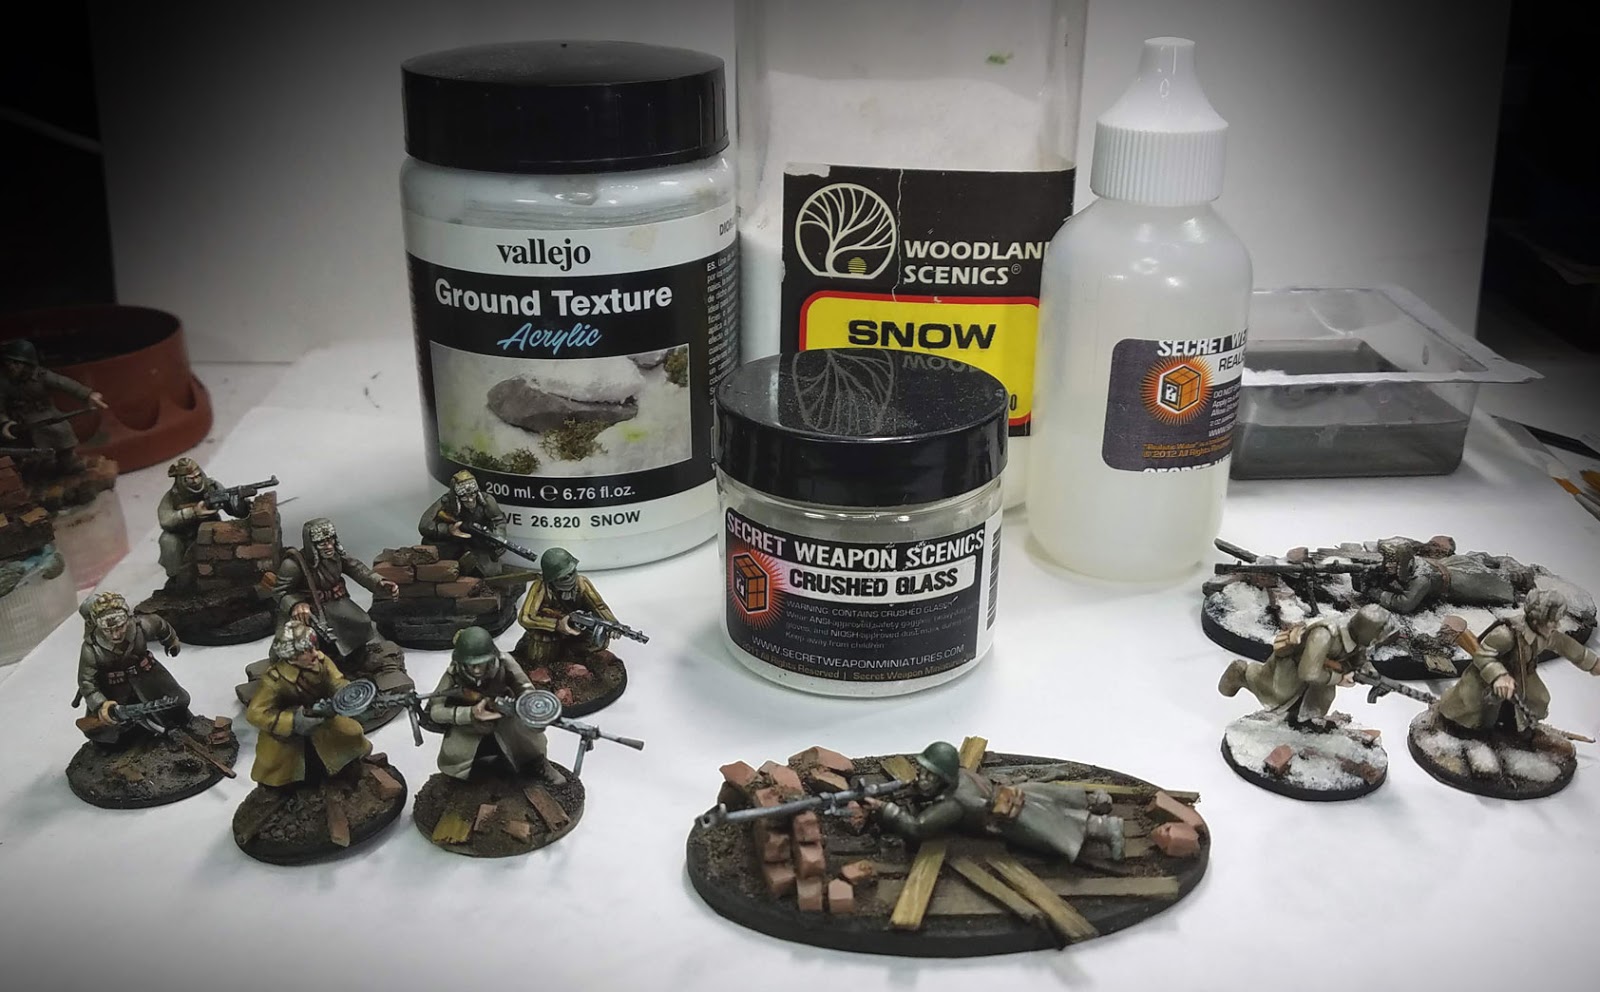
This was a four part set of tutorials, which has a running time of about 11 hours.  It covers the entire process from basing to painting to snow effects.


I try to show you how I go about making the bases, but also having a conversation about the thought process, and how it relates to the game system, available time and materials cost.


The idea is to present as many options as possible, instead of a "here's the one way you can get this done" approach.  I often experiment with new materials and techniques in each episode along the way to reinforce the multiple option idea.


Painting the unit with primarily the Mig Ammo Oilbrushers was a lot of fun!  I have been using the oils on many of my figures over the last few years, and not only historical minis like these.


As usual, I try to show more ways to get the same result.  For me, the oil paints are a huge time saver, as I am painting a host of other figures at the same time... vehicles, monsters, etc.


This is what the figures looked like after the third episode.  You could stop right here if you wanted, but I just had to do a number of snow techniques!


My goal in the final episode was to demonstrate two primary methods using 2 different sets of materials, and then test out various combinations of them on screen.


I do have an example of this in one of my Facebook Live sessions:


Each time I show a different method, I point out differences in the relative advantages and disadvantages.  In the end, my choice was the combination of techniques/materials.


I am now on Series 3, which is taking on a few more new concepts.  This latest series focuses on "rebuilding" an army from scratch, matching a previously painted army.  It also covers a few techniques in "army painting" form that are normally reserved for single figures.


You can get on the Army Painter pledge for $15, which will get you all the current episodes, as well as other tutorials each month not related to the specific unit painting lessons!  Here's a link to the page: