Sunday, February 4, 2018

The Warped One


It is really interesting to be working on old Confrontation figs after all these years.  I think it was back in 2003 when these were really at their peak, and something that had never really been seen before.  That went for the painting as well as the sculpting.


They had more flow and motion to them to be sure.  Poses tended to be a lot more static in those days.  I seem to remember that a goodly portion of fimo was used in order to get the kinds of details that were usually not found in sculpts in the late 90's, etc.


Anyway, it will be a lot of fun to work through this massive set of classic figures!  Stay tuned for many more. :-)


Friday, February 2, 2018

Snow Pack


Here's another adventure in winter terrain!  After the discovery of the tea leaves that you saw in the last post, it was time to put the snow onto these tree stands.


I have already made a post regarding this process (see the completed stand on the right), but these are a little different, and I have made a few adjustments to that process.


This bit is the same, taking a few of the Vallejo mediums like stucco and snow texture, which is mixed with a tiny touch of blue/gray from Badger paints.  I added that tiny bit of color to match the color of the snow on the battle mat.


With a broader 1 inch brush, I started to add this snow mix onto the trees.  It was important not to pile this up too high, because I don't want complete coverage of the ground!


The various snow piles are arranged on the ground cover as closely as they are on that battle mat, and gently brushed over some of the clump foliage which was applied.  Here's a link to that battle mat:


Once the paste has been added, the snow flock is drizzled over the top.  The paste is just sticky enough to hold this material, giving it a fluffier appearance.

The rest of the snow flock 'blends' in with clump foliage too.


Overall, this yields a very nice effect! :-)


Painting some snow on the fallen logs and exposed tree branches adds on extra level of texture.


The newly completed tree stands!  A little bit of hair spray is dusted over the top to keep more of the snow flock in place.  You can use a spray fixative as well, but the hair spray is a bit less toxic.


While these tree stands look quite real, you can see that there is plenty of space for entire units to move through them and take cover, etc.


My next post will show what all these completed pieces look like on the mat!  I can't wait to see myself :-)

If you can support these kinds of terrain projects, that would be very helpful.  There is a never ending chain of supplies which much be purchased to continue this process, and that support is appreciated.

Here is my Patreon Page:


Thursday, February 1, 2018

Hello Kitty


Here's the rest of the Confrontation set with the requested tiger markings.


Some of you probably remember the original post where the 'tiger' was discussed...

Here's a link if you missed that:


Once the tiger stripes had been accomplished, I had to think of a way to make the character controlling the tiger 'match' somewhat.


Fortunately, I had used the Secret Weapon Weathering paints for most of the tiger, and I was able to use a series of glazes with those paints to get a similar feel to the cloak and even some of the armor on the other figure.


Tuesday, January 30, 2018

Reporting From the Front


Over the last few months, I have been trying to prepare for my ultimate goal of filming battle reports for Bolt Action games.  This has meant a huge amount of work... starting with painting the armies!

I have enough of the early war French and Germans ready for some scenarios, with some variety in the army construction as well.


You have seen numerous how to articles on the terrain, the game mat, and even the painted backdrops.  There are dozens of articles alone showing how this Ardennes forest table was created.

Compiling dice, counters and other items also took a while.


There are even some units that I scratch built, such as this medium 105mm howitzer for the French.  I have learned a lot over this massive project, to be sure.

It is hard to believe how much my approach has changed since I first started.  Now I am using oil paints for most of the figures and vehicles, and these are also demonstrated in several Facebook live sessions.


Here's another scratch built vehicle, the SDK 222.  It is great to finally see it on the table in a game, and not just in my photo booth!


These are the kind of scenes that I had been hoping to see for so very long.  As I have been filming, I have tried to find the best way to balance out the action, the tactics, the mechanics, and the results.  It can be a lot harder than you think!

I have been modifying my approach with each turn in this first game, so if you notice a different approach or different angles, it is because I got a new tripod or made another realization on the fly...


For my very first battle report, there are already some very classic scenes, such as the PZ 3 driving right up to the pesky sniper team (which had been on ambush the entire time), and then destroying a more distant Panhard armored car that was seriously threatening the entire German left flank.

This is the kind of thing I had hoped to capture, which is why I will be using the longer format style.  In this way, you will get to see my reaction to such crazy rolls of the dice, and the suspense of the next order dice, etc.


This will mean a lot of extra work, and a lot more editing, but I think that it will be well worth that additional effort.  Filming those live rolls and draws can mean finding a place for the camera to rest as you use both hands for other things...

You also have to think very quickly on your feet, as you don't have much time to mull over and ponder every possible strategy or action.  In some ways, it  is a bit like a tournament environment.

This picture really shows what I had hoped to capture in video form.  Something that looks as realistic as possible, so that it almost feels like you were watching a movie as opposed to a green board with some dice flying across it.


I try to capture that feeling of reacting live to a situation, such as the very unexpected result of a few random machine gun bursts setting fire to the Opel Blitz transport full of troops!


The other element I will try to bring to each of my reports is how terrain can really affect a battle.  There were so many instances of units being within a foot of each other, but no clear sight lines... just like the Ardenne forest!  

I have been observing forests and hills for a very long time, so see how limited sight lines are, and what a nightmare it would be to move large forces through them.  These games will be very cat and mouse, and also very bloody.


I will try to vary the scenarios, forces, missions, and the terrain as much as possible form one report to the next.  Campaigns will be arranged, and I might try to do the 'flip the coin' style reports, in which the same game is played over again, with the two sides switching defender/attacker, and so on.


Re-learning the video editing software has taken a while, since the original machines where I did this work are now long gone.  I definitely need to update/replace several items of equipment to make this happen as frequently as I would like.  That is why a good portion of the videos will be part of the Patreon Page, so that I can try and get these new items.

It also takes a long time to create each report, with up to 13+ hours of filming and editing, followed by the rendering and upload times.

If you want to support this effort, and be sure to see all of the reports yet to come, here is a link to the Patreon Page.  I will also be offering more raffle figures of a Bolt Action nature too!

Cheers!


Monday, January 29, 2018

Reading the Tea Leaves


As those of you who have seen my previous posts about basing and terrain know, using tea leaves can be a very interesting way to do ground cover on larger areas.

These tend to have a wider variety of shapes and sizes, even on one 'type' of loose leaf tea.

I realized that I could use this to augment the winter terrain pieces that I am making now.  I have a few articles on how I have been making these, starting with this:


Once the terrain pieces have been painted, they are set up for flock, and then snow.  Here's are a few episodes on how I do the flock and snow:


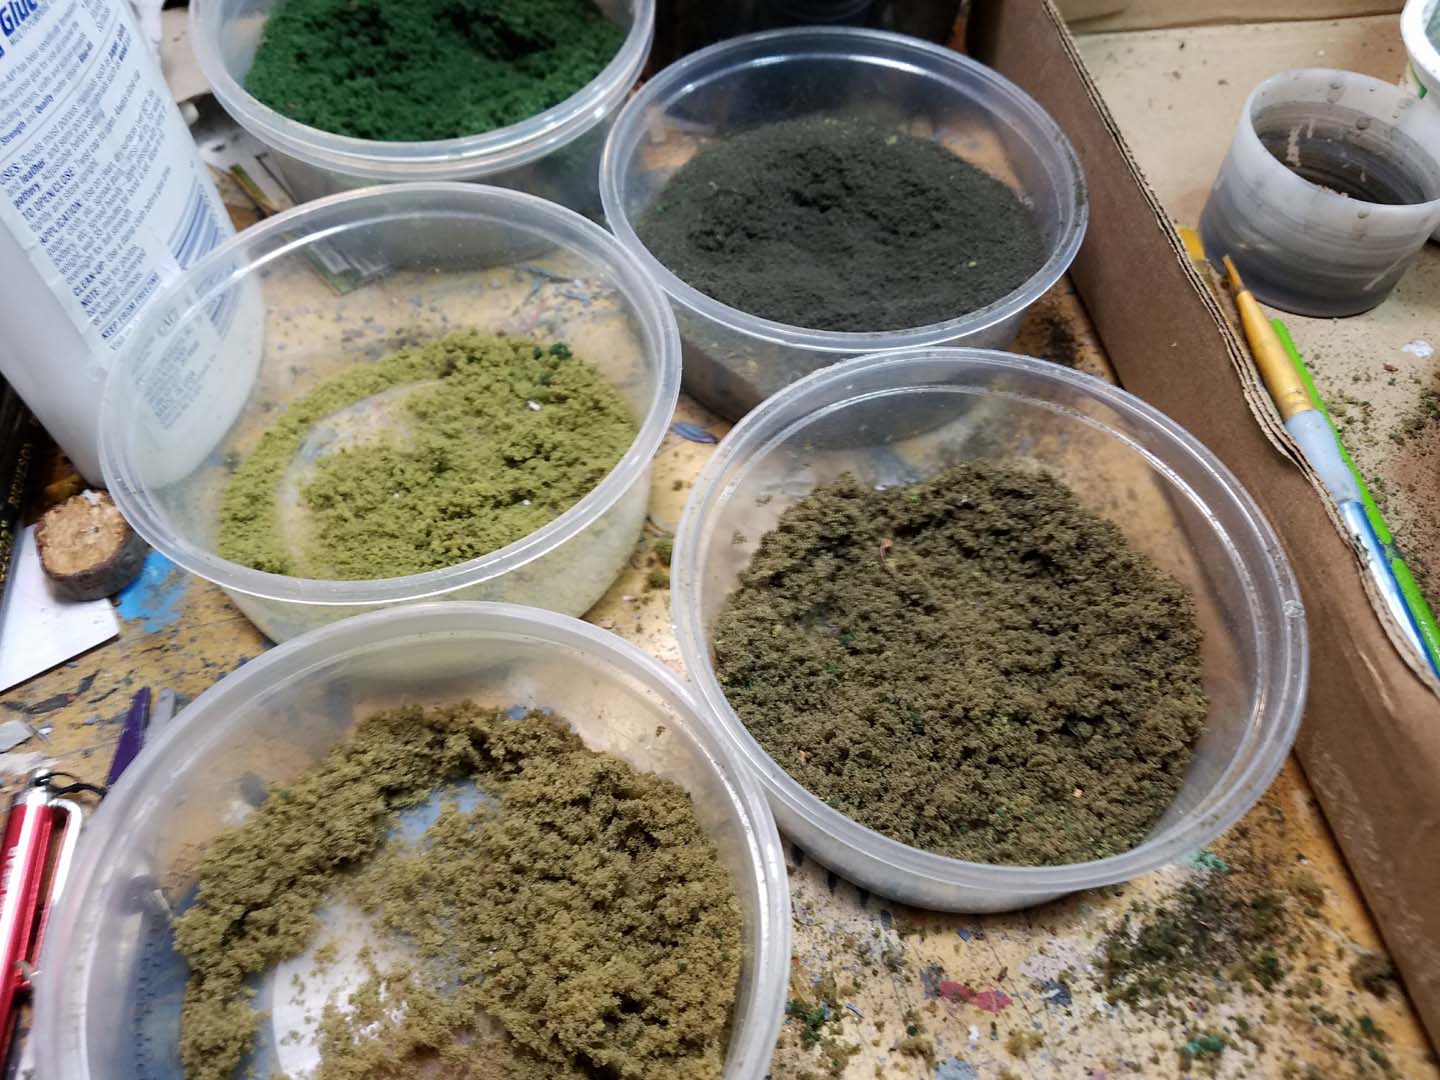
I try to have a number of shade and textures of flock on hand, especially when I am trying to match the game mat that I am using.  The coarse turf is great for that extra flavor of texture here and there, especially where I am trying to put the partial areas of snow.


On several of my tree stands, I have regular leaf trees, so that it is not just endless Christmas trees everywhere!  However, I had forgotten that those leaves need to go somewhere, and that I should have piles of those fallen leaves under those trees!

So, after saving several batches of Cathy's loose leaf tea (Chai and Earl Grey in this instance), I crushed those up a bit with my fingers and then piled them up under the trees.


It made a huge difference in color and texture.  It was quite fortuitous that the colors of those two tea leaves were far better than anything I could have painted.


Here you can see the difference that it makes, and how nicely it compliments the greener flock.  Oddly enough, that flock is really a brownish green, but compared to the tea leaves, it is so much greener!


That extra touch of texture is wonderful, but not so much texture that figures won't be able to stand in the forest pieces.


This tree stand shows it quite well.  Before I put on my flock, I dropped the leaves directly under the trees, scattering it a little more the farther away I got from the trunk.


With the flock placed next, this terrain piece really comes to life.


Next, I will be doing the same snow effect that I created in the previous posts.  I am hoping to do live tutorial sessions on terrain, but that will definitely require more equipment than I have available.

If you like these terrain posts, any contributions to the Pateron Page will be very helpful towards that goal!  And you will also be eligible to win the monthly raffle figure. :-)


Sunday, January 28, 2018

Dead are Rising


This very neat miniature was the first figure which was painted almost entirely in oils.  Up until then, I had been doing a smaller portion, perhaps 60% of the figure, and finishing off the detail work with 'regular' acrylic paints.


On this figure, the primary area for the use of acrylics was the glowing lantern, so that I could use the Vallejo fluorescent paints.  I don't know of any fluorescent oils yet, so once the oils were dry, I was able to do that particular Object Source Lighting effect.

Here's an example of a facebook live session using the oils, and what you can accomplish with them:


If you are curious about how the base was made, I have a link to a facebook live session on how this "Bark and Branch" was created!


I didn't paint up this guy during a live session, but I have several other facebook live sessions where I paint Mierce Miniatures with oils.  If you want to see more of these, there are plenty more on my facebook page, and contributions to the Patreon Page will help me to create even more...


Saturday, January 27, 2018

Gone Fishing


Here's another Naiad Warrior that I conducted a few experiments with.  As I mentioned in the first post on the Naiads, I wanted to see if I could make some seashells mesh with the base, and some plastic foliage too.


I ended up tinting the shells with a light glaze of grayish green, since they stood out far too much from the rest of the base.  I was very pleased with that result, as it took away some of the brightness, but not the overall pattern.

Doing a heavier glaze over the plastic foliage was equally successful, using the Reaper Green Liner, Blue Liner, and some of the Vallejo Sienna Wash.  This not only made the color more appropriate,  it gave it the perfect 'flat' look, instead of the very glossy plastic.