Monday, August 14, 2017

Get me to the Church on time


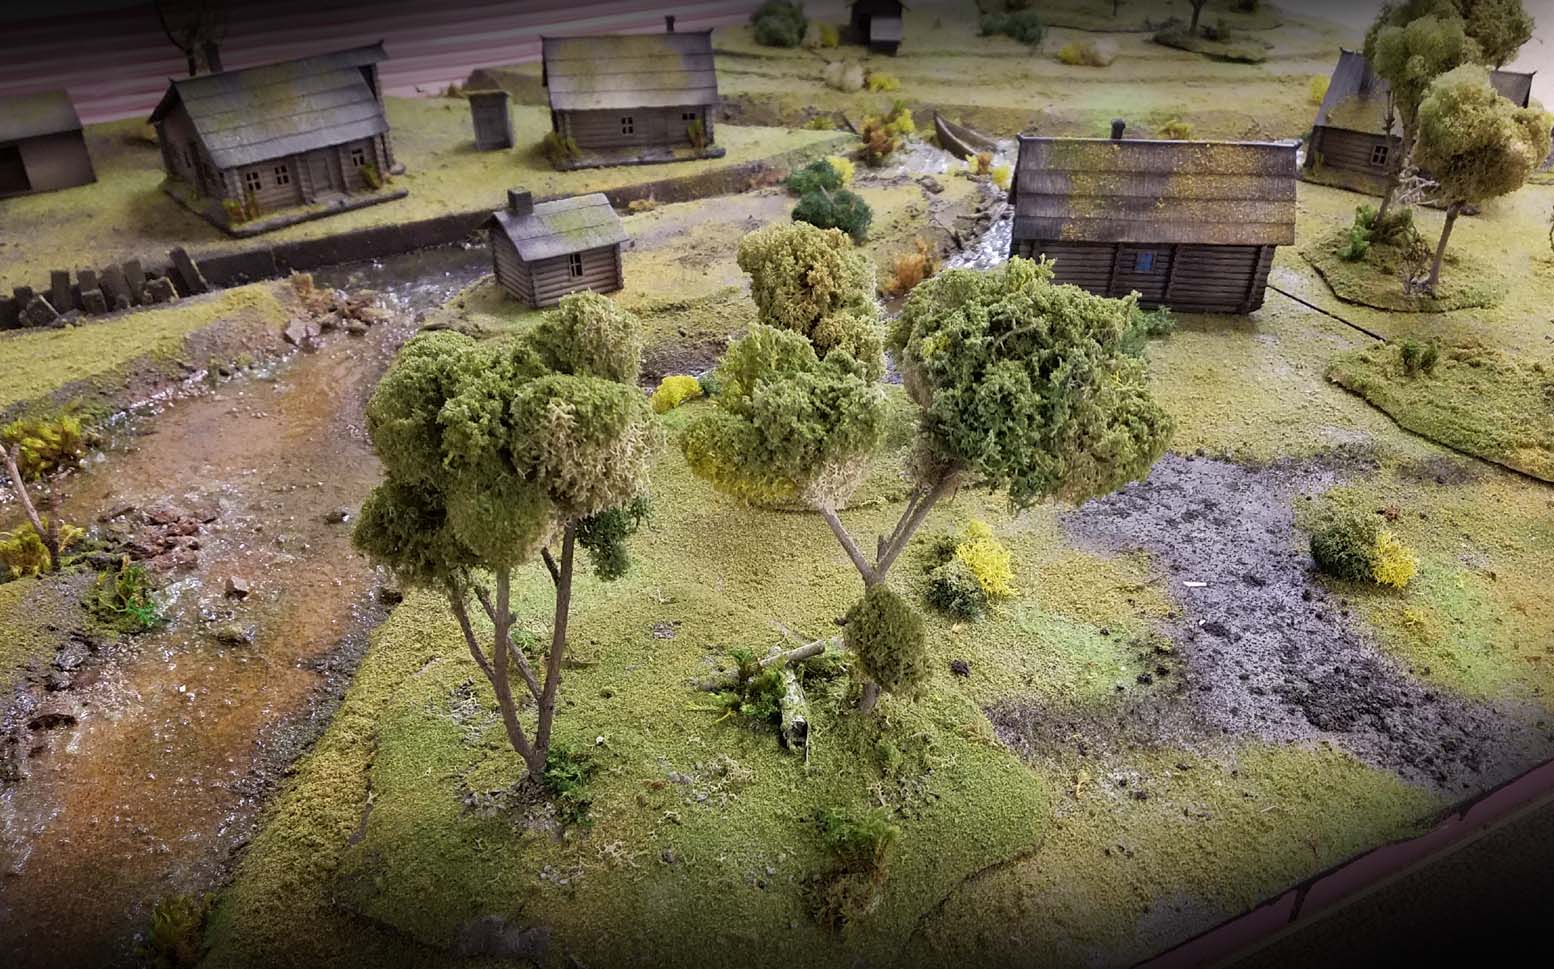
The last major piece of the Barbarossa terrain board is going to be a small wooden church, done in classic Orthodox style.  I ran across a few images in a quick google search, focusing more on smaller, simpler versions.

This is essential, since time and space are an issue.  We will be placing this on the small "island" in the center of the board.  That will provide not only a visual centerpiece, but lots of line of sight screening too!


To match the existing buildings, I chose the simple A frame roof designs, and set about making some quick measurements.  I will be using the same thin pink foam underlayment that I have been using for previous structures.


Once the pieces were set, I used a pen to create a quick log texture on the walls.  I could have gotten fancier with this, but time constraints meant that I had to make do.


The four basic shapes are ready to glue to the base.  I had to leave enough windows for troops to shoot from, but I wanted to restrict the access to the interior by having just one door.

Also, the extreme roof pitch had to factor in, which is why the windows seem so low on the walls.


The initial pieces glued to the base with the strong, fast setting wood glue.


The roof will be made from a thinner hardboard, which is nothing more than the discarded backing of a palette pad.  Any sort of notebook backing, etc., is great for this purpose.  It is strong, light, and has a thinner profile than the pink foam.

This also has to be removeable from the main section of the building to place troops inside.


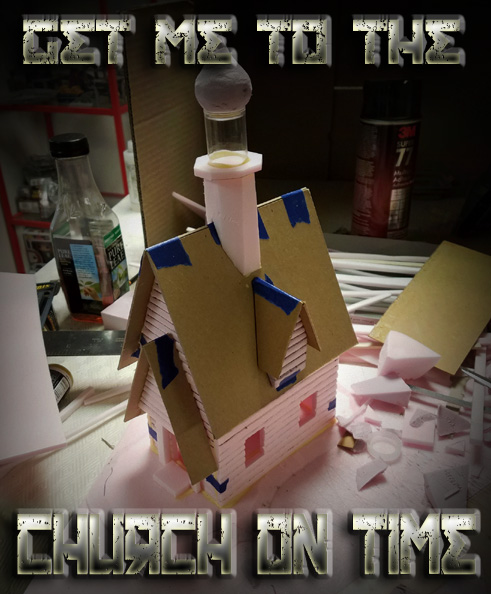
I used a few small pieces of painter's tape to secure the parts together as they dried.


A few left over pieces of thicker insulation foam will form the spire and the dormers.  I used my cut out piece of roof foam to get the correct angles for cutting the lower spire.


On this would be placed a chunk of plastic tubing, left over from a roll of green stuff.  I cut and shaped a piece of thick foam to create the "onion dome", which was then sanded.  I will be putting some stucco like material on that surface to smooth it out prior to painting.


To add the extra roof line dimension seen in the reference pictures, I made a simple A frame roof piece to place over the doorway.  A few vertical strips of the thin foam would hold it in place.


I glued it in place, careful not to get any glue on the roof section.  Otherwise I would not be able to take that away for troop placement!  The added benefit of this decorative piece is that it would help to hold that large roof section where it belonged.


Again, the pieces are held in place as the glue dries with painter's tape, and I started to look for some ideal pieces of thick foam to make the dormers for either side of the main spire.


As before, I used my discarded roof line cut outs to gauge the angles needed to match the roof pitch.  The insert image shows the secondary cuts made to create a roof line for the dormer itself.  These should not be too huge.


Just as I did with the front decorative roof section, more of the hardboard was used to make slightly overhanging roofs for each dormer.


Once the dormers were in place, and the glue had a little time to set, I wanted to make some roof boards that would match one of the reference images, and a few of the actual buildings on the board.  This would take the form of long planks.  

Only one of our roofs had shingles on it, and doing the long boards would reduce the amount of time needed.  As usual, time is very scarce for these projects, and that is a frequent compromise.

The factors of playbility, strength, realism, time and cost all play into the development of these pieces.  Over time, I have been able to really maximize and minimize these 4 elements.

I will post the rest of the construction tomorrow, so stay tuned!


Sunday, August 13, 2017

Jurassic Park


Time for more pictures of toy dinosaurs!


The assignment was to give these plastic dinos a new look, as in a brighter more dramatic treatment similar to what I have done on my Lizardman figures.

Not only is the material similar to BONES, these also had the company name and other copyright information printed on the figure too!  This was very challenging to work around, especially where any kind of markings were done.


In some ways, the markings allowed me to hide some of that by distracting the eye away from the shadows created.  It was less of an issue before I started painting, since the original paint jobs were much darker and very plain in those spots.


The two dinosaurs to the right were pretty huge.  Since I could not put them on bases, falling over was a very common occurrence! I did learn that wearing a plastic glove on the hand I used to hold them really helped to prevent paint loss.

More to come, so stay tuned!


Saturday, August 12, 2017

Long Range


One of the most unique elements to making Bolt Action armies is putting together and painting the weapon teams, especially artillery pieces.

They present a number of unique challenges, since you have to deal with crews of 3-5 figures placed specifically around a very odd sized hunk of metal!


In a recent post I showed how I approach putting these on the bases (a few others are also in the blog file already).  Here's a link:


Painting these is not an easy process.  The figures almost always have to be glued in place as you create the diorama, although the gun itself can be painted on its own.

Using the Badger airbrush and primers is very helpful for doing all the pre shading, which means that I on;y have to do glazing and other "surface" work instead of painting 100% of these figures.


Still, the nature of the poses and their placement can make it very hard to do specific details, such as the faces, hands, and equipment that they may be holding.


I have a facebook live session recorded on how the mud effects and foliage are done on these kinds of pieces:


I still have two more artillery pieces to go yet for the early war Heer.  Once those are complete, I will take some group shots!  I am really looking forward to that :-)


Much more to come on these, including more facebook live sessions on how to base them and paint them... stay tuned.


Thursday, August 10, 2017

The Arch Mage


While this was a relatively small piece, it was a massive pain to deal with :-)  Assembling it was crazy enough, but several chunks had to be left unglued so that I could actually get a brush in there!


The Secret Weapon weathering paints were key to getting this done, since I could do a huge portion of the shading by glazing.


I had begun the process by "pre-shading" with the airbrush, establishing where the general lights and darks would be.  Those glazes allowed be to not only shade this, but also tint the colors to get far more variety than a simple series of grays!  


When you have this many tiny little bits, it is even more important to have that sort of variety.  Otherwise it will be extremely boring to look at, and all other those pieces will simply blend together.


In effect, this was a limited palette exercise, and a challenging one at that!


Since the request was to paint the robes in something other than the usual reds, I lost my primary source of contrast to the grays and golds.  Now all I had was yet another dark gray!


I used blues, greens, and even pinks to tint my metal surfaces different shades.  My highlight colors ranged from bright green to pink to bright yellow.  Once again, it was all about placing areas of key interest.


Tuesday, August 8, 2017

Opening a New Front


A few weeks after making those terrain stands that you saw in yesterday's post, I finally had a few hours to put foliage on them!  That process was very similar to how I made those original "swamp" style trees, but with more precision and strength.

I was able to place the spray adhesive far more effectively, and in smaller areas, concentrating the amount of glue into a limited area.  Also, I had learned that I could use almost any color of moss, because it was all going to be covered with various shades of flock!


This method not only created a better appearance in terms of color and shading, but it created a "leaf like" texture that was far better than anything I had been able to do trying to stick clumping flock to plastic trees.


Using the natural tree branches meant that each one was unique, and would not have that obvious plastic tree shape.

The logs which you saw in the previous post looked great on the water/saw mill1


In Bolt Action, you really need to know the exact outline of the forest zones.  With this method, you get a clearly defined edge, but from a view like this, you don't really notice the isolated sections one bit!  It creates a very nice panorama.


Even now, I have some new things that I want to try out on the bigger trees.  That would be to glue some of the dried foliage pieces from the craft store onto the larger trunks.  You have seen those be used on my bases, but I feel like adding those extra "branches" will make the tree canopy stronger, and add realism too!


We can still have our swamp board, which will mimic the huge Pripyet Marshes that dominated the landscape of western Russia.


Between the very rustic buildings, the rivers, and the tree stands, this should be the most realistic and challenging board that I have ever played on!  The idea was to match the very difficult terrain, with poor roads, few bridges, and other rough terrain.


Roy was VERY happy to see his first completed squad of Soviets hit the table.  They blended in so well with the terrain, it was actually quite difficult to see them when it came time to put those guys back in the box!


We got the T-34/85 painted up quickly, and that just had to join them on the table as well.


Once Gencon and Nova have passed, all the units will have been painted, the final terrain pieces made, and then the Eastern Front campaign shall begin!!!


Monday, August 7, 2017

Forest Fires


Most of you have probably seen the first series of posts on the terrain board that has been under construction.  That will serve us for multiple theatres... everything from France, to England, and several locations in Russia.

Part of that series focused on tree stands, but those were meant for marsh and swamp boards.  I have a link to one here:


The methods that I used on those stands were brand new, as were most of the materials!  So, I decided to make more "regular" forest stands for France and other locations.


These will also be a bit more rugged than those original boards, because I learned a few things in the construction of those swamp stands.  When I made these, I had more oxide paste and other materials on hand.  I also had a longer time frame in which to work.

Since these images were taken, I have done all of the actual foliage on all six of these tree stands.  This time around, it was a lot easier, as I had learned many lessons on how best to use the spray adhesive and the moss clumps.

My latest batches of trees look very realistic, and they will only get better!  A post on that is coming up this week.


You can see more of those materials in this shot, done prior to the primer painting.  I even used some tin foil to create a bomb crater!  That is big enough to fit most of a squad.


For future winter boards, we are experimenting with a variety of pine trees.  While I will be making my own from scratch, I found a bunch of these on Amazon.  The side benefit were all of those "log" pieces, which are perfect for our water/saw mill.


This is a set of terrain that I picked up at a raffle, and it will be modified to fit our urban boards, specially made for Stalingrad, Budapest, Berlin, etc.


Speaking of Stalingrad, the upcoming Soviet army is almost ready for priming.  I have a few more add on figures and weapon teams which I will base live on facebook so that you get a better look at that process.


I also have a wide range of Soviet vehicles, which will mostly get the winter camo treatment.  Others will be more generic, so they can fill in slots for other sections of the front, and seasons.


I have also begun to add some specialized German units, such as Charlemagne Division, early war Waffen, motorcycle troops, and much more!  Stay tuned...


Sunday, August 6, 2017

Leaping out of the Box


Here's a few more recent Red Box Games Cavalry figures.  


They remind me of the Chaos Marauder mounted figs, but with a little more armor :-)


Having them balanced on one leg such as these can make them a bit of a challenge to base, as the figures are metal.  I ended up putting two pins in the one foot in an effort to prevent spinning.


The snow bases were done to match everything else that has been done for this massive army!


One last peek...