Friday, September 18, 2015

Let It Snow!!


Now that the painting phase is complete, it's time to add that snow.  For this session, I wanted to use the Secret Weapon crushed glass method.  I have the crushed glass, realistic water, and a few other items which will be tossed into the mix!


The normal mix consists of the crushed glass and the realistic water, both from Secret Weapon.  A tiny bit of blue weathering powder will be added for a touch of blueish color.


A little spritz of the snow flock will also be added, but not too much!  To make this mixture flow well over the terrain pieces, it was important to have plenty of the Realistic water in the mix.


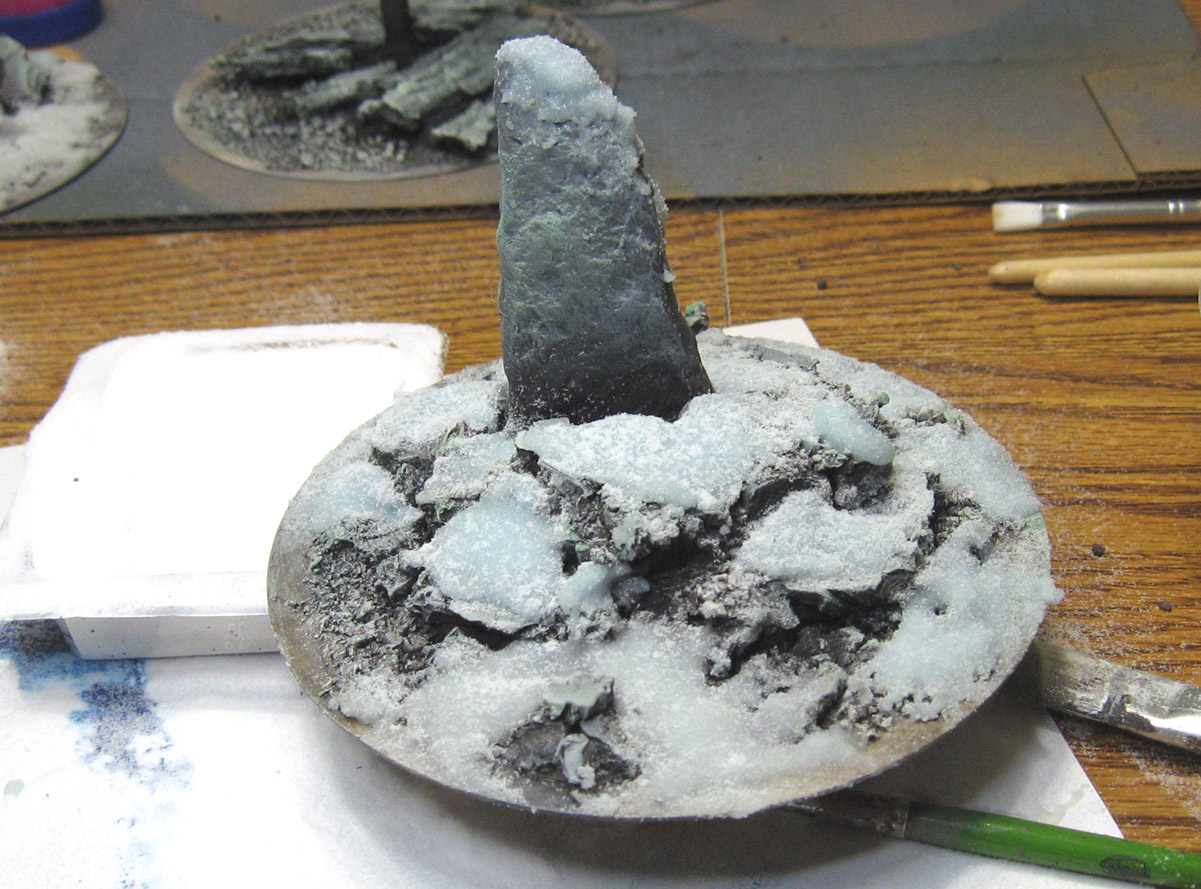
Once mixed, the snow slurry is spread out over the rocks.  This is going to have some gaps in it, because I still want to see my rocks!


After I applied the mix, I sprinkled additional snow flock for a bit of fluffy texture.


You can see that I am working my way around the stand, I consider if there were some areas where I might have more melted snow.  Should this be the case, I would add more realistic water to my mixture, as that really does look like half melted snow!


When you get just the right mixture, you can apply these drifts of snow pretty easily.  The crushed glass gives it a surprising amount of 'body'.


The slight blue tint is designed to play off the warmer tones which were painted onto the rocks.


I think you can see the hint of blue quite well in this image!  These will be used as terrain pieces with the snow base figures you've seen posted here so often.


The standing stone base is the one I've really been looking forward to completing.


This method of snow application worked very nicely with the cork rocks and the sculpey standing stone.

One more view of the different ingredients of the recipe... Realistic Water, Crshed Glass, snow flock and a hint of blue powder.


I made the mixture a little more watery (as in adding more realistic water) so that the snow would stick to the branches more readily.

There are a few more layers and other effects which I will be testing on these terrain pieces, so stay tuned!!


Thursday, September 17, 2015

Winter's Coming


Following up on the earlier terrain posts, I have a few images here showing some paint being applied to those particular pieces.  I'm starting out with a neutral gray.


This is actually a combination of craft paint and primer.  Both of those mediums have great 'flow', especially on rougher, more absorbent surfaces such as these.

Nothing terribly complex, very basic colors.


Since I will be putting the snow over the top of this, I want to make sure that there are enough "warm" colors beneath that snow.


Plenty of that brown is included in the mixtures, particularly when I'm painting the soil/dirt sections.


You can see that the gray in this image looks a bit red.  That's because I never cleaned out my brush, so a tiny bit of the brown is also being mixed in.  This means that the gray is a bit warmer by default.


Back to the standing stone, and some lighter grays.


I added a little bit of yellowish brown for a few touches on the dirt sections, as I wanted a little more color variation.


You can see that the gray also gets affected by the addition of that yellow ochre color.


It really worked well for some lighter shades on the fallen tree.


The rocks on the standing stone are really "standing out" now!


The same light color is worked into all three terrain pieces.


I went lighter still for some more contrast on the standing stone piece.


I have been adding seafoam green to all of my miniatures over the last few years, and even more so on my bases and terrain pieces.  That is introduced now to provide a little more color interest.


This green would ordinarily be considered a 'cooler' color, but it has enough yellow in it to almost make it seem like fine moss growing on the rock surface.


Just a bit of that seafoam green provides a touch of color, instead of the usual dead gray.


Almost ready for snow!


The view from above.  I think you can still see the hints of yellow, reddish brown, and that slightly contrasting seafoam green.

Next up, step on of the snow!  Stay tuned.


Taking the field


Sukubus Studio takes the field with their amazing Blood Bowl team.

Each of the figures is a unique pose, with no repeats! A variety of blitzers, runners and even throwers are available.


There is also a coaching staff, and even some cheerleaders!


Here's a link to their facebook page, where you can see more information on this team, as well as the recently completed Norse team kickstarter:


Wednesday, September 16, 2015

King of the Jungle


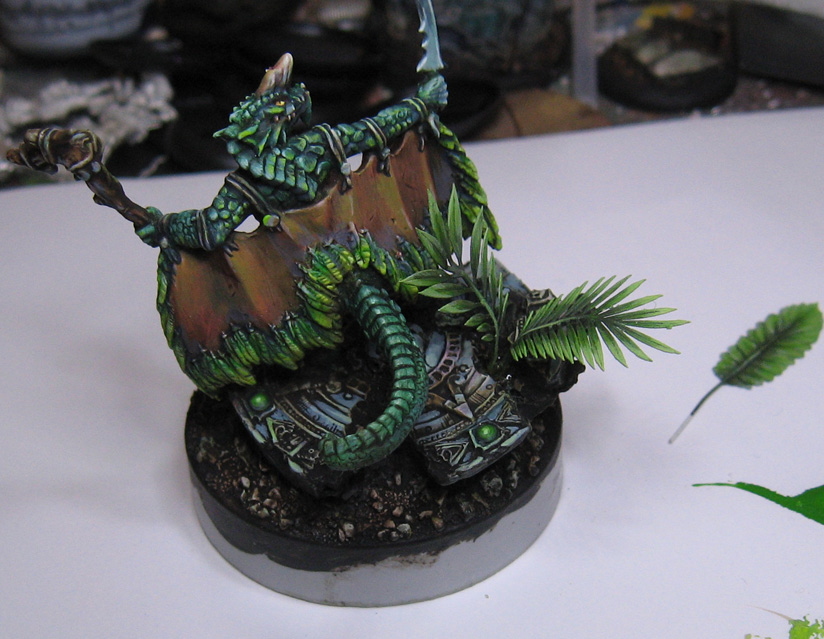
Here we have the finished results of the latest paper foliage experiment!

It's called Diorama Accessories (the company is Korean), and I purchased it from Hangar 18's website.

I don't remember who manufactured the figure.  That was a long time ago.


It's placed on a smaller Secret Weapon Miniatures resin plinth, which is about 50mm.  As you can see, I not only had fun with the foliage... I had a blast painting the Draconic Shaman as well!!


These views show off the foliage even better...


I am amazed at how well the foliage takes paint, with absolutely no warping, even when washes are applied.


I took a few shots on a different backdrop to see what it would all look like.  I may try one or two more to test them out.


Planting Season!


Time for another experiment in foliage!  As you can see, the test involves the paper foliage which I have used on a limited basis.


Thin wire is included with the kit, which allows you to make a very solid stem for the plants. 


Most of the painting is done prior to attachment to the main base.


Ready for placement!!


The ferns in position...


I drilled a few holes to anchor the stems...


The larger leaves are placed as a pair, just like the ferns.


One more leaf to place!


The Gamers Grass tufts will be used to cover the holes drilled for the stems, and offer the addition of green color to the broken temple base.


Both leaves and tufts in place!  Images of the final results to follow!!


Tuesday, September 15, 2015

Favorite characters of all time.


Here's a figure near and dear to my heart... it's an old Inquisitor scale (54mm) miniature, which I used years ago when we played the Inquisitor RPG game.


The character was named Calpurnia, and she was a Master Chastener.  Her job was to explain your guilt to you, and proceed with punishment.  Innocence proves nothing.

The freehand patterns associated her with my Witchhunter army, the Sisters of the Raven.


I have a few blog posts explaining the story behind that army, which was eventually created for the 2014 Adepticon tournament.


Here she is on the alternate backdrop... and she's also on ebay: