Monday, June 1, 2015

Converting your BONES


Having faced The Wraith in a few games of WWX with Rich, I was very curious to give him a try myself.  After reading the A Contract to Die For WWX novel, in which he has a prominent role, I thought it would be very fun.

At first we thought we'd just share Rich's Wraith figure, but then I realized that it might get confusing.

In the heat of the fight, we might each mistake it for our own, or in my case, shooting at it because I believe he's working for Rich's posse!


I had a Reaper BONES figure that looked quite similar to the Wraith figure, but distinct enough that it could not be mistaken for the original.  I did some conversion on him, adding a shotgun arm from Victoria Miniatures, as well as other pouches and grenades.  The armor pieces were sculpted on with green stuff.


I have some WIP shots somewhere, but I may save those for another post where I compare him to the original figure that I was trying to emulate.

Again, the idea here was to get something that looked unique enough from the actual WWX figure.  While I'd love a Wraith mini of my own to paint, I could all too easily see myself getting mixed up.

This will happen more as I begin to experiment with other factions besides the Lawmen.  They are going to play quite differently, which is what I look forward to the most!


Not barking up the wrong tree


Hot off the presses, a new set of bark 'n branch bases.


There's been numerous how to's on both the sculpting and painting process here, so I will let newcomers seek those out for themselves. :-)


Since a few of these bases will be carrying some heavy magnets on the bottom, I chose to pin the branches into the bases.


I normally would not do that, as the normal process of gluing in the 'trees' is pretty solid


.However, the magnets I will be using on these are the same ones that I use on larger creatures, and I will need to exert more force to pull them off the metal sheet.


I had some really sweet pieces of bark to work with here... that fantastic shale texture that basically happens all by itself!


A few Secret Weapon skulls and a bit of the straw..


A wonderful swirling pattern to the rocks leads you right up to the tree...


I enjoyed painting these, as I wanted to incorporate more golden browns and muted reds.  I did this in advance of placing the figures, which will have a distinct set of cooler colors.

This will give me a nice suggestion of contrast, without the viewer actually noticing that it's even there!


Sunday, May 31, 2015

Carpathian Industries subsidiary in Wappelville?


Naturally, Carpathian's evil minions are drawn to the supplies of RJ-1027, in addition to all the other "raw materials" that are to be found in the cemetery and the Undertaker's.


Some of the terrain in this image is from Burn in Designs, as most of you already know.  I also made some of it myself, such as the charging stations and the power generator.


The view from above makes it appear that Creation 7 has some loading to do of those wagons!


Speaking of the Undertaker's we are back to the Final Slumber funeral parlor...


One of the Yi Sisters clearly had some business inside. 


As neat as it is to see the pictures of the finished miniatures, it's even more fun to view them in this context.  I love seeing them in terrain!


These are the same kind of scenes that play out in our games of Wild West Exodus, as you have seen in the battle reports.


At a certain point I will have my own Enlightened posse.  This will center around Eiffel and other constructs, as well as the Monocav.


The next Burn in Designs building that is getting its final details is the train station, as well as the Battle Train.  Those two kits together should make quite a scene!


En'counter'ing token issues...


As you already know, we love Wild West Exodus because of all the actions which are available to even the lowliest Outlaw grunt.  These actions (and effects) are designated by various tokens, which WWX furnishes:


You have seen Rich and I use these quite often in our battle reports.  They work very well.  Since we use a lot of terrain, lots of counters are needed.  To handle this, we combined all of our token sets together.

This has worked just fine, until the day I tried to run a game for a new player.  After we set up and started playing, I realized to my horror that all of the tokens were with Rich!  Yikes!

I set about to rectify this lack of tokens as soon as possible.  These are items that I have made in the past for out WFB and 40k games, but I wanted to have something a little better.

I thought briefly about using a lot of unique shapes, and even charge/retreat markers...


Instead, I settled on circles, because I had dozens of wooden circle cutouts from the Burn In Designs paint pot trays.

A few google searches located appropriate graphics for various effects and actions.


These were sized in photoshop, and text was added where needed (the Wappelville stuff is for the railway sign).


A finished token set!  Well, one of two.  I also thought that I would make custom influence counters, since we frequently got ours mixed up, etc.  The shields are for Lawmen's Forward Eschelon effect.


This has more Influence counters, as well as some close combat designations.  With each figure having a "halo", it's very rare thet two minis are actually in base to base contact during close combat.

Now we know exactly who is fighting who!


So, lots of action on the table... all I have out there are a few fire markers...


But now I am armed with a full supply of counters!!!


And what a difference it makes.  Now it just takes a quick glance to know exactly what's going on!!


Lawmen sniper on the lookout... taking careful aim.


Close combat hired hands in Forward Eschelon.


A maelstrom of combat!!! True WWX style.


Saturday, May 30, 2015

The Great Furniture sale!


New from Burn In Designs!  Come and get it... new furniture!

Play it again, Sam.


Pull up a chair...


Shall we recline?


Look how comfy that bed is!


Bunk bed.


Feeling safe?  Not even these Outlaws can crack it!!


Frosted Flakes for Dessert?


One more post for you showing some more modification of broccoli bases.


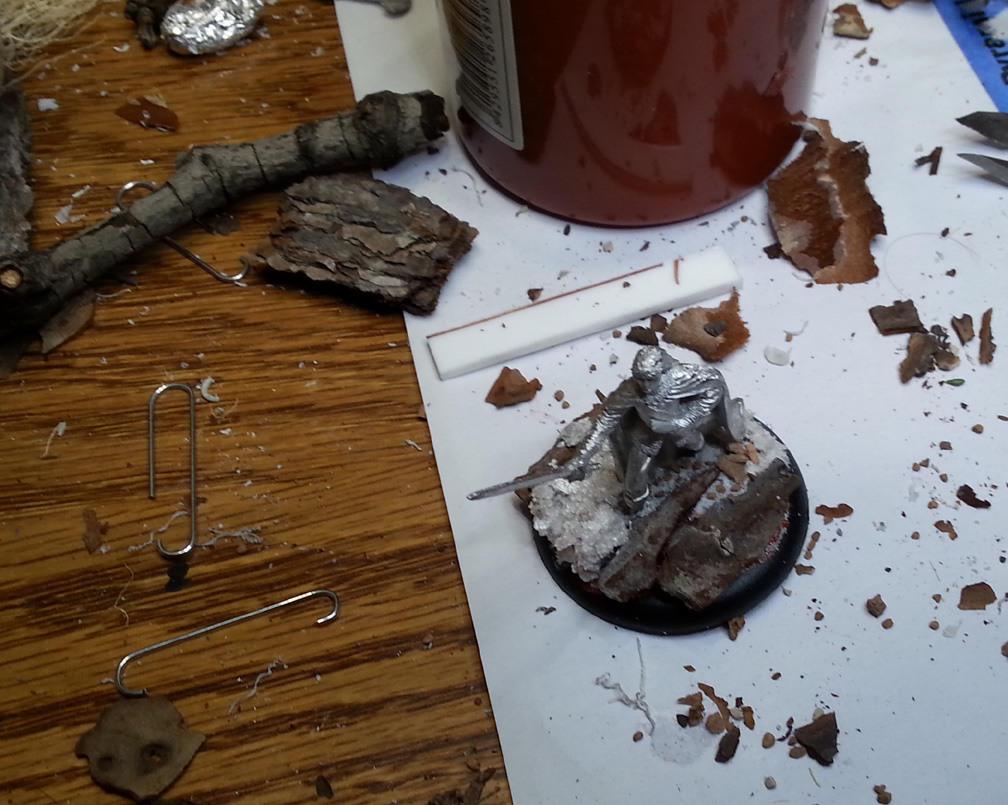
Oxide paste is set down first, to set the pieces of bark like mortar.


This one had far less texture on the original base, which left me free enough to do more than just fill in the blanks.


Mica flakes!  And old favorite returns.


It not only filled in the gaps between bark pieces, it also made a fun leaf texture.  I will be trying out some paper leaves on this one, I think.


A few touches of sand and gravel were just the final touch I needed.


Another Dark Sword figure gets the additional bark treatment.


Four figures, four broccoli bases dealt with!  Time for priming...