Sunday, February 22, 2015

Going to the chapel, but not to get married...


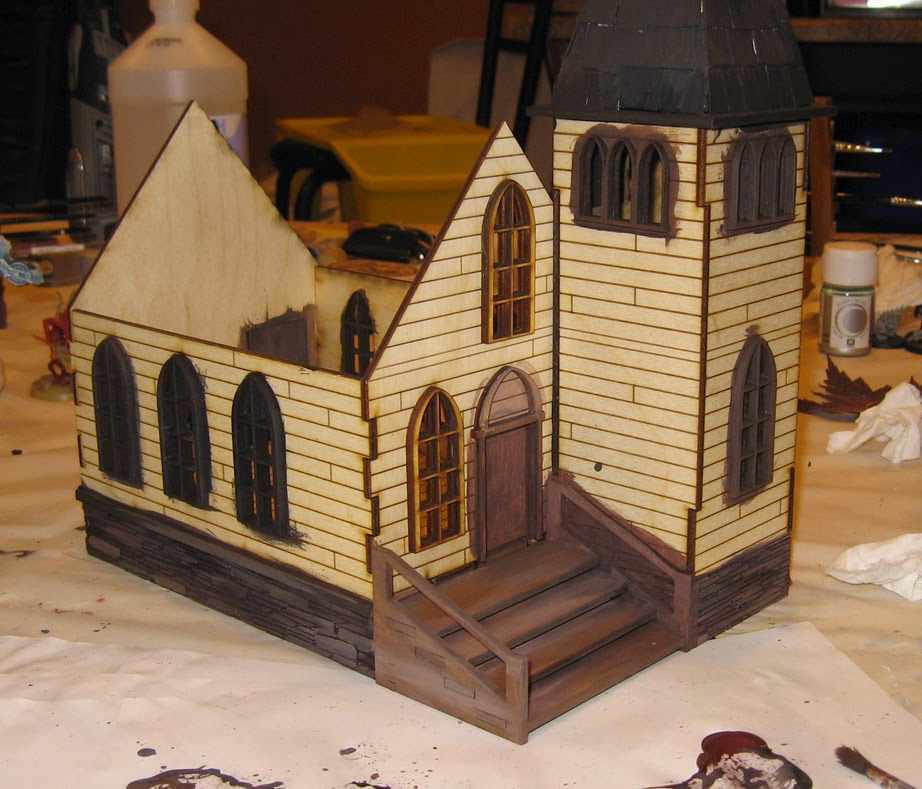
Here's the rest of stage one for the Burn In Designs church.  As I mentioned last time, this is essentially Shaded Basecoat for terrain.

This means that I want to get every surface covered with some kind of color.  Doing so provides "context" for each color, and prevents something from being painted too light or too dark.  That can happen when you only focus in on one small area, and you have nothing near it for comparison!

So, I am starting out with the darker foundation rocks.  I am trying to incorporate some grey in with the reds and browns.


You can see how that plays out here in this stretch.  Since I am working very rapidly with larger brushes, I can blend right on the surface!  So much fun :-)


To get a little separation from the foundation, the steps will be tan and grey.  Subsequent layers will have a hint of green as well.


Getting paint on all the window surfaces takes a bit of time.  You really have to jam the brush in there to get all the surfaces covered.  While some of this will get painted over when the walls are painted, that's OK.  It will be a lot easier to touch those up, and they still need their own highlights later in any case!


For the interior walls, I want a bit of an aged plaster look.  I have an ivory white and a few different types of deep brown... more like a Van Dyke brown for you watercolor fans out there.

You can see that I have my usual concoctions on the palette.  

This area will require a lot of "on site" blending, where I will place colors on the surface and scumble them together with the brush.  The wood is absorbent enough to soak in the paint, but not too much where it will prevent moving that paint around once applied.


Generally, I tried to focus the darker grays towards the top of the walls, possibly indicating years of candle soot.


Interior walls almost ready for plaster cracks, wall sconces, and a wooden cross that I am working on.


At this stage, I just want to get a general light color on the exterior walls while the inner walls dry.


I used a large, chisel edge flat brush to work around the window.  Again, no need to worry about hitting those with paint.

I will be going over the outer walls with subsequent layers of paint and powders..


The interior.  These are the warmest colors I have used so far... way more yellow than anything you have seen.  I am trying to get a little bit of color distinction here.

To get even more color splash inside, I think I will be doing lots of blood spatter and pools inside.  This will really indicate just how rough the town of Wappelville can get!

I might even paint a few bullet holes in the wall. :-)


The earliest stages are now complete.  From this point, I can work to establish more contrast and definition, as well as weathering and other special effects.  Stay tuned!!!


Raise the roof... get me to the church on time.


To get the new Burn in Designs church ready for Adepticon was going to require paint and cereal.  Well... at least cereal boxes.

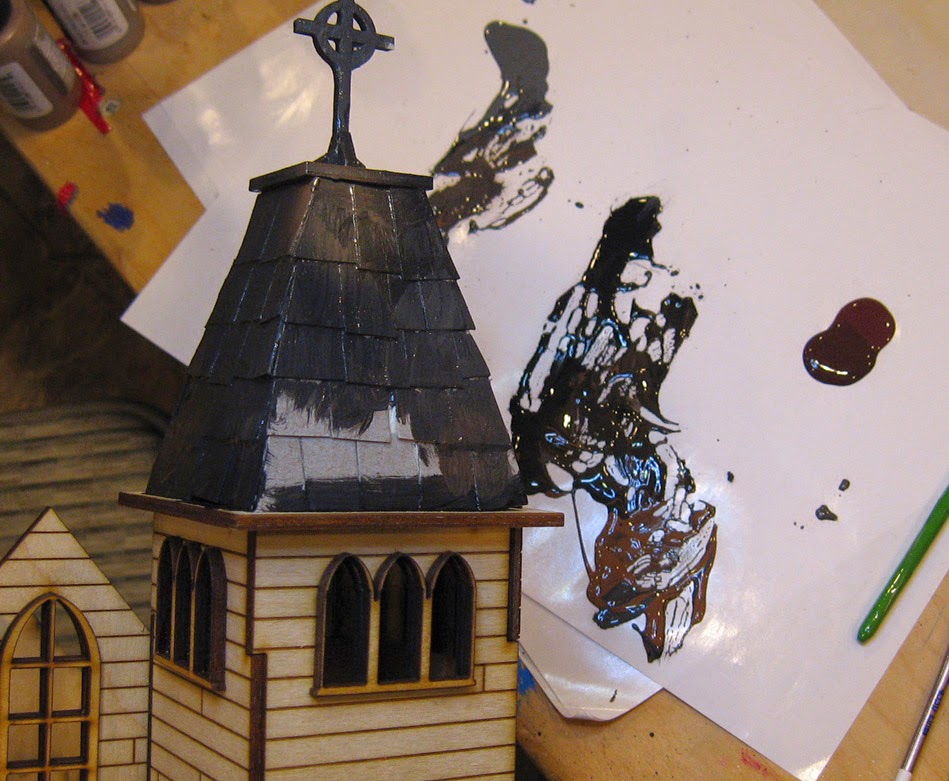
To finish off the roof and give a little extra texture, I chopped up a cereal box to make a few quick shingles.  I also made some stones for the bottom foundation.


Time to break out the craft paints and some airbrush colors, as they already have that thinner, easy flowing consistency you have heard me mention before.


A few colors arrayed on the palette.  I wanted to have some warmer and cooler shades to work with, as well as lighter and darker colors.


To work quickly on the surface of the roof, I made a number of color mixes in advance on the palette.  I do this all the time for my regular minis :-)


You can see this play out on the surface.  I put down some of the darkest colors along the edges, and then went back in with lighter tans and grays, even allowing them to mix right there on the shingles.

These are early layers, which are meant to cover the heavy texture.  Subsequent layers will be lighter, with even more varieties of shades, including more greenish colors in places.


This looks like it is just black, but there is already some tans, reds, grays, and other colors that I can build upon moving forward.


The same process was done on the main roof.


The inner section of the roof was fun, as it had some neat rafters!


Working quickly with the larger brushes, I was able to blend a cooler grey brown mix into a yellowish tan.  Again, this is just a base.  Hence Shaded Basecoat!

Yes, even on buildings. :-)  More to come!!!


Saturday, February 21, 2015

The Wheels of Justice


When you fight the Law, the Law is gonna bring some serious heat!

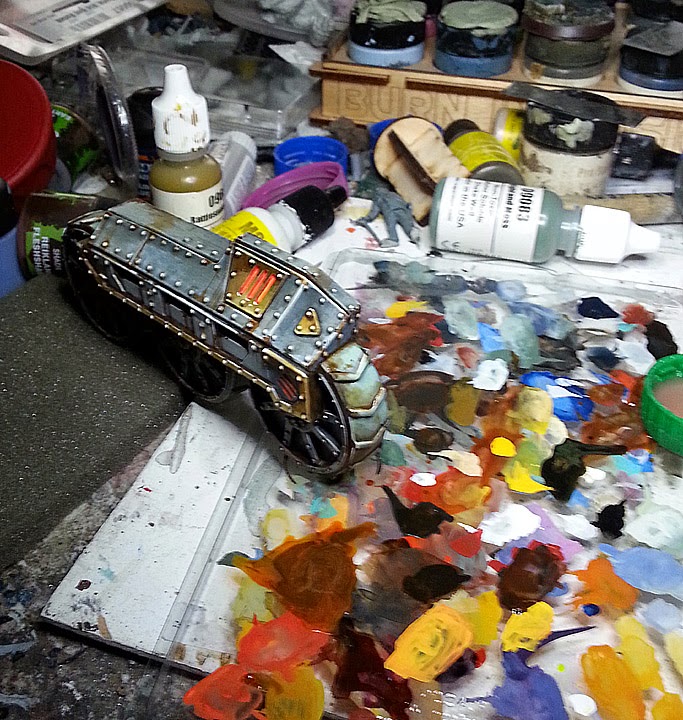
Here is the (almost) finished Judgement Heavy Support.  I still have a few freehand elements to add, bit at least it's all in one piece, and ready for fighting at Adepticon!


I have some group shots coming that show this with the rest of the army, and it really is a centerpiece kind of vehicle.


When I played 40k, vehicles were almost a dime a dozen.  I often had 2-3 Land Raiders is lists, plus numerous other smaller tanks.


It's a bit different with Wild West Exodus.  Multiple vehicles are not really a great option.  Since terrain means so much more in this game, a vehicle is not going to wipe out swaths of guys with one shot.

Instead, the vehicles tend to have specialties... such as this mobile hanging rig!!!  Yes!  I love it.  A rope with Jesse's name on it...

My Lawmen refer to it as Justice on Wheels.


They can do some serious damage, yes, but you never know who's hiding around a corner!


The rail gun is nasty, but it is the net casting weapon that I am really interested in.  This can capture human sized figures, drag them into the Judgement, where they can be summarily executed.


The wheels of Justice move swiftly in Wappelville.


When the Law comes for you in this death wagon, you best set your affairs in order.


I do enjoy the railway engine design of this.  It has the classic armored train appearance.

Each  faction has it's own unique vehicle, which is really fun.  Instead of a universal Land Raider, there is a Heavy Support that is meant for just one faction.


There are other Mercenary vehicles and heavy supports which can be used by multiple factions, such as the Doomsday, Flame Truck and Ironhide heavies.

More pictures coming!


Making it Nurgly, one glaze at a time...


We have returned to Cathy's fun fest with the Ultraforge demon.  As you saw in the original post, she did her take on the Shaded Basecoat technique, and then began defining areas with glazes.


Once she had made those initial washes into the open sores and other crevices, it was time to work on what 'skin' there was.  She tried out a new glaze color I had picked up months ago, but had not tried out myself... the Waywatcher green.


Now she is getting that second type of contrast.  First there is value contrast, the difference between light and dark.  Now she establishes color contrast by juxtaposing the greens and reds directly opposite of each other.


She wanted to hit the bandages and other items that needed weathering.  Since red and green together make brown, you only need to add in a touch of yellow to get something nice and icky!!!


You can see how she is making maximum use of the palette, presenting a whole array of colors for her to choose from right away, instead of having to stop and mix a new color over and over.


He's really starting to take shape, even at this relatively early stage.


You can see just how quickly she can establish even more contrast in critical areas with the supplemental applications of washes and glazes.  Very targeted, very controlled.


Looking nice and nasty so far!  I wonder what she has in mind as a base...


Friday, February 20, 2015

Do you feel like everyone's judging you?


When we last left our massive heavy support vehicle, gravity was being used to help make the washes flow in the correct pattern.  Again, the idea is to get the darker shades towards the 'top', leaving those lighter colors to show reflected light.


That glazing must be done across all the various surfaces in this manner, which is another reason why I didn't assemble the entire thing from the beginning.

I have the ability to hang onto these pieces at any angle, without wiping away any paint from raised areas such as rivets...


More layers of darkness!!


At this point, I wanted to see if things were shaded dark enough for my RJ-1027 lighting effects, glowing freehand, etc.


Obviously, lots of Vallejo fluorescent orange and yellow!!!

I am also starting to pick out some highlights... balancing that against the brightness of the RJ glow...


Here's a look at the fluorescent paints, and the effect on the rail gun.  In this case, I started with the lightest color of the glow, and gradually worked the edges darker and darker.


Glow complete!  Ready to blast some Outlaws and Abominations!


Time for rust effects!!

Done in the same method as before... mixing regular paints with the Secret Weapon orange wash.  The chemical properties of the orange wash are such that you get some wonderful random effects when it's mixed with those 'regular' paints.


You can see why I made the wheels the cooler seafoam green, so that I could have my brownish-orange rust/stains show up even more prominently.


A bit of rust and staining on the prow.  Once all the weathering was complete, it was time to put it all together!!! Yay!!  Stay tuned for the finished images :-)


Similar but different... Cathy's Shaded Basecoat technique


Yes, Cathy wielding brushes... with bad intentions!  

With the recent bombardment of Shaded Basecoat posts lately, I thought I would hit you with some more, but this time from Cathy's perspective!

The essentials are the same, work globally, rapidly, with large brushes, and lighter.

As you can see, she got things started off with those lighter midtone shades, making some classic Nurgle Pastel shades!


While this all looks 'white', you can see by the previous image of the palette that it certainly is not.  The idea is, as always, to get a sense of where you want basic direction of colors to be headed.


Now comes the fun part!  Cathy sets out some washes, including those Secret Weapon washes.  The purple and ruby are something you have not see me use very much.  I did work with them on some of the videos, but it was nice to see them being splashed about again!


Here is that example of the 'watercolor' style again of the "negative painting".  That is, defining edges by the use of darker shading with the washes.  She is preserving her lights, and concentrating the washes on the other side of the edge where she wants the contrast.


An interesting look at the palette.  You can see her original colors of the shaded basecoat, and then her washes.  Obviously it is far less chaotic (see less messy!) than my typical mayhem.


A look at the demon, which is an Ultraforge piece, by the way.


Stay tuned for the next dramatic episode of Fifty Shaded Basecoats of Cathy.