Thursday, July 31, 2014

The Blue Choo Choo


Huzzah!  Happy Day! Hooray!  Yup.  Now I get to try out one of the big Hangar 18 backdrops which had not been used yet!  'Cause it's HUGE!

My hope before I started using these was that the backdrops could also be used horizontally, as opposed to the nearly exclusive vertical setups I have done.


Even on such a massive backdrop, the giant train engine takes up a lot of space.  That's only two lengths of track, by the way!


And now for some 'studio' shots.  For obvious reasons, I am going to have to break up the train into individual elements to get it to fit.


I am still trying to set up some shots of the whole thing together.


It is very very gratifying to see these kinds of images, I can tell you that much!


Coming right at you!


I wanted to use the blue fade for this first set so that I could get that "true" view of the colors which I have mentioned in the last few posts.

However, I will shoot these again using the brown backdrop.


I am quite sure that one is going to make for some dramatic lights and darks on The Beast, as I have called it.


I did use some Secret Weapon powders on these cars as a final touch.  It was not actually for weathering.  In fact, I used them to get a few subtle color variations in the gray colors.

When applied with one of the filbert brushes, I could add a touch of green to an area, or a touch of brown, etc., in an extremely light fashion.

This would take seconds instead of hours to blend in with the rest.


When you are working on something this huge, it is easy to lose sight of what you have done on one side or the other, or even from one small area to the next.  The quest for variety made me feel that it was essential to do this step.


Subsequent posts will show the other cars, as well as the whole set and the series on the other backdrop!


Wednesday, July 30, 2014

A new Favorite is found


Here are some more types of backdrops.  I knew the red one might be a little too much, but I just had to see what it looked like!


It's still fun, because it does create an interesting theme.


Now for the crazy one!  Trying it on green this time.  I thought this would be really crazy, but once again, I wanted to see what it looked like.  It does emphasize certain colors, that's for sure!


Now this one is my personal favorite.  While I will always trend towards the blue/white fade, this one seemed to be the most balanced.  It didn't burn anything out or make something invisible, and it set off the red nicely.

The heavy mottling of the backdrop is very helpful.  The infusion of the purple/gray is great, while the warmer tans keep the reds from going too bonkers!


So, I will continue to see what the other ones look like!!!


More testing of the backdrops


It seems like just about every army I have made has been very difficult to photograph... mostly due to lack of backdrops.  As you know, the Hangar 18 solution came along, so I am attempting to fix that issue! :-)

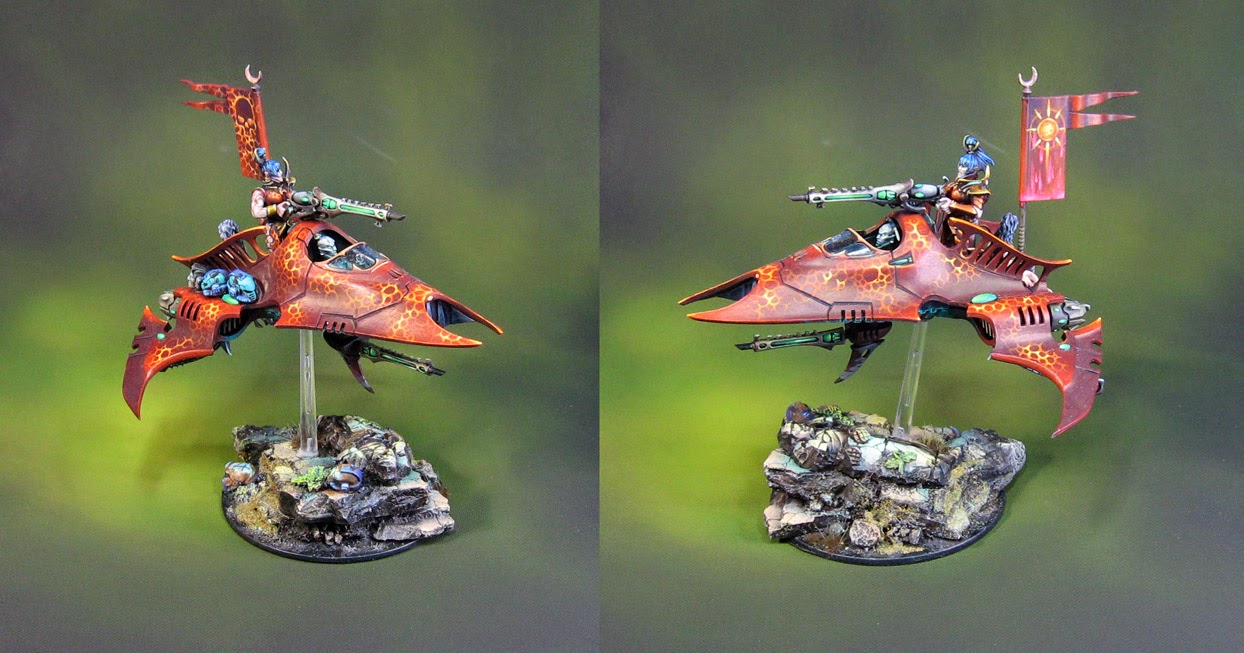
The flyers and skimmers of the Dark Eldar army presented an especially tricky problem.They were taller, wider, and more complicated in terms of color, freehand, and sheer amount of stuff going on!


Heck, I was happy enough just to try out the blue/white fade on these.  A vast improvement over the original dingy piece of drawing paper!


As usual, this is my 'classic' method of photographing figures.  There is a reason why most industry types went with this initially, since it does have a tendency to show all the surfaces of the figure in a more neutral way.


Once you get into the colors on the backdrops, you will have one aspect or another emphasized a little more.


I took images of this vehicle against several of the backdrops to see what it would look like!  I have two here...


The dark blue backdrop.  Three more tomorrow!


Tuesday, July 29, 2014

Oh Caenada!


The campaign for Caen continues.  If you recall, the valiant Desert Rats had been wiped out by the Panzer units, leaving the job of taking the town itself to the surviving Canadians.

They surged forward to avenge their fallen comrades.


But were in turn assaulted from German troops that had been hidden in the ruins!


While they were temporarily pinned down, they managed to get away some devastating firepower on the German positions, eliminating one!


However, The Desert Fox must have brought some of his legendary tank recovery teams with him, as a nearly destroyed Panzer unit regrouped and attacked fiercely. 


This did not stop the intrepid Canadians from taking the first set of ruins, as other infantry and armored units moved from other sectors into this deadly right flank.


The Germans attempted to shift some of their defending units in response.


A spectacular "Their Finest Hour" resulted in the simultaneous movement by all five units!  This could be devastating for the exposed German positions.


The results were not as good as hoped, but more infantry units were able to advance deeper into town, right on the cusp of the objectives.  Advancing trough Panzer tanks and heavy artillery was nothing short of courageous!


The lone Panzer unit continues to wreak havoc as it attempts to overrun deep behind Allied lines.


In the meantime, units of the center manage to score major damage on a Panzer unit, further weakening the possible Axis counterstrike.


Still, the Germans attempt to do so, but fail to take out the mobile artillery which has been dogging them on the right.


The lead elements of the Canadian force recon to the first objective!


The German Field Marshall is faced with a quandary.  Should he use his far off heavy guns to destroy the advancing Canadian infantry in town, or wipe out the mobile artillery once and for all?

The choice is made to target the Mobile artillery, which is hidden deep within the forest... and misses!  The artillery escapes yet again!


Desperate infantry units throw themselves against the Panzers, to no avail...


Heavy losses are suffered again when the furious tankers respond in kind.


A crack unit of highly trained infantry is sent to finish off the tank unit, which finally sets the tanks alight, thus securing the tenuous Allied hold on Caen!!!


Victory!!!!  Now, could this breakout be pushed even further?  Stay tuned!


A light at the end of the tunnel


Time to finish off those turrets!


I added some Secret Weapon Armor Wash to the rust mix to make it a bit more translucent. This way I cold make the initial rust/grime streak, and then add some additional lighter orange colors for the final rust effect.

I did that while the first layers were still wet, so that I could get some nice random blending inside the streaks.


A comparison of rust and no rust.


Faded in some areas, more prominent in others.


Last car on the rails!


Choo Choo!!!!


Monday, July 28, 2014

The ghosts of minis past...


OK, another batch of old timey minis for you!  Starting off with some Lord of the Rings figures.


There are more elaborate images of this piece in the Lord of the Rings section.


I'm not even sure if you can find these Twilight Ringwraiths any more.  I'd be bummed if I couldn't snag some of these again at some point.


The good old days of Confrontation minis!


Some old Reaper figs.  The dancing girl on the left was shown in a "Then and Now" post, where I compare the same figure painted at various points of my miniature painting over the years.  I think it spans 11 years of painting or something along those lines!


Another old doggie


Here's another pre-2010 figure.  The miniature itself must be very old, because I was told that this was GW's version of Leman Russ back in the day.  Tiny little bugger for a big bad Primarch! :-)


Compared to the new Forgeworld Primarchs, he's even tinier.


Nice little doggie...