Tuesday, July 15, 2014

All aboard for some Shaded Basecoat!


Here's something fun.  The very beginnings of the Siege Train from Wild West Exodus.

This item is supposed to be a centerpiece of their display at GenCon!

I was doing some color test on the engine, and these are some images from the initial Shaded Basecoat.


As always, I was working with a filbert brush, moving quickly, establishing where I wanted the lights and darks to be.


I wanted to play off a few different shades of gray.  Some would be cooler, and others would be warmer.  You can see that already.


Even more noticeable now, as I added more blue/gray to the mix.


This mix is now lightened, as I plot the highlights.


By using the filbert brush, I can do a fair amount of wet into wet mixing.  Keep in mind, however, that there is going to be a lot of tinting and shading in the glazing stage!


Highlights and reflected light applied!


I have now worked the cooler shades of gray to the lightest point.


Now for some brass trim.  I began with a greenish brown.


Planning out these highlights and shadows will be very important.  They will form a vital center of interest for the whole piece.


Just starting to figure out what's going to catch light, and what will be in shadow...


I will be shifting the temperatures of this color, just as I did the blue gray.  That will happen after the glazing stage.


Some shape now revealed.


Long sweeping curves such as these can be very tricky when doing NMM, and this is no exception.


Brighter still, but making sure to ultimately leave 'space' in the value pattern for the brightest highlights.


Just about there.  Next up, a test of some glowing conduits and the blocking in of some other colors.

Remember, that's what this Shaded Basecoat is all about.  Just blocking in the colors, and working from there.


Monday, July 14, 2014

What's old is new.


Here's an old timey metal marine that I converted long ago for the Demonhunters army.


I did some green stuff work on the lower legs, the chest and the helmet.  A different sword was added, and some purity seals.  I also added a storm bolter.


He is also here:


And, as a comparison, I shot the figure again using one of the other Hangar 18 backdrops.


It really does make quite a difference!  Wait until you see the Krios with different backdrops.


Breaking out the Big Guns


At long last... the Krios tank is DONE!!  Yea for me!

It was not the biggest thing that I have ever painted, but the "inside out" nature of this piece made it far more challenging than I expected.

It was actually more involved than a land raider, since there are more surfaces to paint.  So much exposed stuff, layered on top of each other.

Even though it was not huge, I still brought out the colossal photo backdrop from Hangar 18.  I think I could have squeezed it onto the 11 x 17, but look at how much room this setup gave me!


I didn't realize until after I had glued the final pieces together that the gun is supposed to be moveable!  Yikes.


Fortunately, the green stuff that I had added between the layers of glue on the two connection points worked out well.  Once I broke the full connection, the green stuff filled the gap just enough to provide some resistance.

Otherwise, the gun would never have stayed in the raised position.


It is nice to see the whole thing together.  There were many elements on this that I dreaded to paint.


I am definitely glad I stuck to the initial plan pf painting as much as possible before ever gluing pieces together.  This can also be risky, since you have a chance of painting the wrong gradations on a given surface.


It is not uncommon for me to have to go back into certain spots and rework them, so that the light looks like it is coming from the same direction everywhere.


I had hoped to use a little less weathering, but Forgeworld stuff tends to force you into that choice.


I am also glad that I chose to do the glowing effect, even if it was limited.  The color had to be red, like the Forgeworld example, but it was one way of making this my own. :-)


There are many more images to come, including a few sets on the other backdrops!  Stay tuned!


Sunday, July 13, 2014

The missing files at last!


After I posted a few of the Arthurian series in the "Why I paint NMM" article, I had been searching far and wide for the other paintings in the series.

Cathy managed to locate the old backup disks for me, so here they are!

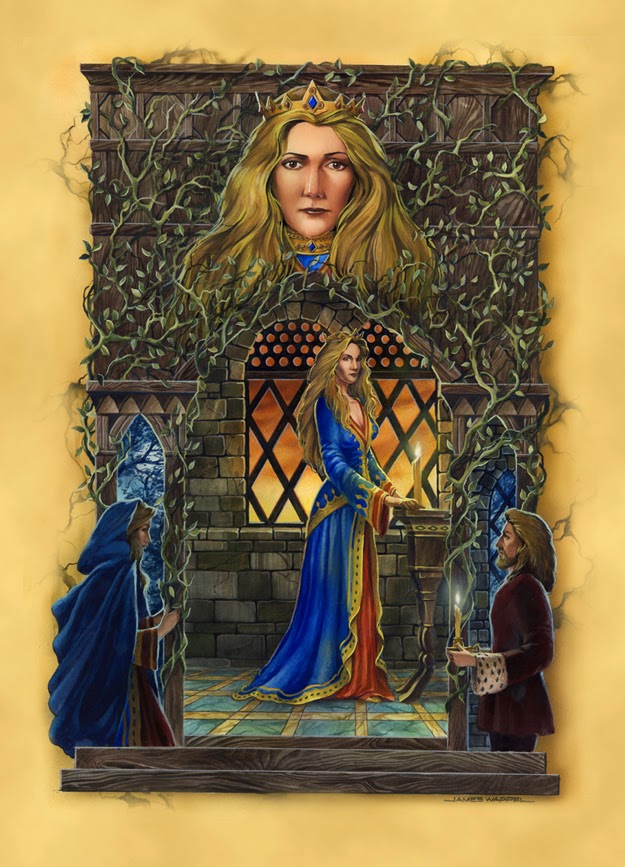
Beginning with Nimue's Gift.  As with all Pre Raphaelite style, imagery is everything.  So, spring vegetation to show the beginnings of Camelot.  Light colors, and a young Arthur.  Merlin is also younger.


Morgan Le Fey.

An older Arthur, more heavily featured (and older) Merlin, and the oak leaf/acorn motif.  The seeds planted.  Yes, lots of people say he looks like me. :-)


The Once and Future King.

Summer vegetation, high chroma colors, the peak of Camelot.


Guniverre.

The vines, showing the entanglements of love and betrayal.  Very dark, muted colors.  Deep reds and blues.


Lancelot.

The Fall of Camelot.  Dying leaves falling from the trees, heavy accents of reds.  The armor has lost its shine, and Camelot is under gray skies.


Not long after I did those five paintings, I had the sixth in the drawing phase... Mordred.  I never did get to that one.  I think I have the original drawing somewhere... or at least I hope that I do!

Anyway, this is my version of the Lady of Shalot, a very popular subject among the Pre Raphaelites.

At the time, I had done a lot of experimentation with the image actually being part of the 'foreground', or the 'reality' of the viewer.  Hence the cracked mirror morphing into the foreground...


Pieces and parts... where to put them?


Now for some images of the final stage of the Krios tank.  

Like all Forgeworld kits, instructions on how to put the stuff together is minimal at best, non-existent most of the time.  I had to scour the images of the painted version just to get a clue.


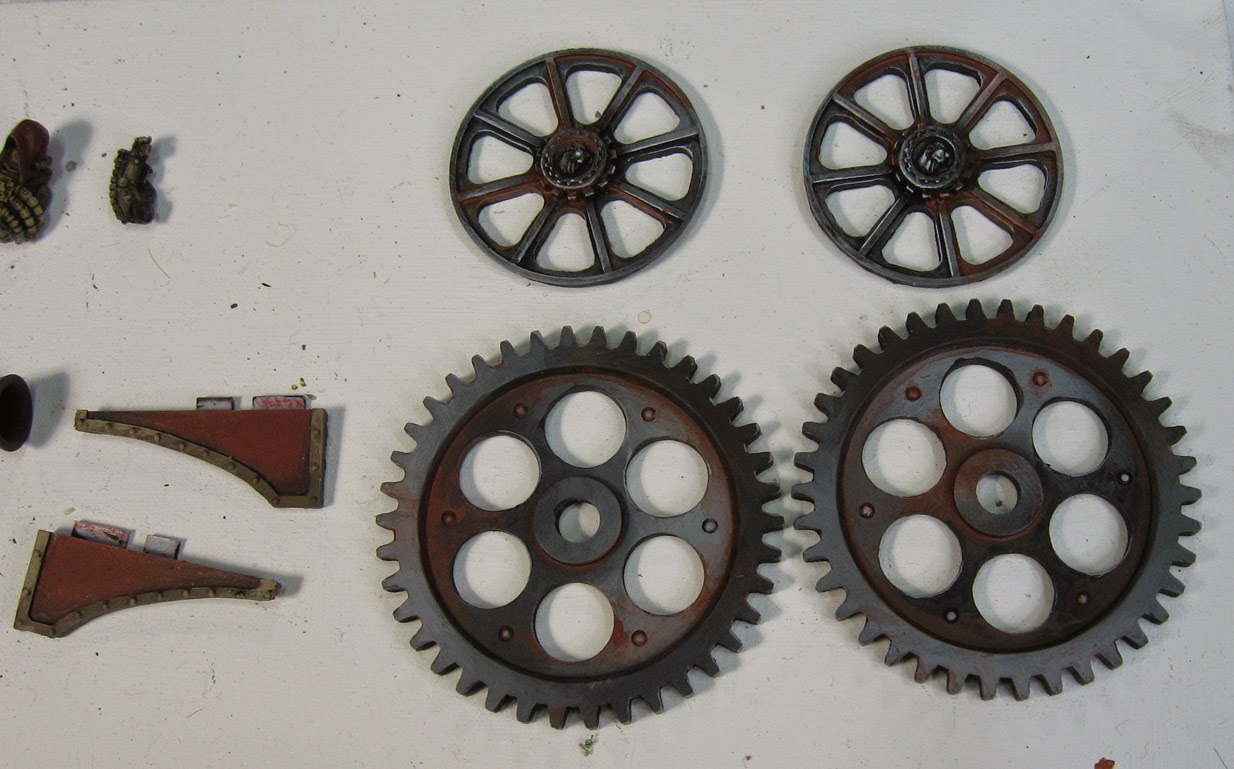
The cogs and wheels now have most of the weathering...


And then the treads, which took a huge amount of time.


You will have to paint these interior sections fully... but beware not to place too much contrast in there, because they really get buried.  Too much contrast here will compete with the other pieces you will place on top of it.


This is the section that was a nightmare.  One of the pieces is not even shown in any of the instructions, and you have to guess where and which way it relates to the surrounding pieces.

Also, do not attach the other side, since you have to deal with the interior large cogs and the weapon itself.


You can't really see it in this image, but it is a cowling that ultimately supports the weapon.


Here is the best view (the piece that has a number of 'V' cuts in it).  It intertwines with numerous pieces, so you have to be very careful when you attach it.

Also, be careful to watch how square everything is, since the parts need to be shaved down here and there to keep things from ending up at slight angles.


I also did some more on the exterior of the treads, adding some rust effects and other weathering.  I tried to set up as much shadow area as I could, since I knew some of the cogs will be glued on top of them... and contrast would be needed.


The same goes for the main weapon asembly.


The left treads glued onto the central hull assembly.


The right treads glued, and the traditional rubber bands in place.


More work was done on the glow effect, mostly adding darks.  I will have to see how this will be working with the secondary housing.


You can see that housing in the background of this image.  Dealing with the pilot was not easy. You can only paint so much of it outside the cockpit... and the arms attach in very odd ways.

So, keep all these tidbits in mind when you go about painting your Krios!

Finished shots soon.  It makes me extra glad to have those Hangar 18 backdrops!!!