Sunday, June 29, 2014

Life in the ice ring


Here's a quick little 5 x 7 painting that I did for Convergence.  A vintage "Rock and Ball" style spacescape.


Working quickly with my filbert brushes, I tried to get color in as many areas as possible.


As always with the Shaded Basecoat, you block in large areas of colors in order to establish that all important value pattern.  You can already see it emerging with the mountains in the foreground.


See the difference placing that dark color near the planet makes.  The atmosphere colors that once seemed so dark have become light!

Also, I am trying to be aware of color shifts.  Some areas are more reddish... others more towards green.


Now all major sections have been blocked in.  Value pattern established!

Further work will concentrate on those color shifts, creating a center of interest, value and edge contrasts, etc.


Lighter colors applied to the mountains start to bring them forward...


While on the planet, I use the "scumbling" technique with the filbert to create the clouds.  That is a drier brush, literally scrubbing the surface to make a softer effect.


Now for the ice chunks of the ring.  This planet is similar to one of the "shepherd" moons of Saturn, at the outer edge of the ring.


Some rudimentary shading applied to the chunks of ice.  They must not compete too much with the foreground, so the brightest colors and highest value contrasts will be focused there.


More development of those ice chunks.


As I continue to work on the ice chunks, I add some of the brightest highlights on the entire painting on the mountains...


That helps to bring them forward, and focus attention on those very hard edges, and extreme contrast in value.


Almost there!  More work on the ice chunks.


Finished!  Again, this was a quick study, a very small piece.  However, it is quite clear that the regular methods I use for painting my minis is the same in principle here.

Oh yes, I also used miniature paints for the whole thing! :-)


Saturday, June 28, 2014

Looking a little green


This was a very interesting Blood Bowl project.  The plan was to make a few teams in one.  

When combined together, you could create an Undead team, a Necromantic team, or a Khemri team.

Werewolves for Necromantic.


Flesh Golems.


One set of Mummies.


Can't have enough skeletons!


Those shifty ghouls!  Nasty with block and any kind of stat increase!


Did someone mention skellies?  Old style!

Stay tuned for the rest of the team!


Capture the Crossing


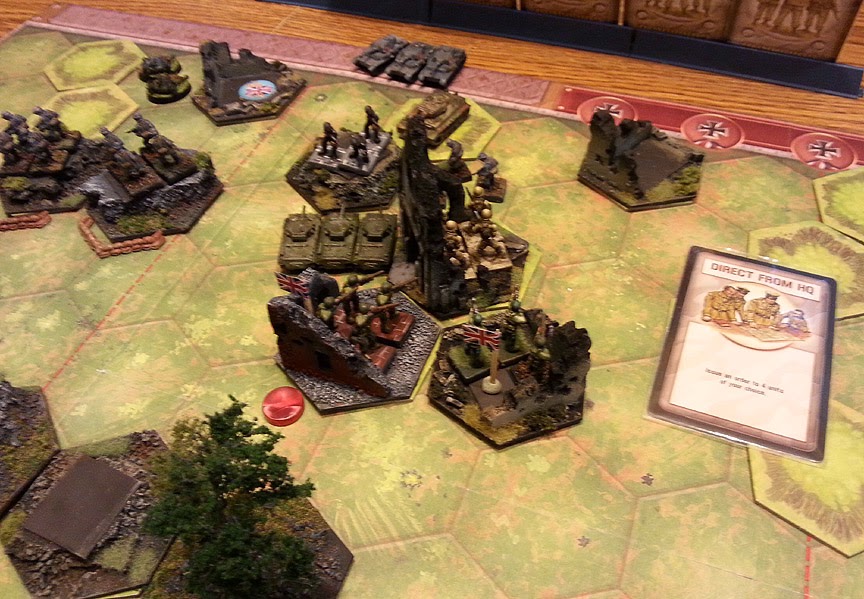
Another attempt at liberating a town!  A heroic charge by a Sherman unit shatters the final Panzers, and leads to an armor overrun by the unit.

However, the wide open artillery unit survives the onslaught unscathed!  Bad news for the intrepid British crews...


Sure enough, a unit of Grenadiers is sent to dispatch the unfortunate tankers.


Undeterred by their fallen comrades, yet another armored unit comes forward to challenge the king of the battlefield... the Tiger.  They are able to get onto the same plateau, and blow the turret from the beast!!!  The troops in Caen are saved... for now.


Bombardment from afar remains the greatest threat to the liberators.  The battle must end soon!

Fortunately, the destruction of the Tiger tank convinces the Axis that their positions here are untenable, and they choose another defensive line, this one at a nearby bridge.


Here you see the setup.  The Allied Victory Event Roll weakened 2 infantry and one tank unit, while the Axis damaged one infantry and tank unit.

However, the Axis lost all of their reserves, due to the defeat at Caen.

The Allies were able to call upon one more additional Infantry unit.


The Axis are even more dug in this time, backed up by multiple Tiger units!


My hand is very strong.  Not only can I execute sustained assaults on key areas, I have nasty command card such as the Barrage, which can take down just about anything, no matter how well fortified a position may be.


The British forces begin by shifting their units on the left into the forest.  They shall await there as their jumping off point.


Seeing this maneuver, the Axis moves to counter.

Stay tuned for the next episode to see if the Allies can take the bridge, thereby solidifying their gains from the previous fight.  Right now, the score is 7 VP to 4 VP in their favor.  Two extra points were awarded for liberating the towns!


Friday, June 27, 2014

Another round of knotwork


I was able to locate a few more of the Celtic theme paintings.  This is one of the last titles that I painted, called Branwen, Goddess of Love.  It turned out to be much more complicated than the initial sketches, which was very unexpected.

Combining the zoomorphs with the knotwork and so many 'realistically' rendered elements was a challenge.


I have posted this one before, but it works a little better in this context.  Talk about complexity!  By far the most difficult and challenging to execute.  It was like 6 or 7 paintings in one!

This was eventually made into a puzzle, which makes a lot of sense when you think about it!

It is called Spirit of the North.


Another elaborate piece.  Arianrhod.  Just drawing out he zodiac zoomorphs too most of a week.  A LOT of masking to do here... possibly even more than Spirit of the North


This is Bridget, which was the very first Celtic knotwork piece.  The inspiration came from a photo of an ancient coin that had an image of the face, and some simple swans intertwined with the hair.

I painted this designs on numerous drums... it was perfect for a round surface.


The fight for Caen continues


Since the all important town hexes were the main priority for the British units, lots of command cards were going to be used to funnel stuff into that particular fray.  Once again, the Brits hit the Germans in the town hard, claiming a majority of the town.


The dastardly Axis once again counter attack!  Two turns in a row!  A fierce and bloody struggle ensues.


Reinforcements could only be brought up slowly, as the surrounding forests slowed progress...


However, those additional fighters do get into position, and an all out blitz from three sections commences.  Armor is now brought in as support, since the Axis infantry has been pushed from the towns out into the open.


The Germans try desperately to relive pressure on the town's defenders by opening up a new struggle on the left.


The armor arrives, but has very little success in dislodging the Gestapo unit from it's perch just outside of town.  No armor over run, leaving the Shermans in the sights of a fearsome Tiger tank!


One final attempt to retake the town by the Germans fails, as North Africa troops take heavy casualties, but hold fast!


This leaves the German remnants exposed to yet another armored assault, which destroyed the hate Gestapo!


Much blood is shed, but the town is liberated.  For now.


From out of nowhere, the rumble to tank treads heralds the arrival of the reserve Panzer unit.  In their haste, gunners do not take careful aim, and the Shermans survive!


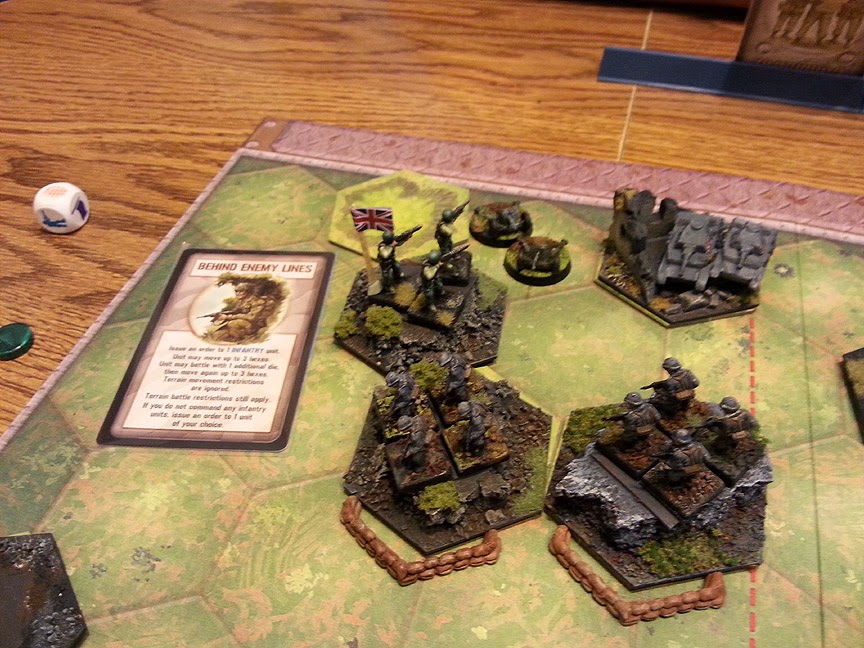
A crack British commando unit is sent on a suicide mission against the artillery unit, which continues to shell the city, killing soldier and civilian alike.


The attack goes sideways, and the survivors are forced to retreat instead of advancing to one more critical objective hex.  Curses!


The combined German firepower of Panzer and rifle is too much for the remains of the brave commandos.  Does this spell doom for the fighters in the town?  Can they hold out, with a Tiger tank looming as shells rain from the sky?

Wait and see!