Sunday, June 23, 2013

Team Wappel strikes again!!


Well, I think you have heard me talk about how, over the years, Cathy and I have bounced all kinds of techniques and ideas off each other.   This really happened a great deal with basing techniques.

It was her idea to bake the sculpey and then carve it, instead of trying to sculpt details into the smushy clay.

You remember that I was baking sculpey a few weeks ago, and that I had tried out something new.  Cathy needed bricks and stones for her project, and I thought that I might be able to make some nice bricks en masse, instead of having to carve them individually from one big block.

I had seen some people make some moulds and casts of bricks, but this seemed to potentially be a much faster prospect.  We thought that you could either pre-weather the stones/bricks, or leave them mostly intact and do some minor cracks and such after they were glued in place.


Cathy was the first one to try out the new technique, and these photos tell the tale!

She took some of the larger blocks and positioned them just so... the other nice aspect of making the blocks this new way!  Pre-assembly!!


In addition, the blocks were all the same height... another benefit of the way I cut them out of the original roll of sculpey.


Cathy positioned her miniature in the scene, and then wisely numbered the blocks.


In the background, we have had lots of History Channel DVD's of the Crusades, as well as Kingdom of Heaven as reference.


She weathered each block one by one with the standard wood carving tools.


The carved blocks back in place!  She saved some of the larger chunks of sculpey to use as rubble and shattered blocks...


It was amazing how closely she was able to make those blocks look like the broken remains of the walls and towers she saw in the videos!


Now it's time to glue them in place!!!


I think you can see the mosaic that Cathy carved on the floor of the diorama base.


A closer view really shows that off!


One more view from behind.

So, kudos to Cathy for working some serious magic with those new sculpey blocks.  I will try to work some of this into the appropriate basing videos, although this calls for a video of its own :-)

I hope you don't mind me posting something that Cathy actually sculpted, but it was a team effort in the end!


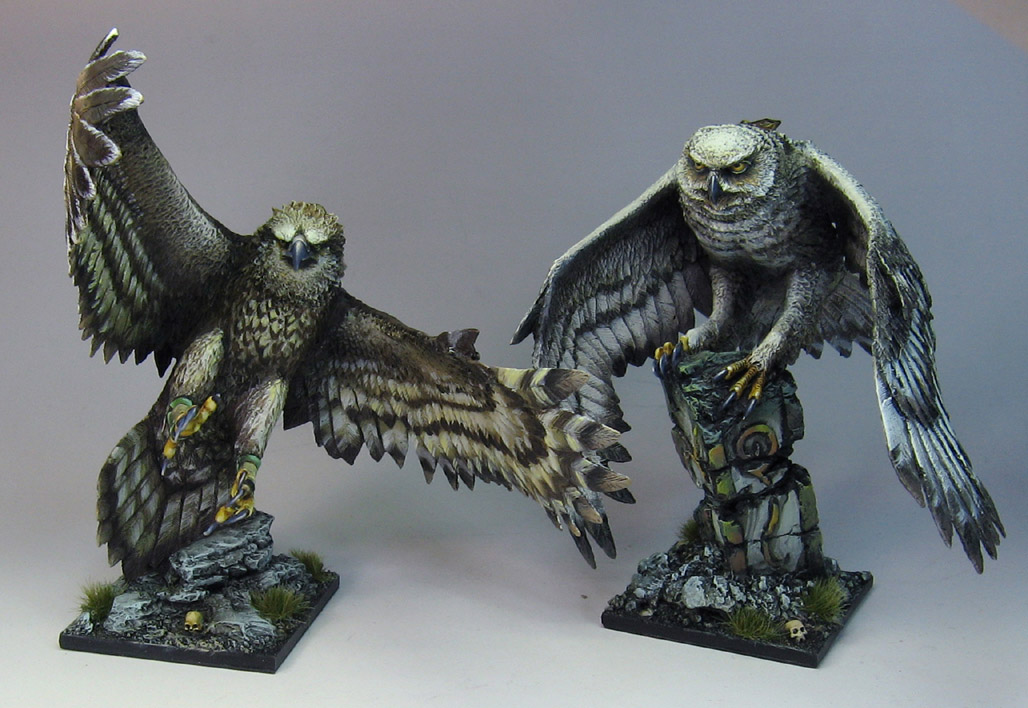
Look out below! The Great Osprey


The second of the Big Birds from CoolMiniorNot rises from its perch!


This one is even a little trickier than the owl on the markings, but a fun alternative to a typical eagle, which is why I did it this way.


I have a few "Birds of Prey" reference books, and the Osprey was featured prominently.  It also had several different species of eagles, many of which had similar markings to this guy (some varieties of African Eagles).


Yes, more repetition and tedium painting all the patterns, but it was time well spent :-)


Here he is with his buddy!  The Griffon pictures are coming tomorrow!!


The 'big' invasion continues...


It seems as if this week is all about the big guys!  Big birds, giants, and lots of Nurgly demon princes.

Along with all the other big resin kits, I prepared this Plague Demon from Ultraforge.  Here are the parts...


It was pretty straightforward to assemble, just like every Ultraforge kit has been.  I did need to do a bit of green stuff work on a few sections, especially where the torso met the legs.


The head fit very nicely...


You have the option of putting wings on him, or placing these over those wing joints.


This shows you the joints prior to assembly.  I have done a lot of demons with wings, so I felt it was time to go wingless for a while. :-)


The arms and weapon fit together very nicely, which was a relief.  I have had trouble with that kind of joint with other miniature companies.  It seems like they never line up, and I end up having to cut the handle of whatever the weapon is to make it work.

Not necessary this time!


I added a few pustules around the waist joint to keep the textures a bit more consistent.


With the alternate pieces on the wing joints green stuffed, it was all ready for priming!!!


Raging Heroes kickstarter has unleashed a few new items.  I will love painting these!!!!!


The 'outdoor' faction of my hive city Imperial Guard will love this Lord Commissar...


Saturday, June 22, 2013

"Who's" there?


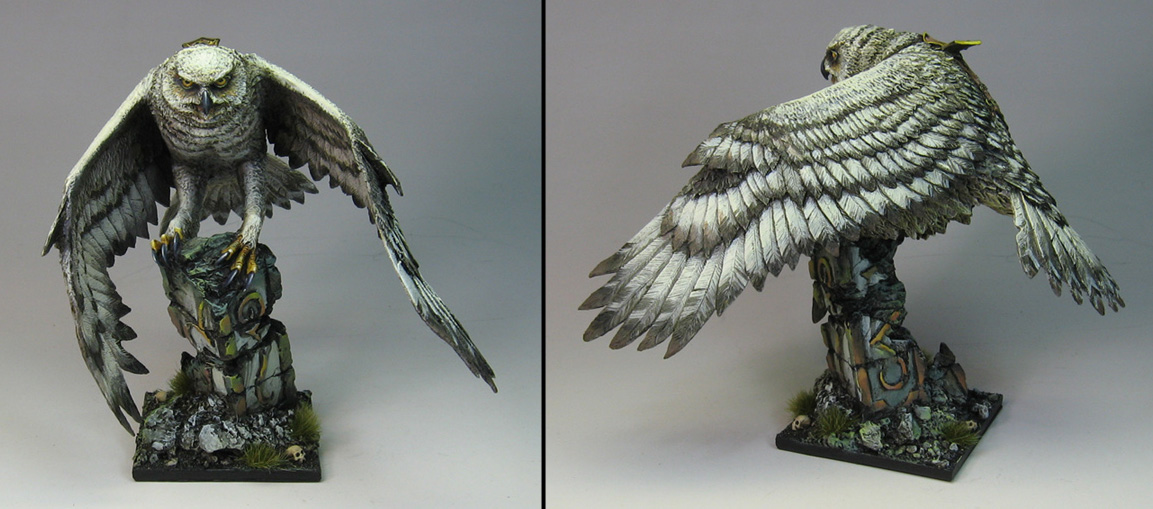
Well, all three of the "Big Birds" are just about wrapped up.  Here is the first... the Snowy Owl from CoolMiniorNot!


I have to admit, I do enjoy these big birds.  The faces are especially fun to paint.


Yes, doing all the markings on the wings incredibly tedious, but it is worth it in the end :-)


I be tormenting you on the video with each little wing tip marking, since I almost went insane myself as I was painting it!


The base is a 50mm, in case people were wondering about size and scale.


The Griffon will be next, followed by the Great Osprey!


Friday, June 21, 2013

They might be giants... something from Ultraforge


Today was another day of bouncing back and forth between prepping and painting.  As paint was drying, out came the files and carving tools!  Those were focused on 3 Ultraforge big guys, including this giant.

The image from the Ultraforge site above gives you an idea of how big he is.., truly living up to the label "giant". :-)

Here are the parts of the kit.  Not a lot of pieces to worry about here...


Once the mould lines had been filed down and hacked away, out came the glue and green stuff.

While the pieces fit together pretty well, I always like to sandwich green stuff in between those layers of glue for extra stability.  It automatically fills in those inevitable gaps, which means I don't have to fill in more later!


Head, torso and legs all set...


Then add the hands and club.


There were not many places to fill in with the green stuff later, which was nice, given how huge this is.  I will probably use the base that comes with this, in case Ultraforge wants to use the images on their website.

Some of the painting on this will be included in the "Using Powdered Pigments" video.  I had envisioned the powders as an ideal way to paint large creatures such as this, so I will be filming most of the painting of this giant, if not all of it.


More bases... and more bases


Here are some shots from a few days ago.  If you remember the post from earlier in the week, there was a lot of sculpey baking going on. :-)


I needed several batches so that there was enough to go around for all the different videos.  Not just to make the bases themselves, but to show lots of other techniques as well as how the clay reacts to different situations


When we did our in person basing classes, I found that I needed many pieces on hand just to show how the clay breaks (intentionally and otherwise!), and it's various properties.


Some new Apoxy sculpt also came in, which is good.  I had really depleted my stocks, and I wanted people to see what the original packaging looked like.


These kinds of bases are very fun to sculpt.  There is a pattern of sculpting that makes them much easier to create.  At least you won't have to learn that the hard way, as I did. :-)


I made a colossal version on the crystals base so that it would show up on camera even better!


Several different types of painted bases for the Painting Marble & Tile video...


Lots of big critters coming next!