Saturday, June 23, 2012

Making holes look like holes: Tomb Kings Armies on Parade

Photobucket

Photobucket

Now it is time to do the landscaping on the "ground" level of the Tomb complex.  First, I had to see if I could make the hole which our sneaky grave robbers made look anything like a real hole!

Photobucket

You can see how I started, using the miracle blue tape in thin strips to connect the hole on the outer layer to the smaller on the ceiling of the Tomb.  I then used my new miracle substance, red oxide paste.Actually, the color does not mean anything, it is the paste itself.  It is just like flex paste, except it already has sand included.  This meant that all I had to do was take a brush and layer it onto my tape lattice!

Photobucket

Now you can see the sprinkling of light sand and gravel to make it look a bit more real...
Photobucket

These  next pictures show me applying this to the rest of the board, trying to leave some flat areas for miniatures.  I love the way I can take my bitz and sink them into the wet paste, rather than having to glue them and smash my sand and gravel in there later!  I can even brush a tiny bit of the paste over the top, to make it look like it is even more sand covered.
Photobucket

Photobucket

Photobucket

I had to work somewhat rapidly, making sure that all my bitz were secure in their sandy beds.
Photobucket

Here is an unfortunate casualty, a victim of a Bretonnian arrow?
Photobucket

Photobucket

Now you get a peek at the next stage... the images on the obelisk and back wall!
Photobucket

More to come...

Solving an Engineering problem: A Necrotect's dilemma

Photobucket

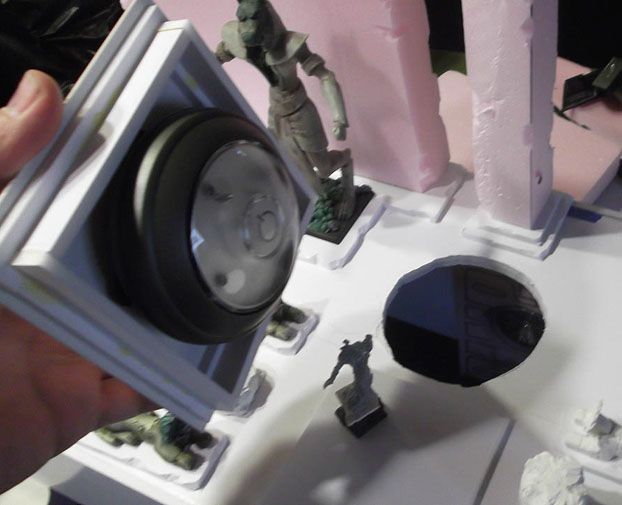
Here is the engineering issue that I brought up yesterday which needed to be solved.  As I mentioned, the "ground" of the upper level ended up much shallower than originally planned, leaving by big spotlight hanging down into the interior of the tomb in an unsightly way.  I also needed a way to get at that light easily in order to change the batteries, etc.

It was obviously crucial to keep it where it was :

Photobucket

When assistant Necrotect Cathy looked at the board, she suggested that I raise the "ground" in some way... perhaps creating a dais.  That proved to be a fantastic idea.  As you can see, not only was I able to raise up the level of the light, it became incredibly easy to get at!

Photobucket

You can see that it also makes a very nice "centerpiece" for the upper level, as the Casket had been for the interior of the tomb.  I had been searching for some element such as that.  I will be putting a design on there that is repeated in the tomb, as well as lots of scarabs that I had been saving.  Prince Apophas will go in that area.  I was also searching for a good place for him.  He was simply lost in all the visual frenzy of the tomb. :-)

The next problem to solve was how to keep the LED lights from looking like... LED lights!  I had purchased translucent sculpey (FIMO), in the hopes that I could cast some kind of bas relief that would allow light to come through, but hide the lights.  I still needed to get at the light, both to change batteries and press the front to turn them on...

Photobucket

I used some thin plexiglass to cover over the hole, and then glued the cast sculpey pieces onto that sheet.
Photobucket

Then it was time for the part I had been dreading the entire time, and that was the curved ceiling.  Yikes.  I knew no matter what material I used, it would be tough.  It had to help support the upper level, and provide a place for some artwork.  To make it even more difficult, I chose to string fibre optic lights into it!

Photobucket

Here you can get a glimpse of what they look like with all the other lights off...
Photobucket

They really don't show up, but you can still see a map of Khemri!  It was very difficult to string those lights, let's leave it at that.

After that nightmare, I had to dig 2 holes.  One for the big light, and another for the grave robbers.
Photobucket

More on that later today!

Above ground: constructing the upper levels of the Tomb Complex

Photobucket

Here is a series of images that show the upper levels of the tomb as I built the upper, or ground level.  This part had all sorts of challenges!

Now that the basic structure was figured out, it was time to figure out exactly how to configure the various lights all throughout the tomb.

Photobucket

These views of the interior show the 4 main lights.  I needed to figure out a way to have these lights show maximum brightness while hiding the fact that they are under cabinet lights!

Photobucket

Photobucket

Now it was time to build up the back wall as well, as that will be a critical area for telling the story of the Tainted Pharaoh!
Photobucket

Photobucket

It was also time to start planning out where things will go on the upper level, making sure that it will still fit under the glass cases...
Photobucket

Here you get a sneak peak at the scratch built Titan and Screaming skull catapult!
Photobucket

I also had to do some weathering on the obelisk and the back wall...
Photobucket

I thought at this point that I had things settled.  However, I still had to do something about the big light that was above the Casket.  It hung down way too far, but there was not a lot of depth to the horizontal surface on the upper level.  I had to worry about the whole structure being too tall, so that part was 1/3 as thick as originally planned.
Photobucket

Tomorrow I will post the solution to this issue, provided by the apprentice Necrotect Cathy!