Showing posts with label Shaded Basecoat. Show all posts

Thursday, November 24, 2016

Bringing in the BEF


Here's a brief set of images that I shot while I was working on the BEF... the glazing phase.


Most of you should be very familiar with the concept of the Shaded Basecoat technique.  This involves working rapidly, across many figures at once, starting with lighter colors and working all the way towards highlights.  The subsequent stage is glazing, where those colors are shaded, tinted as needed.


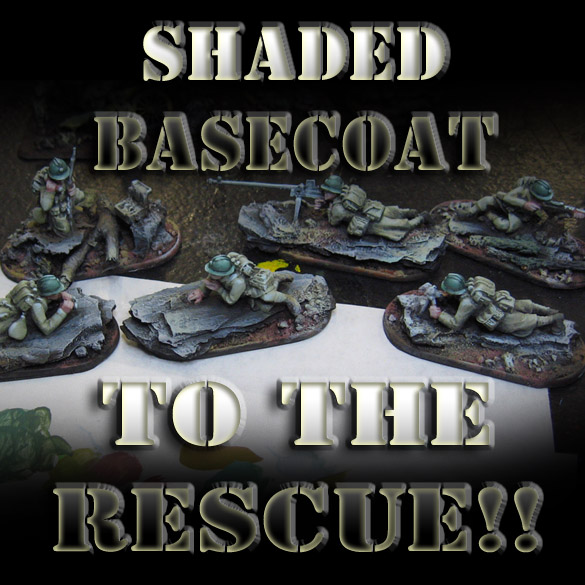
This view shows the Brits looked in that Glazing phase.  I think that I had already done my glazes on the bases themselves.


The pictures will not be ideal, since the lighting and other work circumstances were done "on the road" away from the studio.  However, you can see in the overall image (and the insert) that the glazes can be removed once applied to control them.

This provides a great deal of efficiency and speed, since it takes a lot less time to apply several translucent layers as opposed to opaque layering.


These lads have some of those glazes applied.  I used a few different greens and browns in the glazes, which provided subtle variety from one figure to the next.  This is the equivalent of the Mig AMMO filters, which tint colors and also serve to 'blend' lights and darks together more smoothly. 


I tried to get you an image of a few unglazed figures next to ones that have gotten that glazing treatment.


More figures have been glazed.  I used a variety of companies paints in this task, mostly Vallejo washes.  They have a rich tone, with a little thicker consistency.  I also had some Secret Weapon washes, which are very thin and runny.

Mixing the Secret Weapon and Vallejo glazes together works well, and also cuts down on the shiny nature of the Secret Weapon glazes.


This progression of images gives a blow by blow on some glazing in action. I worked my way from one figure to the next, carefully applying the glazes, making sure to tint the original Shaded Basecoat and not just make it darker.


The machine gun team helmets are the focus of this image set.  I mixed a darker green glaze for the helmets, but I removed some of the glaze on the upper surface of the helmet before it could dry.  This is why I want to try using the oil washes for this stage, because I would have several hours to do this "removal process".


The artillery, machine gun and mortar teams now have their glazing.  They look quite different than they did in those early images!!


I will be sure to post more tutorial style articles on these figures as they progress.  As I have mentioned before, you will probably see me painting some in live Google Hangouts as well, so stay tuned!


Friday, October 21, 2016

Painting Isorians: Phase One


Let's get things started off with some shaded basecoat!  For those who are not familiar with this concept, I have dozens of articles covering it, as well as many painting videos on USB drives.  Towards the end of this article, I will put a link or two to the main articles on this subject.

As always, I try to keep the colors as simple as possible, which is a major advantage of the shaded basecoat approach.  I will also be using the #8 round craft brushes.  You will see how durable and utilitarian these are!


The entire surface of the figure is covered as rapidly as possible, not worrying about 'lines' or edges.  I want to be able to add the subsequent layers of color while this is still wet, so working fast is a priority.  The bigger brushes also assist in this task.


The "shading" part of the shaded basecoat is done with these worn down #8 round brushes.  Take a look at the shape of the tip shown on the inset image, and how it looks more flat.  This is more like a filbert brush, which is perfect for getting these lighter layers applied rapidly.


Using the textures of the figure itself is very important.  I am trying to touch the lighter colors to the raised surfaces, but not with a drybrushing technique.  This is something I call damp brushing, where the brush still has a decent amount of paint in the bristles.

The brush is held at a very shallow angle to the figure, and it is dragged across the surface gently.  That will leave the lighter layers of paint where you want them, right along those upper edges.


Without cleaning the brush at all, progressively lighter layers are applied by adding more of the bright yellow to the mix.  The brush continues to hold that 'filbert' shape.


The shaded basecoat phase of the lighter parts of the color scheme are almost ready.  Keep in mind that the idea is to block in the lighter colors quickly, and then go back in with subsequent glazes and tinting to get the details in the shadows.


A blueish purple will be added over the top of the dark red of the shoulder armor plates, which will be lightened in a similar manner as the orange.


The main image and the inset show that more rapid fire application of light tones was added with the worn down #8 round brush.


There's a big difference between this figure and the finished one in the background... and this illustrates what the shaded basecoat allows you to do.  It's possible for me to not just darken the colors of the armor, but tint them in any way I need.

For example, I can use a variety of dark reddish glazes on this blue/purple to make it look more like that completed figure.  Instead of using a ton of different colors, and worrying about formulas and color mixes, I can "seek out" the darkness and tone of the colors more easily.


It gets even more fun as I add in the glowing colors, starting with the fluorescent paints.  


The fluorescent paint is very transparent, but it is also very thick.  This is a very unusual consistency for most people.  I added the lighter green color to make this more opaque, and help it flow a little better.  I will tone this down with glazing and tinting just like I will on the rest of the colors.

Stay tuned for part two, where all this glazing and tinting will be covered!

Here's a link to another shaded basecoat article:


Tuesday, May 3, 2016

Shaded Basecoat to the Rescue!!


You have all heard me go on and on about Shaded Basecoat, and the many reasons why I use/developed this technique.

The list is pretty long... increased speed, simplified color palette, you can be interrupted for long periods with less consequence, and more.

I'm going to profile one of the reasons which is discussed less, and that's when you don't have the "correct colors" at your disposal.  In this instance, I completely forgot all the paints that I wanted to bring to our last Draxtar excursion!!

I was not a happy camper, because I had set up most of what you see here when the unfortunate discovery was made.  There was even talk of turning around and heading back.

However, there are some paints on a carousel available for people to use, so I thought this could be a teaching moment for all involved!


I grabbed what I could find that I thought could be useful.


I figured it might be best to focus primarily on some of the Bolt Action special weapon teams.  I took the reddish flesh tone and did a little application on the bases as well as parts where skin was showing.


That was lightened with the only light colors that I had, which was the seafoam green and a very light blue.

I also took the grey color, mixed it with a little Secret Weapon blue wash to tone it down, and began working on the rocks.


You can see that I am developing the rocks and the weapons with that blue/gray mix.


Once I had the grays as light as needed, I started to mix up some colors for the greatcoats and packs of the soldiers.  A brownish green is required, so I mixed a mid tone and then made it lighter with the seafoam green.

For those not familiar with the Shaded Basecoat, the idea is to start at the halfway point between the lightest and darkest colors, and then lighten it with simple mixes until you reach your highlights. 
Keep in mind, this is not drybrushing, and I am working with the bigger #8 round craft brushes. 


A little more shape emerges as I get lighter and lighter on the coats and packs.


As I reach the highlight color on the coats and such, I must always be mindful of the next stage... that is, all the glazing and tinting which is to come.  The Shaded Basecoat and Glazing go hand in hand.


As this article has shown, I have used very few colors, and done very simple shading.  All the complexities come in through the glazing, which will not only get me the darker tones, but allows me to tint things like the coats and packs to be more brown or more green with simple tinting.


The helmets are a basic blue green, and then lightened with the light blue.  All the while, I am trying to be aware of the future glazes...


We now reach the end of that Shaded Basecoat phase.  This, along with the Glazing techniques, are available on video directly from me via USB drive or dropbox, and also from Kings Hobbies and Games.

Those videos go into great depth on both techniques, and show you new ways to approach painting your minis.  You can contact on facebook if you wish, or through the blog!

Stay tuned for much more!


Thursday, March 5, 2015

SSSSSshaded bassssecoat and glazing.


OK... here's something a lot of folks have been anxious to see.

This is the other half of the zombie queen set from the Confederate Rebellion, one of four new factions being created with the Wild West Exodus kickstarter.

This is an interesting shot, as it shows some critical elements.

First, the concept art which must be matched.  Doing so is always a challenge, since the final sculpt is always different, and you don't have the benefit of a 'backdrop'.  This can effect the appearance of a color far more than you might think.

Also, for those of you not familiar with my Shaded Basecoat technique, you see my #8 round craft brushes ready for action!  Each is in a different state of wear.

The more worn out brushes are used to make the initial applications of color, as the point has been worn away, making a nice version of a filbert brush.  The newer, more pristine brushes are for more detailed areas.


Let's begin  I chose a generic grayish green color for the scales, which was lightened with a rotting flesh type color.  A mid tone brown was used for the bindings, and a light grey for the metal parts.  As usual, the Shaded Basecoat begins light, and then gets lighter.

This will be shaded and tinted by subsequent glazes.


And let the Glazing begin!

I use a huge variety of glazing colors... Secret Weapon, Vallejo, and so on.

The approach here is similar to a watercolor painter... in that I concentrate my glazing in tightly controlled applications.


This is normally something I use in my Nurgle mixes, but the swamps demand the addition of this high chroma light wash.  I will mix it in with the Algae for some extra boost.


You ca see that I am working around the metal areas and the bindings.


A substantial difference already!

I have made sure to vary the colors of my mixes... some parts were more brownish, while others were more yellow or blueish green.

It is a lot easier to get this kind of color variation through glazing and tinting as opposed to laborious opaque color mixing.


So, the scales, which had been painted a very basic green color, could be turned warmer or cooler, brighter or more muted, with just the type of glazing color I was using.


The same technique was used on the bindings.  I was even able to incorporate some of the green glazes into the mix, which unified the colors... keeping the browns from getting too out of touch with the green of the scales.


Also, I can apply multiple glazes to a given area to darken it further, or tint it, etc.


A blue/black glaze was created for shading the metal pieces.


Now we have some decent shading, which can be refined much more with semi-opaque applications in those all important middle tones.


These techniques are so central to everything I do, I made sure they were the first two videos created for the Painting Pyramid series of instructional videos.


I like to think of them as the steel framework of a skyscraper.  It provides a lattice upon which I can 'hang' sheets of special effects, such as the RJ-1027 glow, and the Blood spatter!

Stay tuned for the Grand Finale!!!!!