Showing posts with label Movement Trays. Show all posts

Wednesday, February 17, 2016

More fun with movement trays


As you know, I have been trying to adapt my previous movement trays for the Empire of Dust Kings of War army.  Since unit sizes and footprints are defined in very clear terms, I had to rework the trays for almost all of my old units.

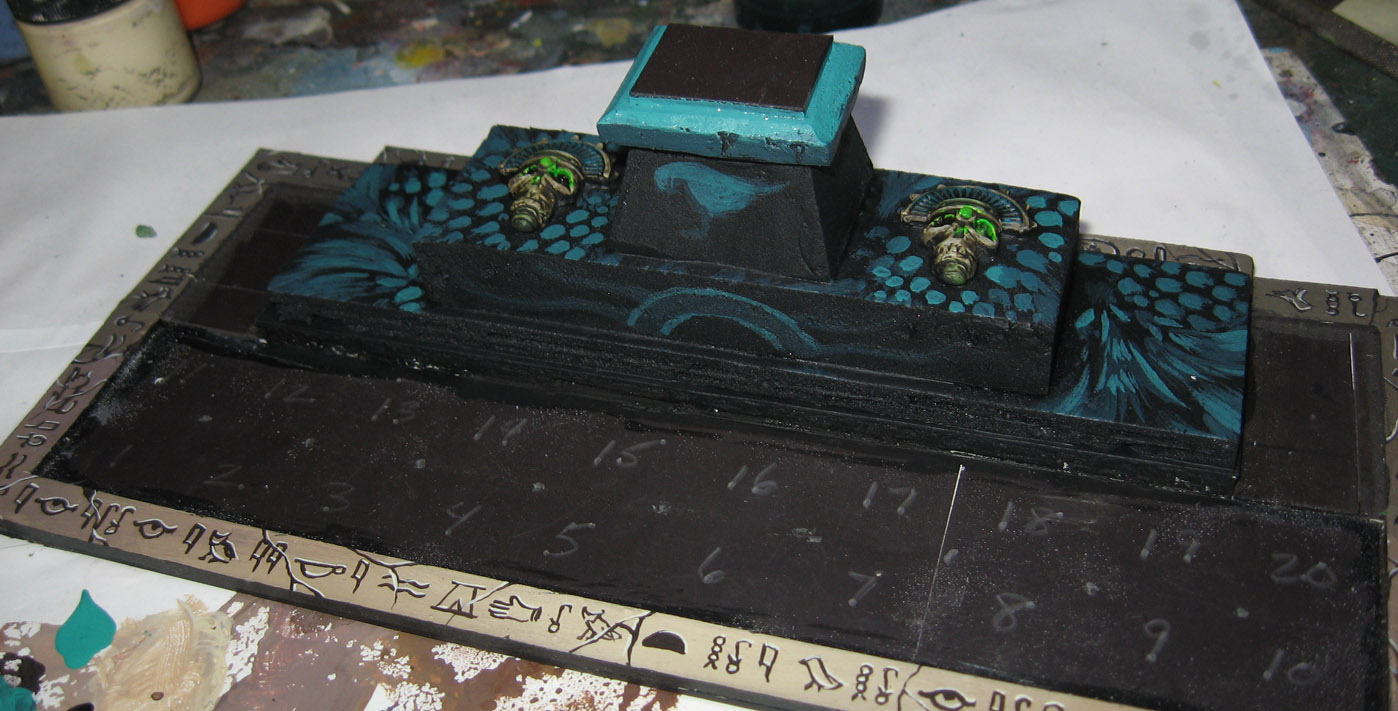
This one is for the Skeleton archer horde.  I added some pink foam unit filler/pedestal decoration.


Just as I did with the filler for the Guardian Archers, I mixed black primer with dark green and blue paint.


The back panel was covered in the hieroglyphs using the same method as I showed in the earlier step by step.


I did a little more painting on the skulls.  Eventually there will be some braziers on here as well.


Here's another round of Demon marble!  There was a previous tutorial on this technique.


In addition to the Demon Marble, I wanted to do some designs on the altar which reflected the kind of images I had painted onto the army board.


These designs were also painted on my chariots, the monsters, and the cloaks of my Priests.


The ultimate goal here is to focus the viewer on the Eye of the Chaos God.


The Eye is now mostly complete.  I will be doing some more designs around the altar, but my hope was simply to get this ready for some games to see if the unit and its configuration will work. 


A glow effect on the eyes is applied at this stage.  

The altar has a strong magnet on top to hold the decorative character figure.


Ready to go!!  I will take some images of the finished unit for you, so stay tuned!


Friday, February 5, 2016

Sacred Inscriptions


After the recent articles on the process of reworking the movement trays for the Empire of Dust, there were a number of questions on how the inscriptions were done.

These were created years ago when I first made the army.  I had to back track a bit, but could not find any step by step posts on the blog.  Since I had to repaint those new and adjusted trays, I thought I would take some images along the way!

Here's what I ended up with after chopping up the old trays.


Since I didn't have the original piece of paper that had the inscriptions (scaled to fit, of course), I would have to use my other trays as a reference.  You can see the cartouche of Pseusennes there on the left.


First, I needed to get the sculpey pieces along the edges painted.  Just three colors... a tan, a purple, and an off white.


The purple and tan were mixed together, creating a few different shades on the palette so that I could reach for them quickly.


I set down the lighter and darker shades first, so that I could blend them together.


I started doing that by carrying some of the 'middle' shades into both the dark and light areas.  Since I was working so quickly with a larger brush, the paint did not dry before this was accomplished.


All the tans are in place.  You can see the variations in light and dark.  I also touched up any of the black lining at this point.


As I mentioned before, I didn't have the original piece of paper.  Still, I had my original trays, which carried the warning "All those who enter the Tomb Cities of Pseusennes shall suffer a fate worse than death".


Having the two side by side made it a lot easier to transfer the design down to the new tray.  The paint is Reaper Brown Liner, which is a very nice, thinner paint that has incredible pigmentation.  This is ideal for such freehand.


The dark colors are in place, but you can see there is a difference between the original sections and the newer lines.  I need to pick out a few highlights along the edges, which will give it the appearance of being carved.

Fortunately I thought of this before I carved each and every movement tray when I first made the army!  That would have been many hours of torture.  This was mere minutes of painting.


I made sure to follow a single direction with these highlights.  The finished bits on the left definitely have more shape than the area without those highlights.


The completed tray!!!  Now I would need to do this to the other trays, and then work on the various unit fillers that I had created.  Those are future posts, so stay tuned!