Saturday, May 31, 2014

My own Fire and Ice


Working with Joe on his Legion of Everblight minis reminded me that I had done something similar with my own starter box a long time ago.  I finally found them!!!


You can see that it is somewhat similar to Joe's Fire and Ice concept... with my carapace more of a normal color.  I still have not had a chance to paint the little beasties yet. :-)


The big critter is still in the shaded basecoat phase.  A long way to go on him yet!


Lots more darks will be added to both the skin and the carapace!  Stay tuned!


The heat is on...


After Ice Bat helped me put in the window air conditioning units, it was time to finish up the Breakout Campaign game #1.  

As you may recall, the German forces are attempting to break out, using their elite tank and infantry units.

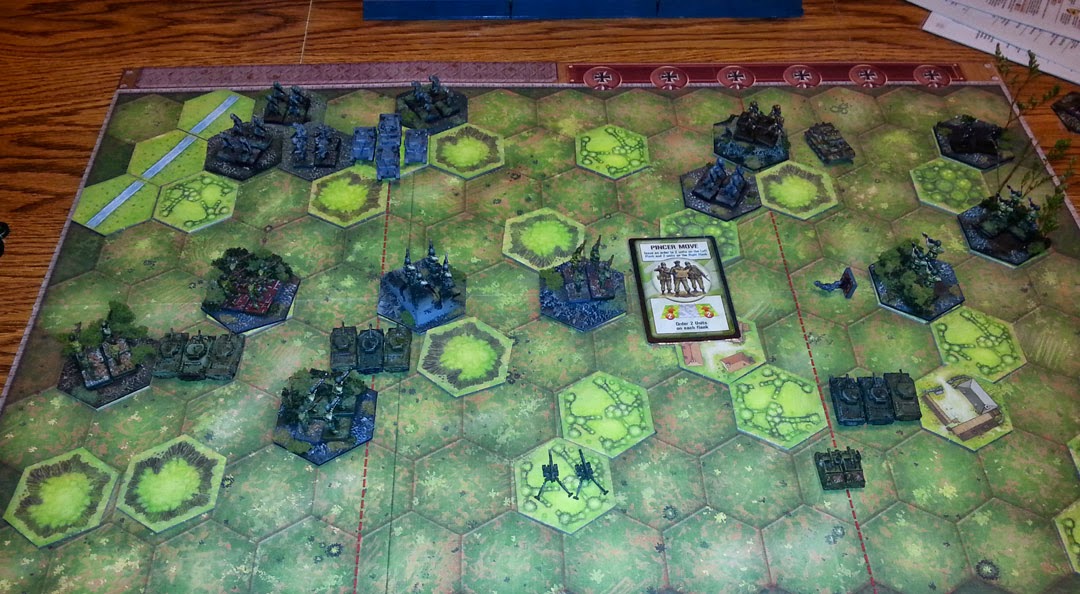
I executed a pincer move here to take advantage of some positioning, and taking down an infantry unit.  I have started to learn that taking away units makes the higher end late game orders less effective for your opponent.  He can't order what's not there!


The German reply was to advance in the center, perceiving that there was a lack of units there.  It was my hope to convey this, since the cards in my hand would allow for a double envelopment should that continue.


And this was one of those cards.  Activating this many units evenly across the board was going to be devastating for the Axis.


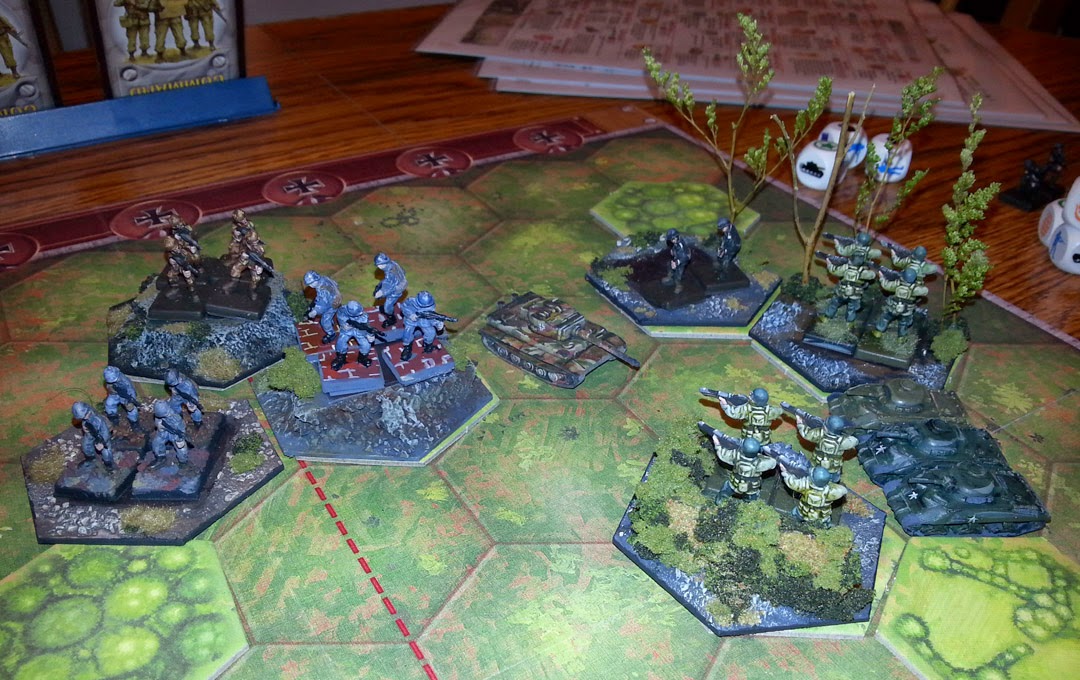
You can see the envelopment in progress...


This was a rather dramatic turn.  Remember the Ambush card?  Well, the perfect situation arose when the Germans attacked one of the American units close up.  However, my rolls barely affected him, and the grey clad butchers wiped out the unit on the hill!

Sometimes even the perfect set up can not go your way at all.


I was not terribly worried, however, since I had some big time cards to play, such as this armored assault!  I had been moving those units into position most of the game to pounce on this advantage, which meant another elite infantry unit was destroyed!


Ground under the treads of the attacking Shermans, the "Unit denial" program was well under way.


The Axis could only respond with a recon card, in the hopes of getting something better with the 2 new draws into their hand.


Another devastating order which allowed for the attack in the center to be sustained.  I have to say, this game saw the most repeated action by any armor units than I have yet to observe.

Also, when a tank unit wins in combat against an infantry unit, they can follow in, and either attack that unit once more, or go after another target.  

I chose to add one more dead platoon to the Unit Denial tactic.


This is why such a program is very helpful.  It is late in the game, and the Germans have what is ordinarily a fantastic card... the Direct from HQ.

However, since so many of their units are either destroyed, damaged or scattered, the impact is greatly reduced.

In one last show of suicidal gallantry for the Fatherland, Whittman advances against what he believes is a unit of fragile Sherman tanks.  He believes he can cut through them on his own, and break through to the Allied rear!


What he did not know, however, is that one of those 'helpless' tanks was in fact, a Firefly.  Taking careful aim, even the monster Tiger tank fell prey to its enhanced firepower.

The Nazi scourge had been dealt with at last!  The tank ace lived no more.


The campaign chart after game one... a stunning American victory.  This was doubly bad for the Germans, since the Allies would be getting extra reinforcements the next game, and have more opportunities to damage the German force pre game.


More on the next battle later.  In the meantime, Ice Bat chills out in the kitchen!!


Friday, May 30, 2014

Breakout hit!


Yes, there have been a lot of Memoir '44 posts lately.  My apologies for that!  Most of the miniatures work I am doing is all prepping of miniatures, and not terribly picturesque.

Also, every day begins and ends with scenes like this:


To keep from going completely insane, Rich has been stopping by for a few quick sessions of Memoir '44.  This time around, we tried a campaign.

I think they are structured quite well.  If one side wins a game, then that effects which fight you do next.  There are also pre and post game rolls which are affected by the result from a previous game, and so on.  Wonderful!

This was the set up for Game One: Panzer Lehr Counter Attack.  Rich would be playing Germany.


The American G.I's are bracing for what could be a devastating assault by the forces of the 3rd Reich.


Tank ace Whittman even appeared on the battlefield!  His "007" tank has a huge bull's eye on it...


All of the German infantry in this match is elite, which means they can move fast and hit hard!


The Americans are hunkered down in villages and hedgerows... waiting...


My initial card draw.  This is a perfect balance of starting cards.  Lots of activity in all sectors, along with a very crucial "AMBUSH" card, which I will save for the inevitable surge by the Waffen SS and Gestapo units.


My pre game roll gave me mobile artillery, which you can see in reserve.  This is very significant, as this stuff can move into a better position, and then hammer those advancing units.  Line of sight and terrain are no impediments to artillery!


Onto the board!  A simple first move, just getting everything in place for the next turn.


Whittman attempts a bold advance with his Tiger Tank.


The Americans respond in force, but the shells bounce harmlessly off the powerful behemoth's armor.


Looks like a big fight is gonna happen here!


The Americans attack once again, forcing the Germans to retreat.

Stay tuned for the next episode, where we see furious action all over the battlefield!


The towering table of terrain


Now I know why I have been having such a hard time finding a place to put all the terrain I have made!  In fact, this is not even the entire collection.


Much of this was made for the terrain videos.  The finished obelisk is not there, along with some other buildings.


You also have to count the 5 display boards I have made.  Those take up even more space!


All this does present plenty of game playing options!


It was pretty wild seeing this all in one place, however! :-)


Thursday, May 29, 2014

From hedgerows to hills to forests


On to the rest of the needed terrain hexes for the troops!  As I mentioned, You will need at least 4-5 hexes of each terrain type.

Hills were easy enough.  I varied between 2 sheets of cork and one bulletin board cork thickness.


The rocks, gravel and flock were getting everywhere, of course!


Forests were also needed.  To make them as different as possible from the hedgerows, I decided to use some of the vast amounts of dried foliage that remains from the Golden Days of dioramas.

Back then, I developed a method of anchoring the trees using green stuff.  A spot of glue on the bottom, and it would be very secure!


You can see the progress at that stage.


A bunch of nice terrain hexes, which would make playing the games not only more cinematic, but a whole lot easier.  Identifying what unit is in which terrain became so much easier!  You can survey the battlefield and take in in much more rapidly... making the game faster to play as well.


A finished piece with painted minis vs what we started with.  A big difference, I would say!


The trees have been used quite a bit, and nothing has broken yet!


Now almost all of the infantry are painted!


Not long from now, it will be time to move on to the Brits from the Mediterranean set!!


Wednesday, May 28, 2014

Between the hedges


No, this is not about Bulldogs football!

It's about the roughest, toughest terrain in all of Memoir '44... hedgerows!

Those buggers are nasty on so many levels.  To make them was not so easy, either. To leave enough room for the 4 figures that need to fit inside, and leave room for sandbags around the edge of the hex, is not easy at all.  

To create a wall to glue some foliage, I cut up some left over matboard.  This would be thin enough, but also strong.  I super glued it, and supported it with some gravel around the edge.


Once all this set up, I had to to paint all the walls and gravel.


First layers applied.  I assumed that I was going to have to paint the walls a variety of green shades, since the foliage would never cover 100%.


I thought it would make things easier if I glued some flock first.  My only concern was the possibility that the subsequent layers of glue would not stick as well to the flock.


Those fears proved to be unfounded.  The two types of clumping foliage worked very well!  However, I had to break it down into some very tiny clumps.  As usual, I super glued a lot  of it to my fingers!


That reminded me of the days when I used to do dioramas all the time that involved the foliage.

I finished off the rest of the base with more foliage, including on the soldiers.  I was liking the results a lot!


Now those guys are in some serious cover!  -2 dice for tanks shooting at them for sure :-)


Much more terrain needed to be made, including some more city tiles.


It takes at least 4-5 of each terrain type to get through a typical Western Front scenario.


So, that means lots more to do!  Stay tuned.