OK, I think many of you have noticed in these recent posts that I have been throwing out the hint that we are working on a potential Kickstarter program! Nearly all of the posts lately have been 'how to' articles, as I attempted to train myself for breaking down all these techniques into information that could be more easily absorbed by you, the viewers!
Many people have asked us for videos and DVD's over the years of our painting techniques, but we never had the time or even the means. Until now!
We have been planning and researching for many weeks now what would be involved with such an endeavor. It takes a lot, let me tell you! So much planning, endless lists, etc., and we are still formulating a proposal.
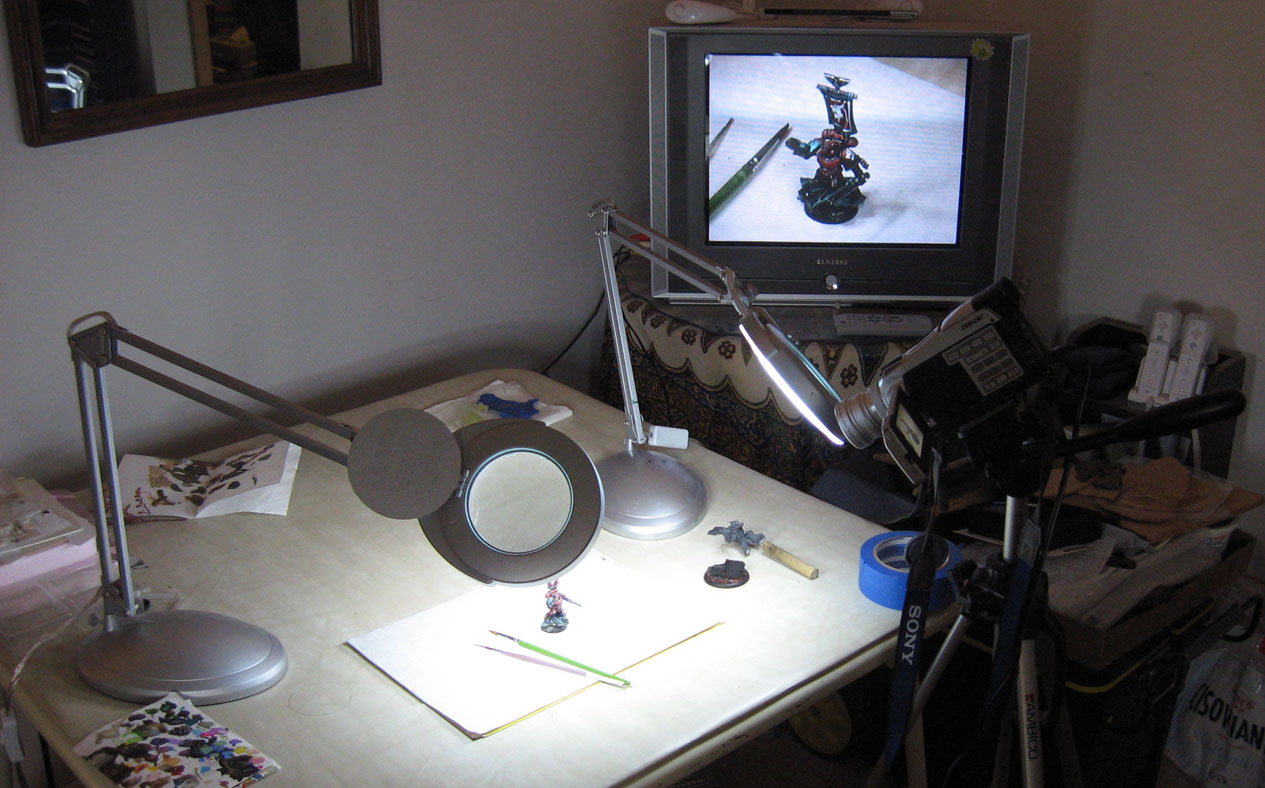
Obviously, the photography element is the most crucial. Rich was kind enough to drop off the camera yesterday despite not feeling all that great. We spent hours looking over the camera, checking out lenses, etc.
I had set up a crude studio with lights and outlets, etc. In a happy accident, or Wii TV happens to make a fantastic video monitor! This is exactly where it normally resides, if you can believe that..
Rich, and Cathy watched closely as I tested to see how close we could get to the miniature, would things stay in focus... centered on the screen, etc.
I will be adding one more light to this set up. There was even a happy accident, as I discovered that this set up could be very handy for painting very large monsters and vehicles.
Normally, those do not fit under my magnifier light. I noticed that the miniature is even bigger on the screen than what my magnifiers can do! So, I am tempted to do some painting using the camera as my magnifier.
Anyway, there will be many more tests. Some of them will be posted to the blog. Over time, I will begin to post some lists of titles which I will be working on, etc. The initial videos will be of more basic topics as we figure out what will work best, etc.
I can say that we will be adding a voice over, as passing 737's just overhead could really ruin a good take!
Also, I have been in discussions with some other miniature companies about using their figures for our how to DVD's. That has been very exciting. I can tell you for sure that Raging Heroes figures will be a common sight! Urban Mammoth is going to be there as well. Both companies have great miniatures!
Cathy suggested that I try to mark the areas where the palette and lights work best. A very good idea!
So, we hope to provide all the loyal Wappellians around the globe what they have been clamoring for...
I will keep you guys updated as this moves along! Stay tuned!