Showing posts with label GenCon 2017. Show all posts

Thursday, August 24, 2017

Heads Up


The "Primer Painting" process continues with the Badger Stynlrez primers... all 12 colors!

Lots of mixing and tinting (with the Ghost Tints) was used to slap some colors on this giant BONES dragon.  As I mentioned in the previous post, I had no idea what I wanted to do with it in terms of color, theme, etc., so I simply started shooting mixes of primer at it to see what it would look like!

You can see that I tried to vary those tones all across the figure.  I think this image shows how the blues and browns intermingled on the rocks and on the dragon itself.


Even for something as simple as the horns on their heads, I could rapidly experiment with which way the light to dark shading would go.  That is, starting dark at the head and working to lighter at the end, or the other way around.

Eventually it became clear that I wanted to have them be lighter on the ends.  A simple adjustment to make with the primer and airbrush!


This was part of the Ghost Tint experiment that I have been talking about.  In this case, I took some of the Golden Yellow Ghost Tint and mixed that with one of the light tan primers.  This created a very intense shade of primer, and gave a more saturated look to the colors on the dragon (and even an Italian tank!).

You only need a few drops of the very intense Ghost Tints to alter a primer color.  We mixed the blue tint with the metallic primer to create a fantastic blue metal, and also used the purple Ghost Tint with white to make an incredible intense purple primer.


The Ghost Tints were also mixed with the primers to do some "regular" painting with a brush.  I did this to show why you don't have to limit yourself to airbrush only.  I painted some details on the heads, such as the mouth, teeth and eyes,  to show how the primer can still be brushed on.


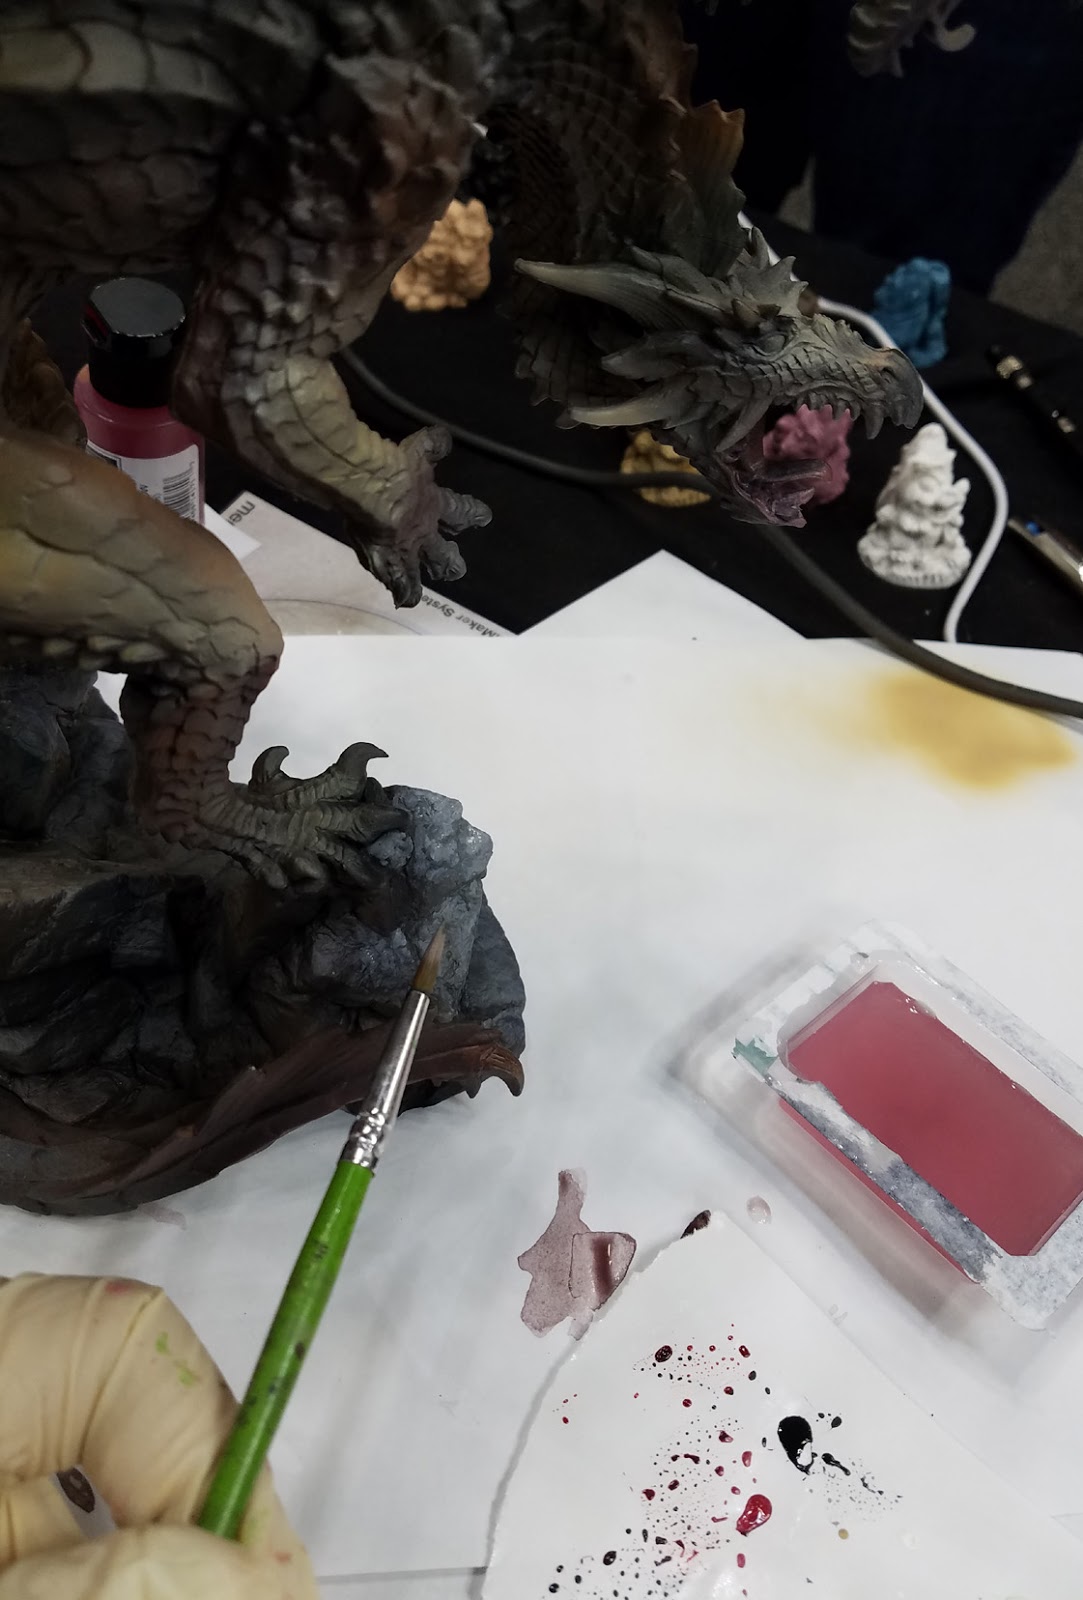
I mixed some of the lighter color primer with a few deep red Ghost Tints, which made some excellent pink tones.


You can see some of those added elements here.  I also mixed the green Ghost Tint to make some eyes, and to drop a few test brush strokes onto the scales...


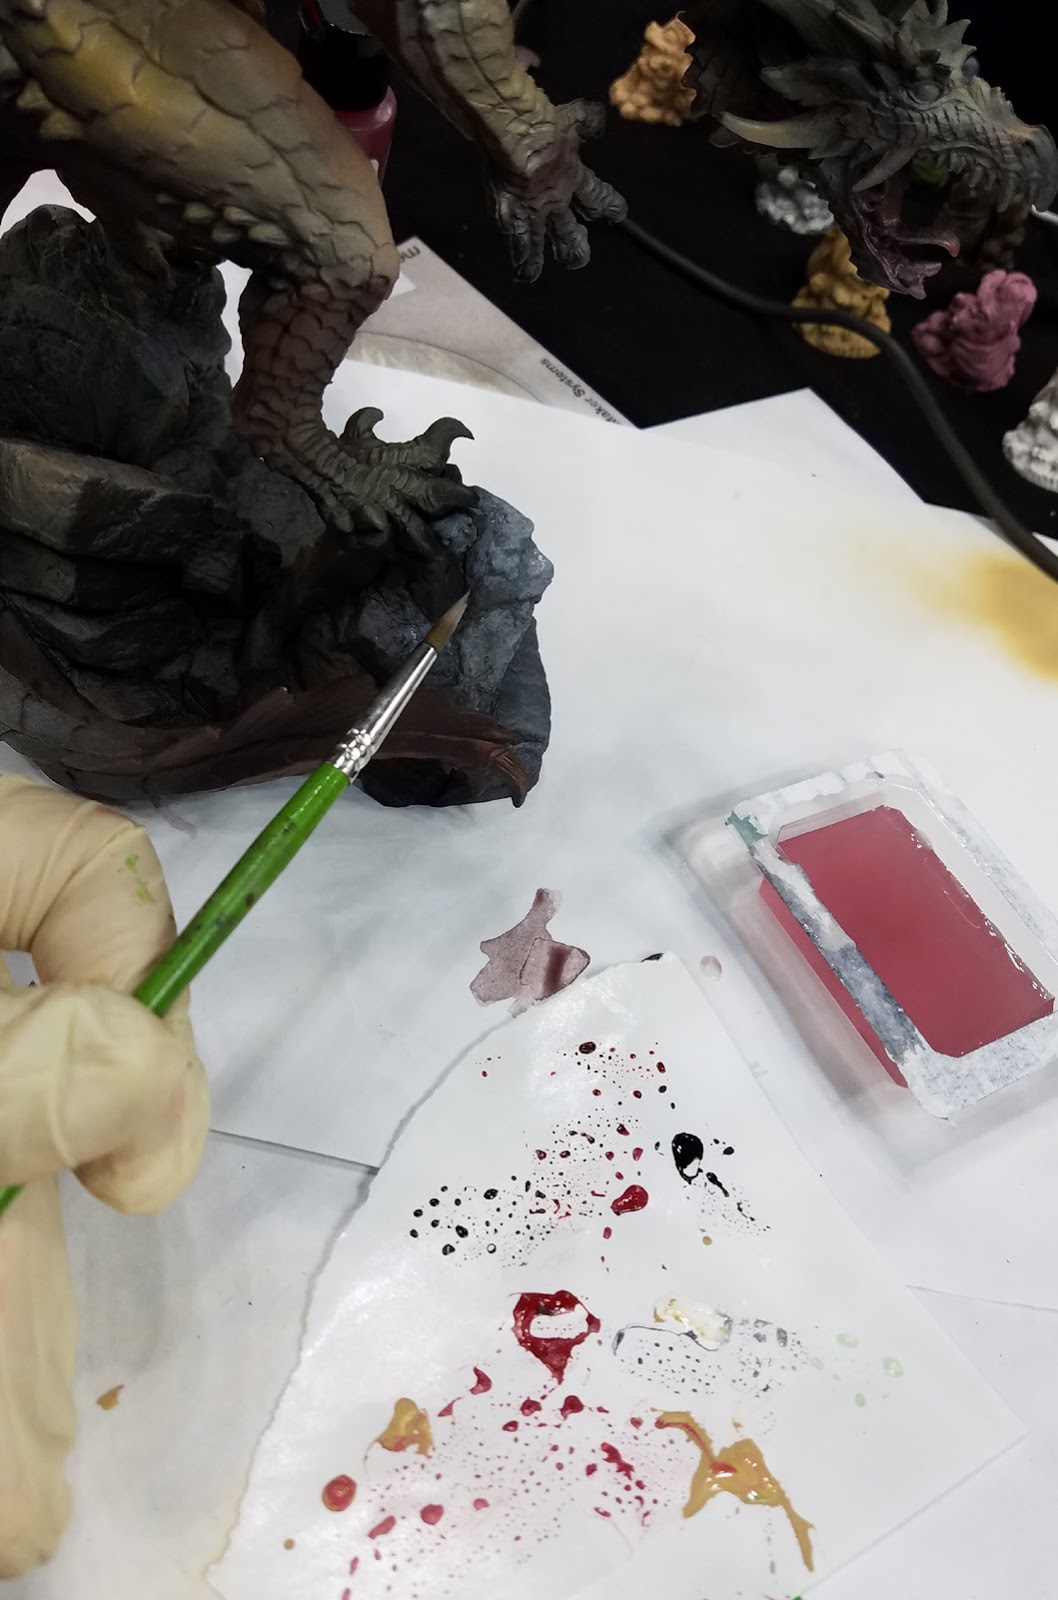
If you look at the head in the upper right hand corner, you can see the greenish tint as compared to the other heads.  That makes a nice contrast to the reds in the mouths, and to the deep purple darks used around the eyes.  Again, this is just setting up layers of paint that will be added... since this is only "primer".


You can see some different shading on the wings here, reflecting the different angles which they are set once they are in place.


Look at the top dragon head closely, and you can see some greenish brush strokes on the ear and the scales on the back of the head.  Here I was taking advantage of all the subtle dark reds that the airbrush had placed in the shadows and mid tones.

By using the greenish colors on top of that set up was far easier than trying to mix all those colors and applying them with a brush into the crevices and around all the obstacles!

I will be going over this with my regular oil paints and weathering powders, along with putting it on a wooden plaque to create a base.  Stay tuned!

Also, here is a location on line where you can get the Ghost Tints and Stylnrez primers.  If you use the discount code of Wappellious, you will get a 42% discount.

A link:


Wednesday, August 23, 2017

Wing Span


Among the many thing that I prepped and brought to GenCon for painting in the Badger Airbrush booth was the massive multi headed dragon from Reaper Miniatures.  It had been part of the BONES 3 kickstarter campaign.

Here you see some of the final setup in the booth on Thursday morning.


In addition to the BONES minis, I had a collection of Bolt Action tanks, weapon teams and infantry.  This would be used to show how to effectively use the "primer painting" method that you have seen me using lately.


I had no idea what I wanted to do with the dragon.  An idea to make it into a Fire Dragon was even entertained, but I just decided to start spraying various colors of primer at it to see what developed!


I made a few dark mixes of the Stynlrez primer, a favorite product of mine from the Badger line.  I took black and let that mix with some of the dark brown primers for the deepest recesses.  At my usual high PSI of around 40, the paint had no problem reaching into those hard to access areas.


Once the darks had been established, I went back in with lighter mixes.  There are 12 colors of primer to choose from, so you can make just about anything!  I even mixed in some of the blue primer here and there.  

I showed onlookers how they could position the airbrush and the figure itself to get instant highlights on raised surfaces like the wings.

Another experiment was performed, and that was to mix in a few drops of the Ghost Tints with the primer.  This created some amazing colors an effects, and I will definitely be doing more of that!


You can see how I focused on those darker areas to begin with in this image.

Also, while I had this set of primer colors going through the brush, I worked on some of the other miniatures and vehicles.  When I do an airbrush session at home, I often have terrain pieces, figures, vehicles, planes and monsters all lined up, just in case those colors could be used on any of those items.  It really maximizes your time, and the amount of paint you need.


This image shows some of the tinting that I mentioned, including some blueish colors, and even hints of red.  With so many elements of interest on this giant figure (not the least of which was 5 heads!), it is very important not to have huge swaths of similar colors.


What I like about doing this primer painting with the airbrush is that I can experiment on the fly with all kinds of colors in a matter of seconds.  If I don't like the result, I can simply primer over it with a different set of colors.  This was done with a dragon that had been painted green at World Expo.


You can see some of that tinting and adjusting here.  I had to make some changes on the areas where the wings met the main body, mostly tinting them more reddish and making them darker.

Stay tuned for the next episode, where I will discuss how regular brushes were used to work from the basic colors created with the airbrush, and mixing the primer and Ghost Tints!

For those of you who have asked me over and over again where you can get the Badger primers on line... I finally have a location for you.  That is at webairbrushes.com.  If you use the discount code of "Wappellious", you will get a 42% discount.    Just click on paints and scroll down to the Stynlrez primers!

A link: