Tuesday, March 12, 2013

The Ruined Chapel... part 1


This is a piece of terrain that I have been eager to try for quite a while.  I had hoarded the supplies for it, waiting for a chance to give it a try.  One of the interesting items I had saved was some sheets of textured plasticard that looked like tile floors.


Here's a better view.  Normally I would just cut up pieces of matt board or hard board, but this stuff seemed like it would be fun!


To make the walls, I took some of that nifty craft foam that Rich had given me.  Unlike the normal pink foam, this carves extremely well, especially with a very sharp knife.  The pink foam will crumble a little more easily.  I traced out a window pattern that would give some good sight lines to 28mm figures, and but them out.

The pink foam is a special corner piece.


Here you can see that I have hacked away at the white foam, trying to simulate the broken stones as quickly as possible.


I cut some foam board to support the walls.  This would make it a bit more decorative, and provide a better surface for gluing the walls to the base.


The walls begin to rise!  You can see how I am using the corner piece to help join the two walls together...


The walls have been raised.  I tried to keep enough open space in the interior to easily place at least ten 28mm figures inside.


Meanwhile, on the exterior, I wanted to provide cover by using the thickness of the walls to cut down on sight lines from outside the structure.


To create the next decorative element (which also offers some more support to the walls), I cut a bunch of uniformly sized strips of foam core.


I matched whatever damage had been done to the main walls on these support pieces, and glued them in place.


This was done between all the window sections.  Stay tuned for the exciting conclusion, where we put in the floor, use the excess window cut outs as fallen stones, and glue in all the rock and gravel!!  It will be lots of fun!


A little fixer-upper, painting the house...


For everyone who has been waiting to see what the house would look like painted, today is your day!


I'm starting off with the top views, so that you can see the roof and the ground treatments a little better.  I will post some ground level views later...


This was another pretty limited palette.  The same black, white, sap green, cadmium red, and tan.  I did use a little Vallejo dark sea blue and some black ink for certain effects, such as the windows and cracks.


I put a layer of gloss varnish over the windows, which gives them just a bit of a transparent look.  I didn't want to go too shiny, since they are not exactly supposed to be high quality plate glass :-)


I love putting the mossy stuff on rooftops!

Once again, the grass and flock was used to create some extra color contrast.  I focused on the reddish and tan colors during the painting, so that brighter green adds a little splash!


By painting the windows the darker blue grey, it allowed me to lighten up the wood trim around it with the tan, adding some interest there as well.


Finally, making the cracks with the liner brush and the ink mixed with various paints is the touch that I look forward to the most!


Monday, March 11, 2013

Some more views of the fortress


Here we have the rest of the images that I shot of the fortifications with the Grey Knights inside.

Eventually, I would like to get some images of this in the various setups.  This can make two separate installations, or one very long wall.  


I think the antenna will probably be a stand alone piece that can bet put inside the fort.  I am still making the bolters that go in the corner sections.


Here's one of those corner spots.  It will be able to rotate.


The lascannon fixture will go here:


I am very curious to see how this works in an actual game ;-)


Perhaps this week!


Dark Sword mage.. I think


Since I have been getting a lot of these 'old time' figure identities incorrect, I will say that my guess is she is from Dark Sword.  I now recall that Dennis had a unique way of sculpting cloaks as well as the hair :-)


There was a very specific method of how the folds were done, and this is a really good example!


Sunday, March 10, 2013

Introducing Ashara: Archon of the Fire Talons


Here is my latest Raging Heroes figure.  This is Ashara, a special character that comes with many extra weapons, heads and other gear.  In fact, there were so many additional pieces, I was able to use them to convert Kabal warriors into Incubi!

As usual, there was very nice casting on the parts, making it very fun to paint.

I enjoyed the glowing back panel, as I thought it would go well for this army.


I will be painting the Incubi squad that goes with this character so you can see what they look like at some point.


Here she is next to one of the Raging Heroes sci-fi Vestals.


I can't wait to see what Raging Heroes has in store with the upcoming kickstarters!!!!


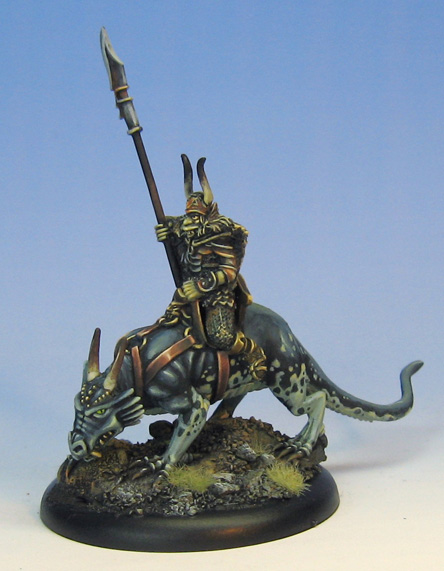
Something old and crazy... Orcs on dragons?


Check out this old timer.  I am pretty sure it is from the Ral Partha range.  It would be an interesting character for a few games that I can think of... such as Celtos.


This is another one of those minis lost in the archive! :-)


Moving in... some figures in the fortress.


OK folks!  Looks like the Grey Knights set up house in the fortress.


I snapped a bunch of views, and here they are:


I was very glad that everything worked out in terms of size, and everybody can see over the walls, etc.


A close up...


The Justicar is in charge... 


These side pieces are designed to be placed in different patters, etc.  You could also make 2 different forts from this set.


If I get to play the test game this week, I will try to get some shots of it in the various configurations.


Till then!