Saturday, October 13, 2012

Reaper and Warmachine Inquisitor converts


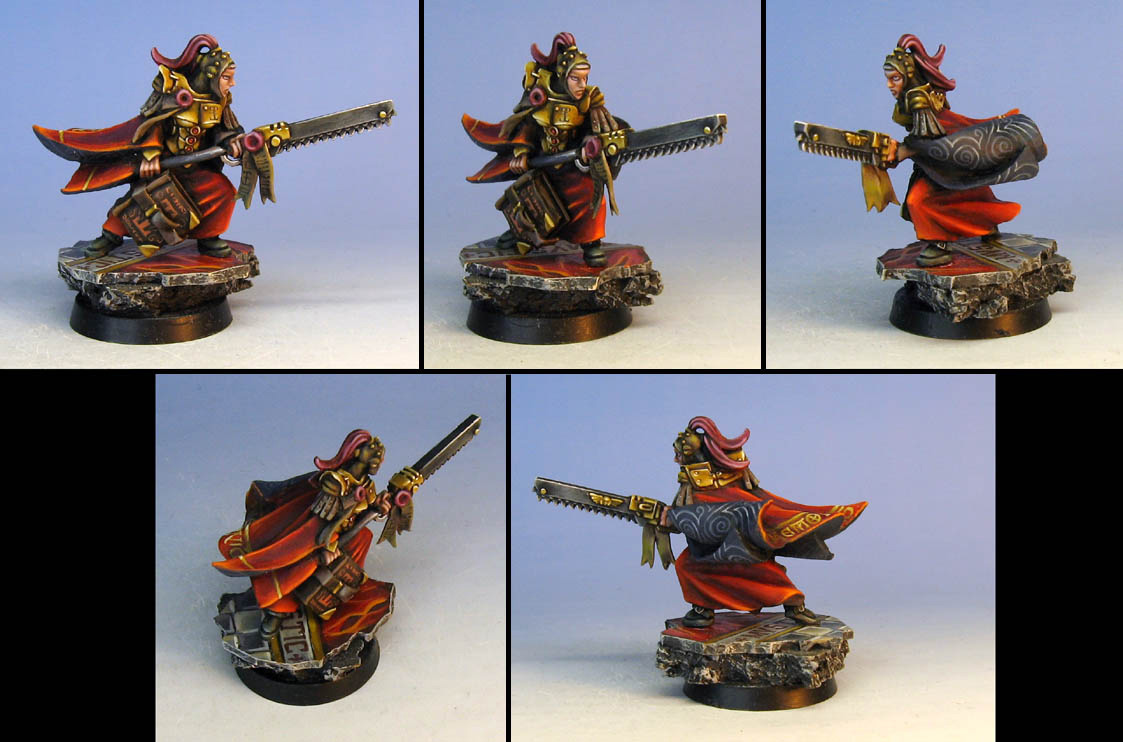
Following the previous Demonhunter conversion post, we have some more minis that I substituted for Inquisitorial henchmen.  I wish I still had these ladies, which I used as Death Cult Assassins, now that you can have huge bunches of them!  I believe these Warmachine figures are from the Witch Coven of Gharlast.


This was a sage that came from the old Void game, which is probably available through Brigade models now?


Then we have a few Reaper figures that I changed a bit to work as mystics.  This one was a particular favorite of mine!


I am not sure what this guy is.  He may have been a Mordheim or Necromunda figure...


Converting non-GW figures for Inquisitor retinues


My original Demonhunters army always had at least 2, of not 4 Inquisitors with retinues.  As a result, I needed a lot of retinue figures!  I had a decent amount of official Acolytes, familiars, along with a smattering of servitors, but I definitely needed much more.  As a result, I decided to have some fun making the needed conversions from figures at hand.

Here is an example of a blood bowl player being turned into a plasma toting servitor.  There are some Empire and Tau bits in there, along with a scratch sculpted plasma cannon.  Back in the day, these guys were very nasty in a retinue where the Inquisitor had a Sage...

He caused so much damage, he even got a trophy head!


Here's another, even older, blood bowl figure with a scratch built heavy bolter.  I used random bits and plasticard to make the saw arm.


More random bits, another sculpted heavy bolter.


I had some broken Dark Age minis, which make perfect retinue figures!  I sculpted some storm bolters for these Acolytes...


These are also Dark Age minis.  Amazing what a piece of chainsword and some purity seals can do!


This one was a favorite.  Another Dark Age mini with some Sister of Battle Canoness bits and extra purity seals...


One more Dark Age figure with a Canoness bit, a Space Wolf head, and other sculpted pieces.


Friday, October 12, 2012

Taste test: Survey says...


This is going to be a different sort of post (as if a post about cardboard and toilet paper was not unusual enough!).  And it is not a survey.  It is just a little window into why I made a fundamental choice in my overall technique.

That technique would be NMM, or Non-metallic metals.  Since there is so much debate and vitriol over this topic on the web, I want to make it known that I am not advocating anything, or putting anything down.  This is strictly about my own personal choice.

People have all sorts of reasons for choosing one over the other, and I will not bore you by repeating them here.  I'd rather be painting anyway!

My choice was primarily based in my training.  That is decades of work in watercolors, pastels, acrylics, and oils.  There are no metallic paints in these mediums that were ever part of my original training.  You had to simulate the look of metal by dealing with contrasts and reflected light/colors.  This is basically what NMM is, just on a 3D surface.  It was only natural for me to choose this method, and it has been great fun over the years.

In the last 12 years, I have experimented here and there with metallics, but never liked using them, or the results.  Again, I have seen other people do incredible things with them, and I salute them.  It's just not for me.  I will continue to experiment, though. :-)

Recently, I had thought of using my 2 LOTR armies as laboratories in which I would conduct many experiments with metallic paints.  It was not really the best choice, since those figures are not as well sculpted or cast as most figures.

In this example, I have some side by side pictures of the original Galdrhim knights in metallics, and then in the repainted NMM version from yesterday.


I am pretty sure you can determine which is which.  If I have been spectacularly clever, and you don't see it right away, the NMM figure is on the left.  Both of these figures are at the same stage of "shaded basecoat" and glazing.

I used the same set of colors that were used on the 'color test' infantry figure that was posted a few weeks ago.  My favorite aspect of NMM is being able to put so many different colors and hues into my shading.  For instance, I used the same color of the cloak in some of the darker areas of the metals.  I did the same with the umber tones, and even the ground, where I incorporated more greenish hues.


I will play around with these shades much more in the finishing stages, as well as working on the highlights and reflected light.  In contrast, the metallics on the right were much more limited.  I even noticed at the time that my lightest silver was, in fact, a dark grey!  It was a big surprise.  In the future, I will experiment by using a metallic medium to turn any color into a metallic color.


This could be important, as I don't like the way metallics look when you do a lot of shading in an area, or try to mix regular colors in with them to tint them.  Yes, you can use washes to tint metallics more re or green etc., but it is not quite the same as my usual NMM.

Since time is a major issue now, with the tournament only weeks away, I need to go with the technique that can get me to the finish line in a predictable way.  I promise that I will continue to experiment. My Chaos Dwarf army is the best candidate for that at the moment.


Back to some images that show what I was able to complete at the Dragon Shoppe!


Much more to come!  My big tasks upcoming for the elves will be flesh tones and shields, so I have a better idea of where to go with the cloaks and armor.  Stay tuned!


So you wanna be a mini painter: part two... the BOX


While prepping miniatures is not exactly a task I that makes me jump up and down with glee, this task is by far my least favorite.  It is stressful, tedious, and a tad emotional...

Shipping minis.  More art than science.  The more complex the figures, the more intense this process becomes.  When you have to ship to an exotic locale, say Minsk, that tension goes up, as you know the box has a 3-5 week journey ahead of it!

This task has undone many a mini painter that we know.  I had been shipping 2D art for many years, so I was used to shipping fragile things.  When it came to miniatures, the "fortified box" proved to be invaluable.  I try to make my boxes strong enough for me to stand on.

One way to do that is to line the outer edges with cardboard that is glued to the main box with wood glue.  Then I build sections inside the box.  Not only does this stabilize the figures inside, but it helps prevent vertical and lateral crushing, since you are providing resistance.


In this case, I had to ship a bunch of salamanders, handlers and terradons, along with the skirmishing movement trays.  I use any sort of soft tissues (Kleenex, toilet paper, etc.) to "fill in" the ope gaps, such as those under the wings and around the rider.  That is wrapped in bubble wrap.


Once they are in their section, I use bits of tissue in the corner gaps to keep thing from bouncing around.  Building and packing these two boxes was a 4+ hour process from start to finish.  Obviously, wee keep stacks of folded up boxes in the house (some just for the interior cardboard), while my mat cutter is a hugely helpful tool.  It would take much longer without it!

There is just no way to take shortcuts here.  Shipping services have gotten worse and worse with each year that goes by.  It does not matter which one of the Big Three you use.  Lots of bad things can happen.


Somehow these pictures did not get in last night's post.  So, more WIP images of the Galadhrim cavalry!


Here's a peek at the shields...


Reworking the Galadrhim cavalry: shaded basecoat at work...


Today I tried to get (among other things) the Galadrhim cavalry up to speed with the infantry I had been working on.  My color scheme had changed a lot since I first started painting these.  The robes were now a different color, and I had decided to go with NMM instead of metallics. There were a few reasons for this, which I will be covering in a different comparative post tomorrow.


In any event, I had to repaint everything except for the horses fur.  The shaded basecoat technique was crucial in this process. These images show how they looked after I had added the glazing and shading:

 I was very pleased that just a few layers of shading produced a nice clean edge and color transition!

This image shows one freshly shaded figure next to one at the pre-shading stage


This is a preview of tomorrow'a post, where I will be comparing the original color scheme to this, and where I will share some of the thought process.


Thursday, October 11, 2012

Another dose of Malifaux


This morning we have one last collection of Malifaux figures.  I enjoyed painting this one... especially making the base from sculpey and flex paste.


Some very unusual zombies!


A Victoria...


Steampunk spider!


Old time Justicars


All right, another stroll down the Demonhunter memory lane.  This morning we have a series of justicars that I made for my original Demonhunters army.  The first piece was a very fun conversion that I did, which became the basis for a few Grand Master conversions later on.  I am pretty sure those have been posted already.

I used a skeleton from an undead sprue (not sure how I even had any of those bits at the time), and some plasticard for the iron halo.  The banner was green stuff, as was the storm bolter.


The Emperor's children trophy head was placed on him for the very same reason my Khand charioteers are getting Gondor trophy heads... as well as the Fellowship heads.  Gimli will eventually end up on the King's ride.


This was another quick conversion using a standard space marine of some kind.  In the early days, the majority of my Demonhunter figures were conversions such as these.


These next two are a bit more "standard".