Tuesday, June 23, 2015

News from the Forge


DragonForge Designs has an interesting kickstarter under away.


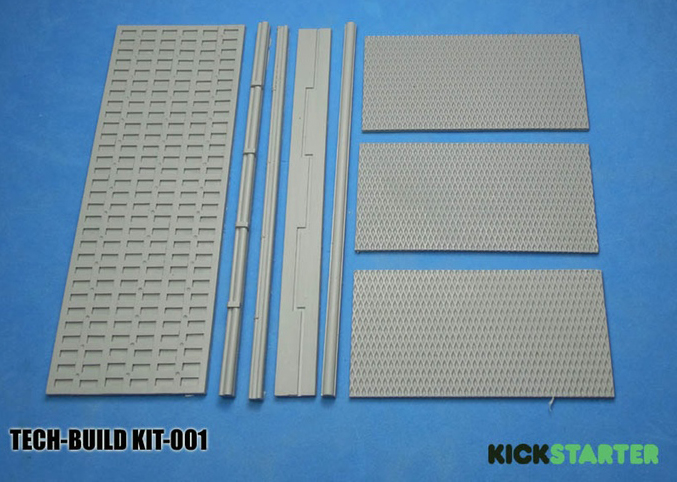
These are sheets of sci-fi/high tech materials which you can add to your bases.


Plus some additional fun items such as this column.


There are also some base sets:


Getting bigger!


Getting huge!!


It seems like any game of 40k requires dozens of flyer/Knight bases these days, so here you go!


Speaking of Knights...


Here are the sheets and tubing which I mentioned earlier.

A link for you:


Monday, June 22, 2015

Gun toting civilians


One of our favorite aspects of Wild West Exodus is the impact that civilians have in the game.  They can block movement, line of sight, or even step on land mines!  If you don't think I'm serious... this has actually happened in a game.

You can shoot them, and even grab them to use as mobile cover.

I have been experimenting with other elements, such as moving objectives kike a her of horses, the famous zombie attack game, and so on.

These figures are kept to a slightly smaller scale than the WWX minis, so that it's easier to tell them apart.  You have seen a number of Reaper miniatures used in this way, but now I have a string of Artizan miniatures from their Tombstone series.


This guy is one of a few "deputies" which are brought onto the table via a trigger.  That is, accomplish this objective or task, and you get these additional deputies.

They would not have the same stats or capabilities as the 'real' Lawmen, but still a threat.  Obviously, killing them gives the opponents VP's as well.  We do the reverse for the Outlaws.  These really enhance the game, as you can't custom fit a list to an opponent, since you will have to worry about moving objectives, and additional NPC's coming onto the table in the middle of the game!


Best buddies


It occurred to me that it might be interesting for you to see the latest Mierce Monster next to a truly colossal beast.


As a reminder, the octopus man is standing on a base that it larger than a DVD.


And you thought the crustacean's base was big!!!


I was also looking for some symmetry with the color schemes as well.


I enjoyed the play of the brighter reds and oranges vs the cooler purples so much, I had to try it again!


The penny is there for scale.


Sunday, June 21, 2015

Tooting your own horn


No unit is complete without a musician, so here he is!


This musical beastman joins the Mierce Miniatures group.


He does seem to be a but hungry though!


Time to lob some grenades!


We return to the Union with their own version of the UR Bots.  This guy has one heck of a gun, and lots of action points to use it!


He can also mess around with your obw RJ-1027 powered weapons with the Interference effect.


Those blue bellies sure do toss around some serious firepower!


Saturday, June 20, 2015

It's green.


Yes it is!  This is the container for Greenhouse Gas Inc.

So, let's ignite the future!!


The basic green was a mixture of a Badger airbrush green and the black craft paint.  As always, those flowed very nicely across the wooden surface.


Since I was working quickly with the big brushes, I was able to wet blend lighter colors into the mix right on the surface.


I splashed some dirty darks over the ventilation grates.


Now for some weathering on the outer walls of the container.  The large, soft brushes were fantastic for pulling the color up along these walls.


The doors got the same treatment.


Most of the dark/light contrast would be achieved by placing these darker weathering colors in the recesses.  I didn't want the green to get to bright, and that's what would happen if I just kept highlighting it.


These darker, grimy colors would set up the lighter rust colors very nicely.


Just about ready for that rust color!


That is placed in the deepest recesses for accents.


It's also placed along the walls.  Not too much, since the big logo and the smaller freehand is not in place yet!


The rust effects on the doors are enhanced to match the exterior.

Stay tuned for the final phase of the logo!


Take Caution!


Well, not really!  It's just time to paint some containers!


I used the black craft paint as I usually do in this stage, since it flows very well over the wood texture.


I painted the inside a few different shades of grey...


And even put a bit of rust and grime in there just to make it more interesting.


That's plenty.  Since it's very dark inside the interior, I boosted the colors a bit.


Now for the same treatment on the rig.  I mixed in some brown craft paint with the rust and black.


There were a lot of places to hit on the undercarriage.


These views of the palette should give you a good idea of the color mixes.

Since I was using the craft paint and working quickly, I could do some wet blending right on the surface.


Once all that dried, I hit a few spots with very intense oxidation.


Nothing Sci-fi is complete without caution stripes!!


A touch of weathering, and you're good to go!

Stay tuned for the container next.