Saturday, July 19, 2014

Among other things...


Well, there's a million and one things going on here right now, but here are some pics I snapped the other day.  This is the caboose of the Siege Train from Wild West Exodus.

It's got a few turrets, which I wanted to pin so that they could turn in place.


Out came the pin vise, and I drilled away!


Then to glue the main guns in place... which means it's time for the "glue/green stuff/glue" option.


You put glue on each area that you are going to attach, and then put green stuff in between them.

The fills in any gaps, and forms a better attachment.  It also means that you don't have to sit there holding the parts together... waiting forever for them to stick :-)


Gun in place!


There's a bit more of the lighter blueish gray color on this part of the train, according to the concept art.


There's many ways you could make this color.  You could even mix a blue/white with a black.  In this case, I used a fun Reaper color... can't quite remember just now.


I marked the areas that are supposed to be brass as well.


Getting some lighter shades on the turrets...


Most of this was done with the filbert brush, shaded basecoat style.


The brass is also lightened.  As always, this will be shaded and tinted later with glazes!
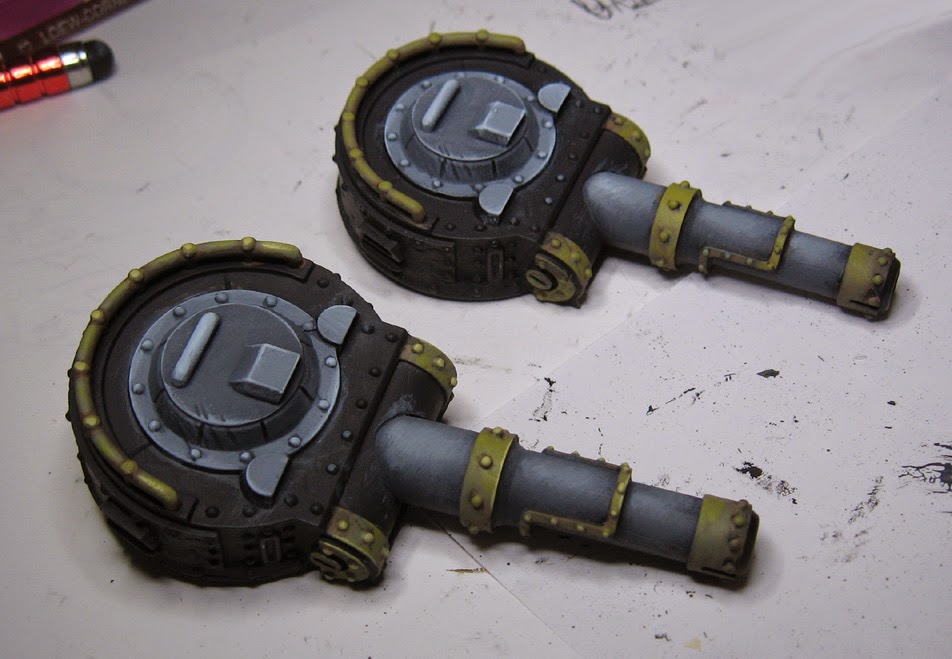

Seeing what the turret looks like.


I also worked on the secondary armament for a bit.  Next up, some more glowing stuff and freehand!  Stay tuned.


Friday, July 18, 2014

From Inner Space to Outer Space.


I didn't think that I could find more spacescapes in the archive, but I did!

This one was called "Above the Clouds".


Into the Vortex.


Ice Fountains.  I had so much fun with the magentas!


Cave of the Winds.  This one had a very different color palette for me.  I was trying to play out the various gasses and how they are illuminated, forming these unusual, but specific, sets of colors.


A Distant Shore.  Combining my old love of landscapes with galaxies!


Best Seat in the House.  A rogue planet, and a cosmic perspective.


Racing along...


Here's another comparison set of the Hangar 18 backdrops, using the Tomb Kings chariots as examples.  Starting out with the blue/white fade on the large backdrop...


The only way I could shoot this unit in the past was to tape together some pieces of larger drawing paper and retouch out all the irregularities.  So cool to just place the unit and snap the picture!


I have also noticed that I don't have to go through the same color corrections in the middle tones and highlights as I always had to... even though I am using the same camera and settings.


And this was certainly not possible before!  Having Settra right there with the Cavalry unit.


Comin' at ya!


One last view with the fade.


And then the same brown backdrop that I used in the last post.  It makes the same dramatic difference.


It does bring out certain colors and shade more.


It's also interesting to have the light color be behind the unit, instead of at the bottom.


That really changes the effect when you look at it from above like this.


The banners and weapons are more silhouetted, and the edge of the movement tray is now lighter.


This also seems to bring out the purples more.


So, more experiments to come!!


Thursday, July 17, 2014

Hanging out in the desert


OK... more testing of the Hangar 18 backdrops!

I started out by taking pictures on the standard fade.  Even this was just a fantasy a few weeks ago.  Having the huge backdrop was fantastic!


I could do so many more angles.  Normally, if I try to get "adventurous" with my angles, I end up with exposed corners that have to be retouched out of the image.


Let's see how this looks on one of the other backdrops.  I was REALLY eager to see how this one would work with my Tomb Kings!  For obvious reasons. :-)


This was an objective marker that I made out of one of my terrain pieces.  That same sphinx was everywhere, including on my scratch built Screaming Skull catapult.


One last view.  The browns really play off the greens.  I will be trying this out with two other back drops, so look out for that!


Speaking of scratch built catapults... here it is!


Check it out in brown!  Again, lots of new shots to test out, and a whole army to do that with!!!!


Stay tuned!


Poised to fire!


As I mentioned a few times during the assembly phase of the Krios, I learned that the gun is supposed to be able to change its angle.


While I was trying to get the mass of pieces to stick together, it seemed like a pretty impossible task.  There was a lot holding the sections together towards the front, but not much in the back, where a lot of the weight would be.


I had used to green stuff to close the gap on the axle of the gun, and it's a good thing that I did.


That extra green stuff provided the contact needed to keep the gun in place once raised.  So, be aware of that!


I just had to see what the tank would look like on one of the other Hangar 18 backdrops!  Tomorrow I test out some more with the Tomb Kings.


What I have noticed about the Hangar 18 backdrops is that they can diffuse the shadows created by my lights.  Granted, I use three of them to counteract the shadow effect, but I would still get a little of that on my printed backdrops.


It is interesting to see what colors look very different here, as opposed to the blue/white fade!


The raised gun.  It really makes it look like a WWI artillery piece. :-)


Ready, aim FIRE!


It was very tough to get any pictures of the pilot... sorry!


A few views from above.


These used to be impossible to do... at least not without tons of retouching work later in Photoshop.


It's so nice to just snap the pictures and crop away the vast unbroken field of backdrop!