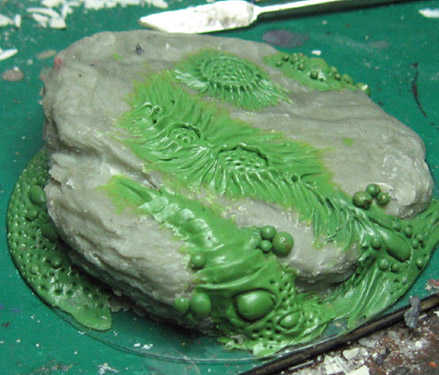
Well, primer and paint are drying, Apoxy sculpt is setting up (yes nother base insert!), so it's time for the conclusion of the chaos base.
Using the yellow heavy mix of green stuff, I had set a big blob on the top surface of the rocks and created the ovals. Fron the edge of each oval, I used my tool to stretch the material out away from the oval. By keeping the tool wet, and having a stickier mix, the long slender pulled texture of green stuff managed to stick to a somewhat slippery surface.
In the previous post, I also had a few bases with this kind of texture. I began with a pointed blob, and used a flat sculpting tool to create the "ribs".
The edges of the ribs are smoothed out, and I get some more blobs and holes to match the surrounding effects on the bottom of the base.
These "blobs" could be painted a few ways... even as eyeballs!
Going back the "principle of threes", I need one more oval on the top surface to offset the previous two that were sculpted.
Some tiny holes added so that all three match...
I put another set of blobs and pulled texture on the far side of the base for some balance...
And then added some pustules. A chaos base without pustules? Inconceivable.
After seeing all the pustules n my primary texture area, I felt that balance required a few pustules on the far side.
Some oxide paste, a few rocks, and there you go!!
Coming up... a little trench warfare.


A great sculpting tutorial! I keep on smiling
ReplyDeleteMany thanks for checking out the blog!!
Delete