Thursday, June 19, 2014

A fly in the ointment


Years ago, I thought that I would do some Mucha inspired art with the help of a few mask designs by Judith Rauchfuss.

See her designs here:


My favorite group of painters are the Pre-Raphaelites, but Alphonse Mucha is someone who I admired a lot.

The incorporation of the elaborate designs and text for his posters was masterful!  I still have some very large art books of his work.

I never actually got a chance to paint these, as they were right at the point where I switched over to miniature painting 100% of the time.  Early on, I had thought that I might try to turn these into miniature designs.

Once I realized how difficult casting was, that idea went by the wayside.


Once all the miniature painting (and all that went with it) took over, these fell further and further into the background.  I have completely forgotten about them for at least 5 years!


I ran across them yesterday looking for scrap mat board, if you can believe it.

Looking at them now, I still think it would be neat to turn them into sculpts!  Perhaps 54mm or 72mm.


Who knows... maybe someone who knows far more than me about sculpting and casting will take on that project.  I know a few sculptors at Reaper that might do some fun things with these characters!
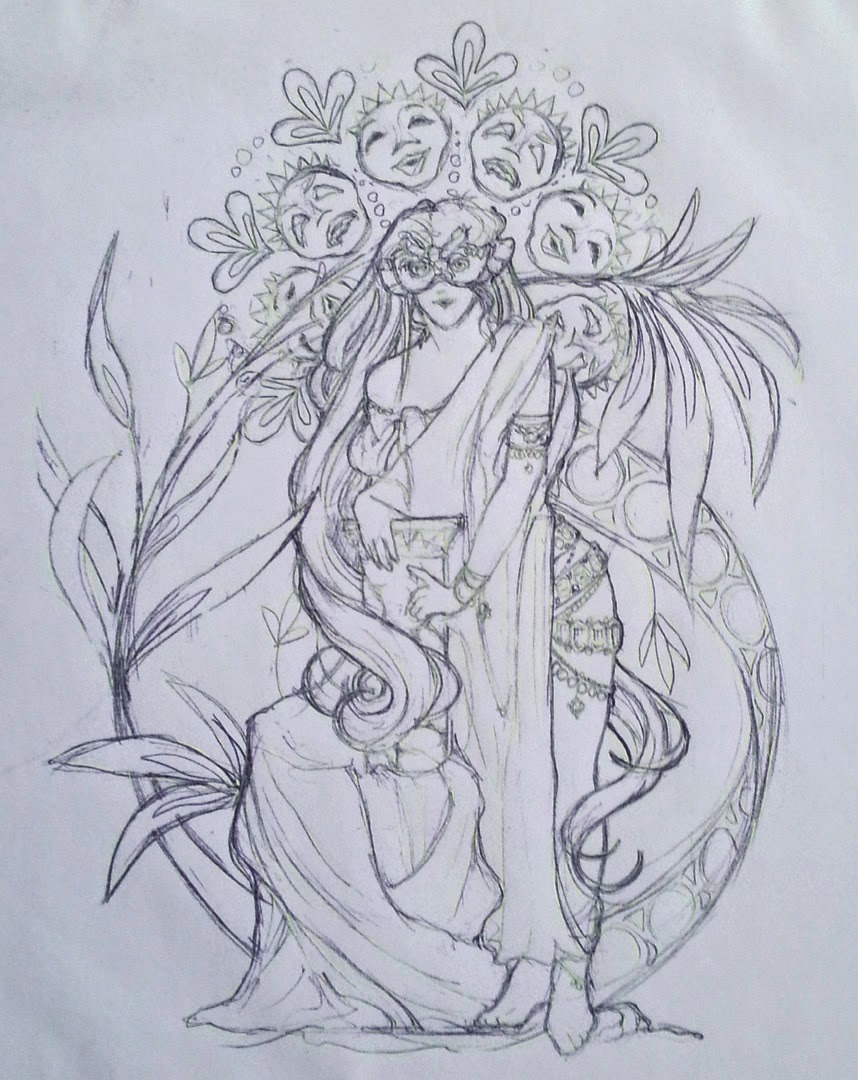

As it is, I am going to try painting these in the coming weeks.  I hope you don't mind me putting the WIP's on here.  As I have said many times, my approach to miniatures is exactly the same as my 2D art.

You will recognize the techniques and the basic principles right away! :-)


Perhaps I might have a few of these completed for Convergence!  Yes, I am going there with Cathy, and the goal is to have art in the art show.  Believe it!  And they would be all new as well.

Wow! 


The forest for the trees


Back to the terrain hexes, and a bit of experimentation.

In addition to all the extra terrain pieces we needed to crate for the Western Front... I wanted to start trying out some ideas for Pacific Theatre terrain.  So, out come the aquarium plants!


As I mentioned in a previous post, we have learned by experience that we needed to create 'generic' terrain for unoccupied hexes.  It was becoming all too frequent that I would move a unit in a forest piece into something else, like a Warhammer Fantasy unit on a movement tray!


Rich had gotten some N scale trees, and we thought those could be handy for making general forest tiles.  I added to them with some Woodland Scenics realistic foliage.


Fooling around with Jungle hexes!  


The workshop...


Painting the hexes... trying not to make them warp too much.  Using a lot of oxide paste instead of watery glue seemed to help.


Ready for the additional ground cover flock!


Ah, yes.  clumping foliage, which tends to clump on my fingers via super glue!


More terrain pieces, including a mountain created by Rich.  He also painted one of the city hexes in brick red, which was a very nice change!


Check out this array.  Believe it or not, we would soon discover that many more pieces would be needed to keep the entire board covered in actual terrain.


All the forest hexes together.  When you see the battle pictures, it might give you an idea of just how cinematic the game now becomes.  It also makes the thought of advancing through it far more daunting!


Well, I want to say thanks for all the birthday wishes folks!  And, as always, thanks for checking out the blog!


Wednesday, June 18, 2014

Generating the Void...


OK, while we were at Draxtar, Scott was in need of a few Void Shield Generators.  What he had was a few power generation units from Secret Weapon Miniatures.

They are fantastic kits, and are very easy to paint!

Scott's idea was to combine the two together, so that it would be more the size of a Shield generator.

I had a piece of foam with me, so I cut that up to fill the gap between the two pieces.


A piece of sculpey was added to the bottom section to give it more stability.


A few fiddly bits were added to the foam to give it more interest.


Let the painting begin!  Some fluorescent paints mixed in with Emerald and sky blue, which was then lightened with a blue/white.


You can see what a big difference in contrast you get when you restore the surrounding dark colors.  The warm nature of the red also gives it a boost!


However, it is also more grayed down, which is critical. That makes the highly saturated glow colors seem that much more 'pure'.


Working on the gold/brass here.  This was done to match Scott's overall color scheme.


A few preliminary glazes on the lower unit.  These were done by mixing some deep red wash with black, adding some Reaper Brown Liner to warm it up a bit.


A few more darker glazes near the bottom.  Even more Brown liner added to the black shade.


I painted a few little glowy diodes on the extra tower section for effect and interest.


Two of them side by side.  Very Mayan in appearance!


Using the bases


Ok... you finally get to see the other base with a mini on it!

This very cool Reaper mini was on the list for a number of videos.  Freehand cloaks, flesh tones, even yellows (obviously).  In the end, it was used for the Object Source Lighting video.


I had lots of fun working the various yellows, orange, browns and reds.  With the ground cover and even the tufts working in that same color range, I knew that keeping everything in harmony would be relatively easy.


On the flip side, however, that meant creating contrasts would be slightly more difficult.  That had to be done through value contrasts and saturated vs unsaturated versions of colors placed opposite of each other.


Thanks again to Mr.Justin for his fantastic broken columns!

She is also here:


Tuesday, June 17, 2014

A day at Draxtar


A slight shift of plans over the weekend.  I had the studio all packed up and ready to go, but the location changed suddenly.  

Scott came up with the idea of visiting the folks at Draxtar Games, out in Batavia.  So, we loaded up the vehicle, and were on our way.


First, it was very nice to see some old faces from the Bunker!  Gregg, Mike, Homer and more!  It's been years in some cases!


Speaking of cases, there is a wide array of painted goodness in this one!  Fantastic work, covering a wide variety of game systems.


And there are plenty of hobby supplies to be had at Draxtar.  It was hard to fit them all in one image!  Vallejo, Privateer Press, GW, Secret Weapon and more!


You need minis?  How about a wall of Reaper figures.


Tons of other stuff as well, such as the X-Wing and Trek craze.


Oh, and Flames of War!  Nifty!


As you can see, wide open, nicely lit, easy to see, paint and play.


Yes, places to play.  Full size gaming tables with lots of fantastic terrain.


Remember the paint bar?  Well, this is about as close as you can get to those glory days.  Even better, I think.

So, thanks again to Scott, and to Draxtar!
A link:


Stowing away some Secret Weapon


I have been compiling and saving a bunch of stuff for a special project... putting stowage on a Secret Weapon tank.

I did some google searching for some ideas...


That's quite a load!


In addition to the RAV 6 x 6 tank from Secret Weapon, I have a variety of items.  I have some sandbags from Secret Weapon, some Highland Guard bits from Victoria miniatures, as well as model tank bits from Tamyia and even some metal pieces from Reaper Miniatures!


I wanted to have a tank commander, so that meant carefully shaving off the top of the hatch.


Applying the first of the sandbags.


I had to make sure that the sandbags didn't interfere with the heavy bolter/heavy flamer... and even the main turret!


Stuff is starting to pile up!


I also want to have some Victoria Mniatures Highland Guard sitting on the outside of the tank as well.


This view shows you some of the GW bits I had been saving.


Much more to come!  I will also be 'wetting down' the sandbags so that they sit a little more naturally.  I didn't want to do that until everything was glued on.  Stay tuned!!