Thursday, October 18, 2012

The Grond Finale!


Well, hopefully you have all anxiously awaited these final images of GROND!


As I mentioned in the first post, the display base was about 25 x 13.  I used at least 4-5 pounds of sculpey!


The trolls and the orcs were metal, so every part of this giant diorama weighs a lot.  Now that I play LOTR all the time, it would be very interesting to actually make this again, with the knowledge I have today.


It's hard to believe that I did this almost 8 years ago.


In some ways, my techniques have changed a lot, and not just painting.  Even the display board would be much different, using brand new ideas that I explored on the recent terrain project.


I might be more inclined to convert some plastic dinos to pull this thing, to save on time and weight.


This piece required many many hours of work, and it really has been fun to look at it again (at least in picture form).  As I look at the sculpting of Grond itself, I am very pleased with how that turned out.  It was extremely close to the movie version, as I did have a lot of artwork and references on the battering ram.


If I did this again, I would leave more space for surrounding orc horde. :-)


I hope that you folks have enjoyed all the various posts concerning this diorama.  I split it into many posts to make it easier for me to manage.  There were tons of pictures to go through, and I was able to make it more cohesive when I broke it down into the individual components.  

Thanks for checking out the blog!!!


A break from Grond with Wrath of Kings. Sword pattern blues?


Before I get to the final post of Grond, I thought I would interject with a little Wrath of Kings.

I think the reason I wanted to post these was to discuss the real challenge of painting weapons (swords in this case), that have a very unusual shape.

It seems like I never get to paint "regular" swords anymore!


I guess companies are trying to make their minis more unique and stand out by doing some different patterns with the swords, but that makes it way more difficult to determine what surface is getting direct light, where the reflected light goes, etc.


I was restricted here in my color choices by the pre-determined concept art.  If I had a choice, I would have had much more 'earth' tones show up in some areas.


This one was not too difficult, since the surfaces were quite large.  Still, I had to change on the fly at least twice with the weapon n his right hand.


Again, these color choices were not mine.  After doing all the wild fluorescent colors on my Tomb Kings weapons, everything seems dull now. :-)


Here is one of the "grunts" of this faction.  These weapons were even more difficult, as the ends were rounded, and not flat, as they were on the big guy above...

Not long before the final images of Grond appear... Stay tuned!


Wednesday, October 17, 2012

A Forgeworld Chaplain Dread for Grey Knights...


This is by no means as elaborate as some of the other dreadnoughts I have painted, but it was one of the more unique dreads.


I t was a very long time before I got to try a second one of these (for the Angels Solarus), and this original piece posed a lot of challenges at the time.


I am pretty sure that I was relatively new to dreadnoughts at the time.  Until then, I have been sculpting my own from scratch.  That was a lot of fun, and I look forward to trying that again armed with the knowledge I currently have :-)


I would love to try this guy again in in a deep purple/blue scheme, to make the wings really jump...


Ready, aim fire! Orc archers for Gronde


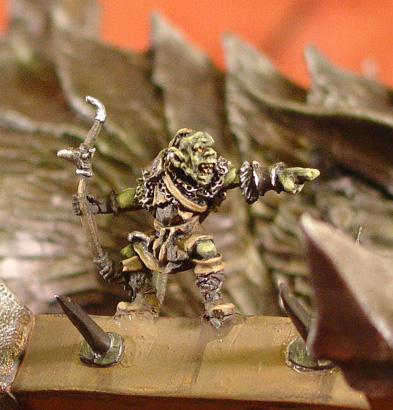
This was my last step before the final assembly.  I thought it was very neat in the Return of the King movie to have the orc archers firing back up at the walls of Minas Tirith.  I also had a handful of metal orc archers.  Of course, this would be much easier today with the plastic variety!

Normally I would have done my NMM on these, but with all the metallics used on the warmachine, it only made sense to carry that through on the archers as well.


I had to carefully pin them to the apex of each horizontal beam, and hope that the scale matched the way I anticipated it would.  From the images I had, they were very very close!


This is what it looked like before I attached Grond!


When you have some extra cave trolls...


OK, time for the promised Troll images!  They are not terribly fancy, but they were incredibly difficult to convert.  These were metal, of course, since this is January of 2005, long before the trolls became plastic.


Also, this was many years before I would even hear about razor saw, much less own one.  If I remember correctly, I had to gradually chip away at areas with giant metal files, and even a tin snips!  I had to green stuff a lot of the rough textures on the back of the hides.


Once all that was done, it was time to get them positioned on the diorama itself.  That was difficult as well.  I had done as much "dry fittig" as I could when I was converting them, but things always seem to be a bit off when you secure the piece to the larger construction.  It's hard to factor in the anchors and other items meant to secure these guys to the display board.  All it takes is a tiny fraction, and it gets magnified in a hurry.


So, a few views of the trolls helping the beasts of burden!


Tomorrow I will post the images of the orc archers, and then there will be a few more posts with the entire finished diorama!


Tuesday, October 16, 2012

ROAR! Here come the beats of burden...


Well, for something as huge as Grond, it's gonna take some hefty monsters to haul that thing around!

I didn't have as many reference photos as I do today, so I had to make my own monsters in my own vision.


At the time, I really liked the dinosaurs from the VOID sci-fi game, of the Viridians faction.  These two monsters were sculpted to look similar to those.  As usual, sculpey was used to make them.


I think the actual Grond in the movies was pulled by 3 monsters, but I only had space for 2.


They had to be completely sculpted and painted prior to attachment to the main display base.


These views will give you a better idea on the scale of the dinos!


I used some twine to make the ropes attaching the yokes on the beasts to the frame of Grond.


Tonight's late night post will show the converted Trolls... Stay tuned!


Something "Gronde", part 2!


With the 300,000 views no in the rear view mirror, we begin the journey to 400k.  What better way to start than with more 'Gonde'.  Here are some images of Grond after it was painted.


It was a major challenge to paint, not only for some of the very heavy textures, but also a lot of hard to reach areas!  It made me very nervous to continuously turn it upside down to get at those places!  It weighed a lot, and there were dozens of actual spikes sticking out of it.


I had used tiny little brad nails as spikes, which looked very realistic, but was also realistically sharp!!!


Lots of tin bitz used on this, to say the very least. :-)


Stay tuned later today, when I post the images of the sculpted dinos that pulled this bad boy!