Saturday, April 16, 2016

Boxing day


One more Red Box barbarian for you on this early Saturday morning!


These have been the most heavily armored of the Red Box Games figures in a while.  There are many nicks and cuts in the armor plates, so that requires an altered approach from what I would normally try.


With this many damaged sections of armor, any glazes need to be very controlled, because too much extra liquid can go in some pretty unexpected directions!


Stay tuned for much more from this group!!


Friday, April 15, 2016

The old squirt gun trick again!


These Dark Eldar Grotesques posed so many challenges.  Not only was I trying to establish an overall theme for the army in terms of color and story (basing, freehand designs, etc.)m but I was trying out a host of new materials as well!


The skin tones had to be light enough to show veins and soreness/irritation where grafts had been made, but still deep enough to not get lost in the mass of blood effects and the new fluorescent paints.


The first few Grotesques took quite a while to determine how much blood effects that would be done.  I thought the deep reds would prove a good contrast to the very warm neon greens!


He's also here:


Army of the Dead


Since I had a lot of the fluorescent paints out for other projects, I kept adding more and more to this guy!  This kind of color scheme made the LOTR Army of the Dead one of my favorite miniatures sets to paint.

It's made even easier now by many new products, and an updated approach in terms of technique.


The stained, rusty dirt effects were made infinitely easier by creating them with the Vallejo Game Color Flesh Wash.  This particular glazing color has that "sedementary" effect which you have heard me mention over and over.


It was a massive advantage here, as it settled right into the areas where I needed it.  The natural translucency meant that it would not completely bury all the brighter fluorescent paints from earlier layers.

I really love these guys... and I think I will have to do something similar with a more "regular" fantasy style army.


He's also here:


Thursday, April 14, 2016

Standing among the stones


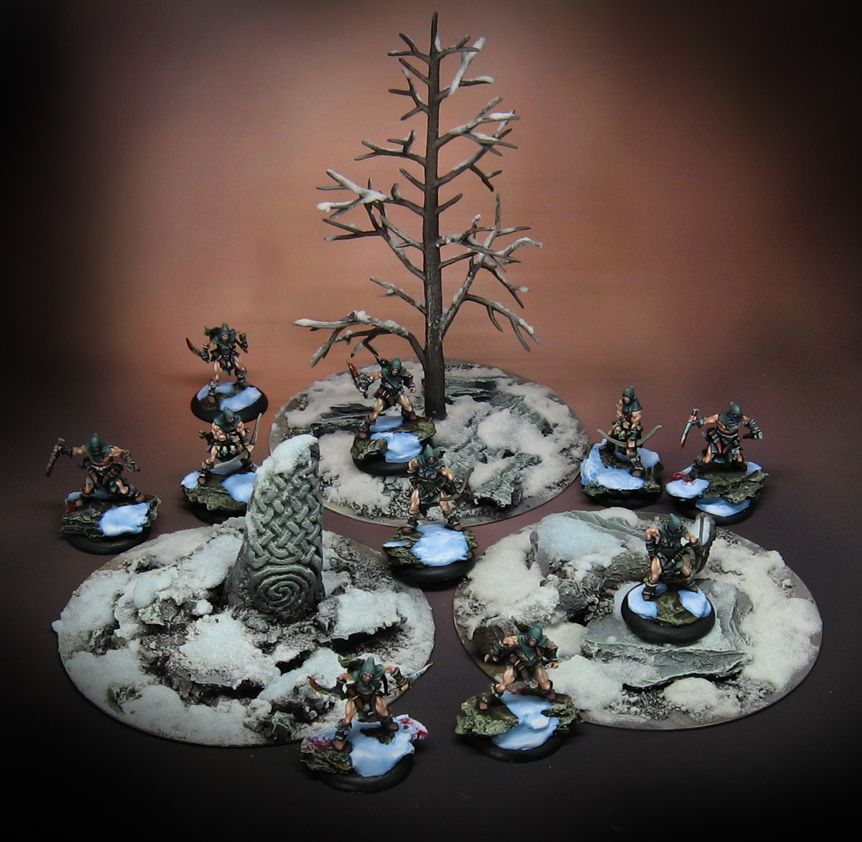
I thought it might be fun to see some of the "Ninja Archers" from Red Box Games in a group setting.


There's a series of articles showing how the miniatures were painted, and how the terrain was built and painted too!  I have included all the links that I could find here in this one article, so be sure to check those out!


Here's a post about creating the standing stone:


Here's a post about painting them:


Followed by a post on making the snow effects:


The first step by step on painting the archers, which includes the usual Shaded Basecoat and Glazing:


Another stage:


There's a few on glazing, and then the finish!


This article focuses on the skin tones:


This one is the big finish!


On the hoof


More fun with golds!

One key strategy I try to remember when I am working on golds is to mix in a bit of the yellow Vallejo fluorescent paint.  Not only do I include it in "lighter" shades such as the highlights, but I will mix it in with my shadow colors too.


This means mixing it in with one of my favorite gold shadow colors, which is purple.  That's a very natural shade to gold.  I also had to be aware of what was around the gold armor, such as the cloak.  As a result, I tried to sneak in a little red into my mixes.


A small amount of grey/green is also important, since using only various shades of yellow will make it appear more like yellow painted strips instead of shinier metal.


I think these views give a hint of how the colors transition depending on the shape an position.  Light to dark shading, with the darkest shadow typically nearest the bright highlights also lend a hand in getting that shiny appearance.

Many of these strategies are discussed in my Painting Golds video, part of the massive Painting Pyramid series of instructional videos.  I paint a Raging Heroes horse and rider, in some ways very similar to this.

As another side note, making the horse a neutral gray (tinted a bit towards the cool side) helped to make the warmer colors of the armor seem even more intense.  The added impetus of the fluorescent paints sealed the deal!


He's also here:


Wednesday, April 13, 2016

In the Beginning...


These Grotesques were the testing ground an laboratory for many of the Painting Pyramid series.  This was one of the first times I tried out the new blood effects.


It was also the first mass use of the Vallejo Fluorescent paints.


All in all, there were at least 5 new techniques that were developed over the course of this relatively small unit of 4 figures!


He's also here:


The ol Skull 'n chains


Here's objective marker number two from The Edge Awakening series.

If you have to claim something as scary as this to win the game... then there's some major spooky happening on your battlefield!


I guess our games of Kings of War will be getting pretty freaky!


I used a number of the new Secret Weapon paints on these.  The blueish grays were wonderful for the rocks, while the tree colors and shades worked just as well for the skulls and tinting the rocks warmer too!


A few Red Box Games figs as a size comparison, and you're good to go!

Here's a link to their facebook page.