Saturday, August 9, 2014

A checkered past...


To make this Castellax a little different from the first one, I thought it would be fun to do some tried and true checker patterns.


Nothing very difficult, but it does take a little bit of planning.  By making the lines the way I have here, it makes it far easier to ensure even spacing!


That was something I learned the hard way a few times :-)  You can see the basic patterns now, which will be highlighted and shaded, as well as weathered, later on.


Highlights done, so time for glazing!


Just like I did with the last piece, a variety of blue/black glazes were applied.


With the glazes finished, I set about working those midtone areas.


I will put the fluorescent glow on the back of this guy just like the first one.


Most of the middle tones in shape.  I still want to do some more tinting there, and then some final highlights.


Friday, August 8, 2014

Something to stand on...


Time to paint the bases!!  But first, let's see what the miniatures look like on them.


The tree bark is such a flexible and multi use material, I was able to make these bases without even looking at the figures!  I did try to keep in mind certain types of 'footprints', such as wide stance, closed and so on.


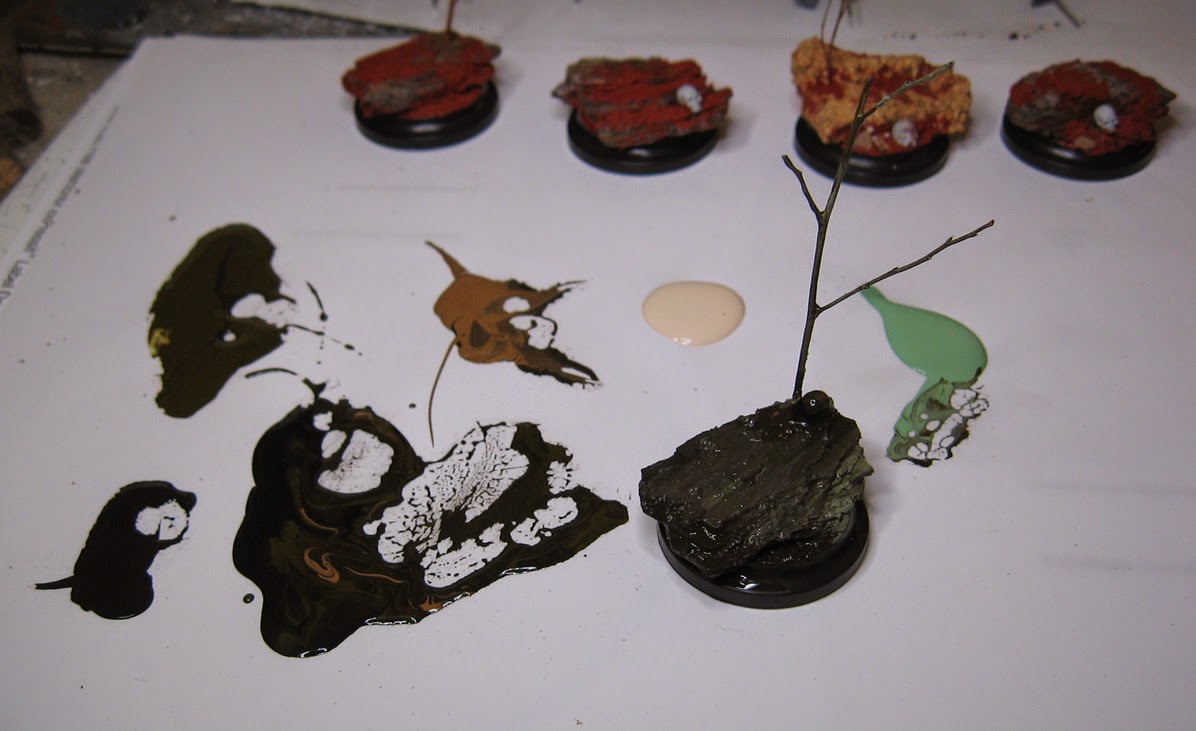
Nothing complicated on the paint choices.  Some high density pigments, which will be mixed with the Badger primer.


You can see the blob of primer with some of the other colors mixed in.  This will give it the coverage on a surface that is more absorbent than most, and even provide some stability to the structure of the base.

As usual, some warmer colors, and some cooler colors.


You can see that I worked quickly, allowing the paint to mix on the surface.  No drybrushing at all here.  Just make sure that you vary the colors!


The initial layers of paint applied.


This is more of a close up view.  Note the big swirls of color.  I am using one of the beat up craft brushes, which actually makes it more like a filbert brush.


I will now allow these to dry for a bit, and then do some more refined applications of highlights... and then some Glazing!!! Stay tuned.


The Razor's edge


I have been very eager to take pictures of the Razorwing using the giant backdrops, since I have not gotten any kind of decent pictures of this piece before!


I started with the standard blue fade to get the best sense of the colors.


If you go through the Dark Eldar section of the blog, you will see lots of WIP images of how this was built, painted, and so on!


You have seen the pattern emerge on the Venoms.  I enjoyed doing the pattern more and more with the increasing size of the vehicles.  Wait until you see the Raider. :-)


The organic and curved nature of this plane lent itself to the filbert brush technique quite well.  The broad flat surface covered areas so quickly, I was able to wet blend.  Using the curved edges of the filbert, I could really take advantage of this scenario!


It's too bad this thing spent the entire tournament being shot down on the turn it arrived...


Still, it was a lot of fun painting it!


I forgot just how huge this was when I went to use one of the standard size backdrops.  Even there, it was just to freakin' big!


In those WIP posts, you will also see how I magnetized the missiles, since I had planned on changing the type of missiles depending on what sort of list I was going to run.

I never played these guys again after the tournament.  Way too frustrated with the state of 40k.  It's only been more magnified since.


I have not had a chance to process the images of this Razorwing on the other backdrop, so I will probably do that over the weekend!


Thursday, August 7, 2014

How the West was won.


One base at a time!!!!

Among the million other tasks I am desperately trying to finish before GenCon, I am trying to get some bases ready for a few batches of Wild West Exodus figures that I will be painting in their booth.

Michael Harber was kind enough to send me a huge shipment of tree bark. Thanks!!


I wanted to make a small set of bases for Outlaw Hired Hands, so I began to break up the bark into smaller pieces.  You do have to be careful when you do this, since the bark can separate into flakes if you press too hard on the wrong spot.


I used some of my wood carving tools to scrape away the sharp edges and give it a more natural look.


The Oxide Paste would be used to fill in gaps, as usual!


It would also provide some strength, keeping those layers together.


No western style base would be complete without some skulls drying on the ground.  Supplied by Secret Weapon.


I chopped up a chunk of road construction cork to vary the texture a bit.


The set begins to grow!


Time for some dried out foliage.  I drilled some very small holes in the bark, so that I could remove the branches for painting.


These twigs are just for a little background effect.  I want to make some heftier trees on the lawman bases so that I can hang a noose or two from them!!


The set gathered together for painting.  Stay tuned!


Here comes Stompy


OK!  Here you go!


First one down.  I am working up different freehand designs for each one, obviously within the Mechanicus theme.  The next one will have the checkerboard patter, I think!


From above.  These buggers are more complex than dreadnoughts, partially due to the more organic surfaces, but also to all the 'open' areas, such as the bolter feed.  I had to essentially melt that down with a hair drier so that I could get it to fit!


I figured that these might be tougher, based on what I had to do with the Krios tank.  More to come!


Wednesday, August 6, 2014

Now this is fun to see!


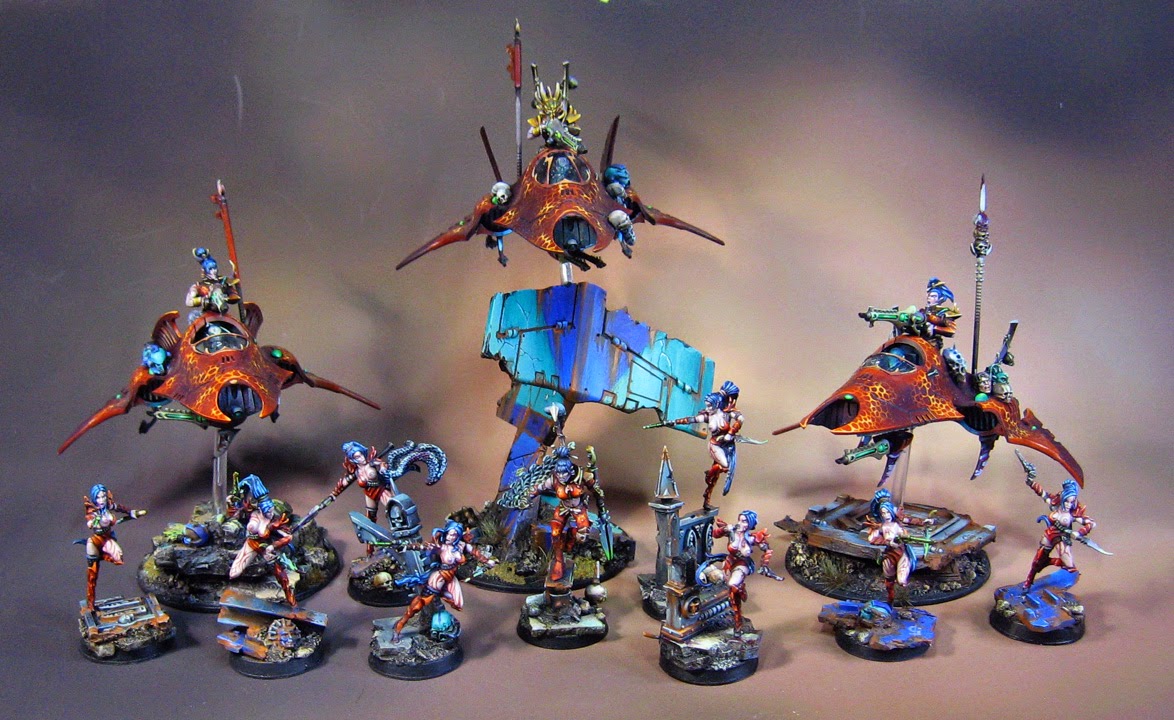
The promised group shots of the Venoms!  I was really itching to see these!


I could not believe how everything fit so comfortably on the Hangar 18 backdrop.


I know I have never had a chance to see everything together like this.


Then I threw in the objective markers...


And then did a "ground level" shot, which was impossible before, since my other backdrops could not cover something as tall as the Archon's venom.


So, I thought, would there be room for the passengers as well?


Sure enough!!!


A little closer.


On the other side.


One more shot... much more to come!!