Tuesday, March 17, 2015

Meet Stompy


Well, you have seen the basing project, and even the first few stages of painting the Great Elk.  Now you get to see it all together!!


This is the Great Elk of the Warrior Nation, one of their heavy supports.


This is, as might imagine, a brutal monster, which has colossal hitting power and a 3 inch halo!  I'm certainly looking forward to that :-)


As gigantic as the base was, I never anticipated that the 'miniature' would make it look so small!  Wild!


I am so glad that I chose to create this vignette with the ruined Fire Bringer and the hapless gunslinger.  I don't think he's got enough RJ-1027 in that pistol to do much harm before he gets flattened by Stompy!


I have played with a number of vehicles in my previous armies, and even some monsters (Lizardmen and Tomb Kings), but they pale in comparison to this beast.


Stompy will also be my entry in the Crystal Brush, intended for the Fantasy/Steampunk large creature category.  I'm hoping that he does not have to go in the open category.


This looks so fun from just about any angle, it made all the hours of work on the base worthwhile.  I really tried hard to position it to get the best visuals, but also keep it as "out of the way" as possible for when we are playing games.


So, when you see him up for the voting process at some point, you will have a pretty good idea of what went into making this thing a reality.  Stay tuned for much more!!!


Second helpings on the base


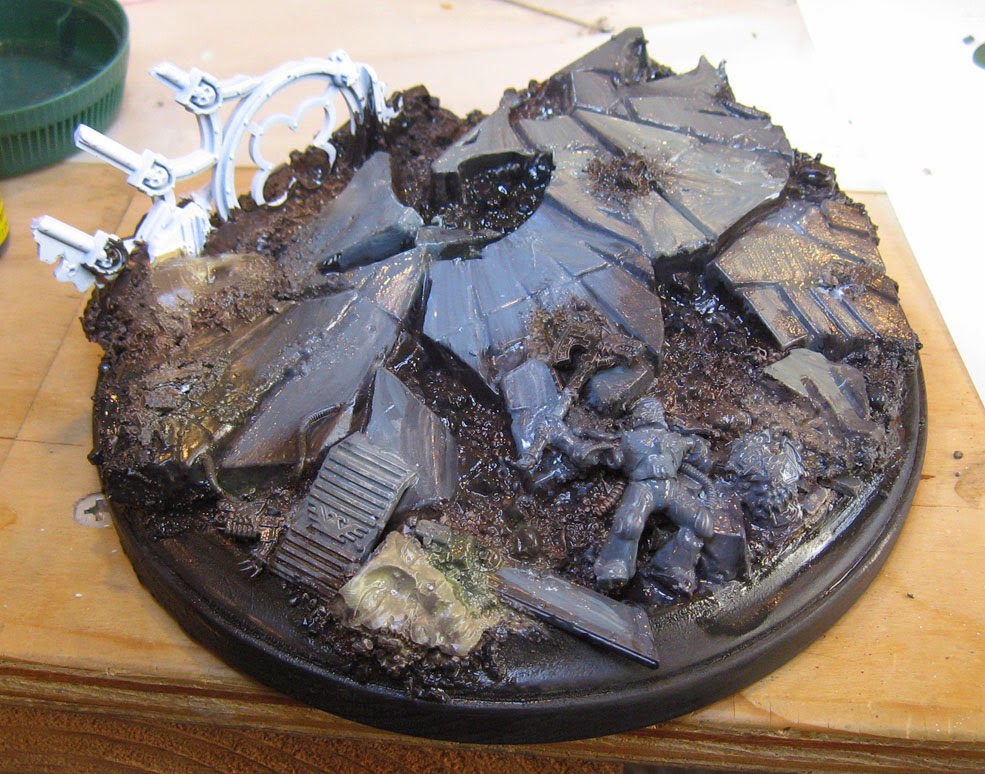
Rapid fire progress continues on the base.  As you can tell by the glistening paint, I have been able to work fast enough so that the paint can be pushed around on the surface and mixed together.


Just as I did when painting in the darker colors, the light colors are varied.  In some places, I used more of a warm grayish green, while in others I went with a blue gray.


It's important to note that I generally placed the cooler light colors next to the warmer darks, while reversing that with the warmer lights next to the cooler darks.

This provides additional contrast to the usual light vs dark contrast.


When you do that, you can generate a lot more interest and depth across a large, complex surface which will have a relatively limited palette.


This view gives you a decent idea of what I have been attempting to do.  In some areas there is much more contrast... while in others there is very little.

Doing so makes life much easier on the viewer, as I let one or two things catch their eye and draw them in closer.  A better approach then punching them in the face with a blizzard of things that they 'must' look at immediately.


At this point, I am also working a bit slower.  Instead of constant wet blending, I am using more of a 'scumbling' technique shown here.

 The idea is to press the somewhat drier brush into the surface.  It will create a tiny bit of texture, which will be handy when trying to give the impression of stone...


More refinement, more light colors added.


Some of the other pieces on the base are getting colors that are even warmer, such as the statue heads.  Those are tans and reddish browns, just to let them separate from the main stone pieces.


One of the last things I did during the Shaded Basecoat phase of the base was to paint the casualty.


A little bit of yellow was added to the casualty.  A touch of yellow, as he's a Space Wolf.  Still, this has to be a toned down yellow, so as not to create too much of a distraction.  

Some yellow will be used on the Angelic figure, which will help to spread that around.


He's just about ready to go, so I moved on to the broken wall segment.


The broken wall was painted a bit lighter in some places, forcing the highlights on the upper surfaces.  The vertical pieces need to be more in shadow, so it creates more of a silhouette impression when the figures are placed on the finished base.


Just about set!  Only one more piece which I almost forgot about...


One wee little helmet painted, so now it's on to some glazing!!!


Monday, March 16, 2015

So destructive...


Here's the last Myrmidon Destructor for the Mechanicum army.


As always, a very unusual item!


More images of the 'regular' Myrmidons next!


Sunday, March 15, 2015

Paint on a base


Remember the huge plaque base for the greater demon?  Yes, it's about time it got some paint!


The primed base, which already looks very different from the original kaleidoscope. 

Normally, I would 'primer paint' this using blacks, greens and reds, but we shall see what we can do with the white primer.


To the right, we have some of the #8 rounds, and to the left is a set of cheap synthetics that were on clearance.

It's a collection of flats, filberts, fans, and so on.  They will be mostly used for terrain and other large scale projects.


An array of colors out on the palette, specifically designed to create warmer and cooler grays by mixing them with black.


Here's one mix in action... reddish brown and black.  Notice that I am employing the "negative painting" approach, which means painting darker areas around the light colors that I want to save for later.


As I move around this area, you can see that I am altering the colors, switching from more of a greenish look back to the brown, and so on.  This gets a lot more interesting variety in those darker areas.


I don't even mix the colors entirely, opting for "marbelization".  I will allow these swirls of colors to flow randomly across the surface. 


Another look at establishing that all important value pattern.  If I plan out the darker areas quickly, I will actually be able to mix my lighter colors with them!


Here's a nice close up example of this on site mixing.  You can see the greenish colors to the left, and the reddish browns to the right... blending freely on their own.


As you can see, it's just a matter of working my way around the base, leaving the lighter areas for later.


At this point, I start to pull some of those darker colors onto the upper surfaces of the stone, so that I can do some wet into wet blending!


Some cerulean, or sky blue, is mixed in with the original black/brown colors.  Once again, it is allowed to have the marble effect.


Moving fast and furious, mixing and scumbling the paint together.


This final image gives you a hint of what's to come... more blending as I work on those upper surfaces.  Stay tuned for the next episode!!!


Welcome to the Big House


Everyone's favorite UR-31 Lawbot invites you to step inside the Alcatraz of Wappelville.


Should you find yourself a guest of this particular institution, you will be processed quickly, and shown some of the other attractions on the grounds.


The Copelie Sisters are frequently found at the Law Chateau these days...


Their little pups are never far behind!


It looks like I will be using the Copelie Sisters and the dogs as my Crystal Brush fantasy/steampunk unit.  I figured... why not?


Anyway, the Jail was provided by Burn in Designs.  Check out the blog post series on how it was painted!  Three episodes of goodies!


Adepticon draws ever closer.  That will be the final week of the Wild West Exodus kickstarter.  Jump on in!!


Here there be Drago(ons)


Yes folks, they come in green too!  Same guys, a little different set of colors.  Apparently this set of colors indicates Dragoons.


It's the Christmas Cavalry!