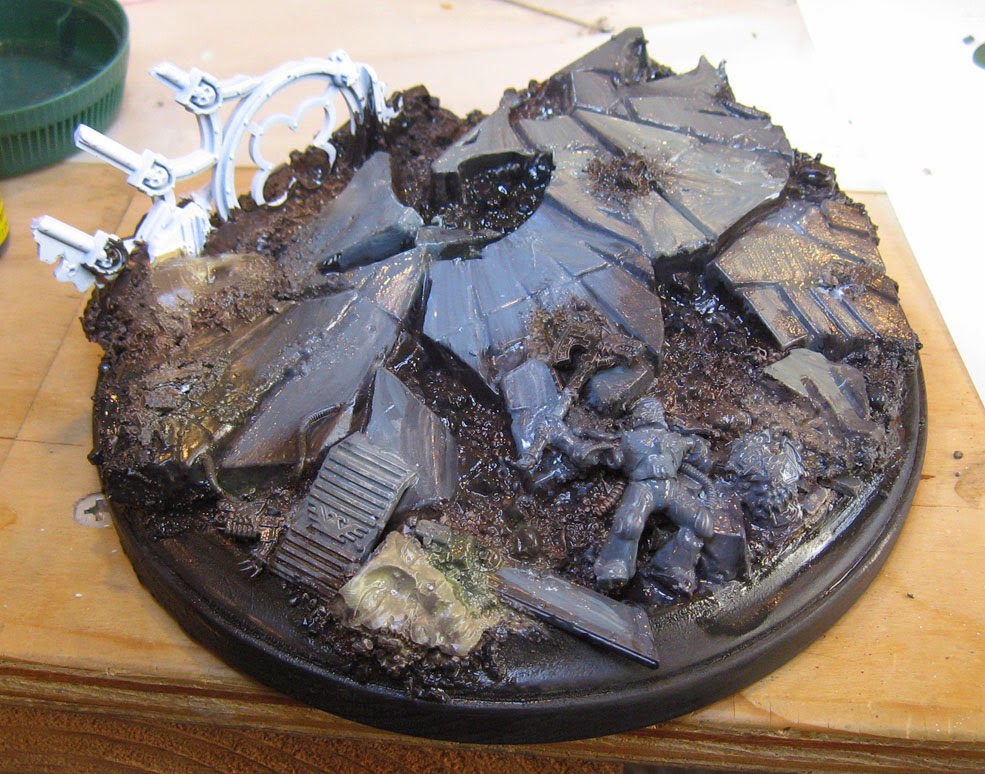
Rapid fire progress continues on the base. As you can tell by the glistening paint, I have been able to work fast enough so that the paint can be pushed around on the surface and mixed together.
Just as I did when painting in the darker colors, the light colors are varied. In some places, I used more of a warm grayish green, while in others I went with a blue gray.
It's important to note that I generally placed the cooler light colors next to the warmer darks, while reversing that with the warmer lights next to the cooler darks.
This provides additional contrast to the usual light vs dark contrast.
When you do that, you can generate a lot more interest and depth across a large, complex surface which will have a relatively limited palette.
This view gives you a decent idea of what I have been attempting to do. In some areas there is much more contrast... while in others there is very little.
Doing so makes life much easier on the viewer, as I let one or two things catch their eye and draw them in closer. A better approach then punching them in the face with a blizzard of things that they 'must' look at immediately.
At this point, I am also working a bit slower. Instead of constant wet blending, I am using more of a 'scumbling' technique shown here.
The idea is to press the somewhat drier brush into the surface. It will create a tiny bit of texture, which will be handy when trying to give the impression of stone...
More refinement, more light colors added.
Some of the other pieces on the base are getting colors that are even warmer, such as the statue heads. Those are tans and reddish browns, just to let them separate from the main stone pieces.
One of the last things I did during the Shaded Basecoat phase of the base was to paint the casualty.
A little bit of yellow was added to the casualty. A touch of yellow, as he's a Space Wolf. Still, this has to be a toned down yellow, so as not to create too much of a distraction.
Some yellow will be used on the Angelic figure, which will help to spread that around.
He's just about ready to go, so I moved on to the broken wall segment.
The broken wall was painted a bit lighter in some places, forcing the highlights on the upper surfaces. The vertical pieces need to be more in shadow, so it creates more of a silhouette impression when the figures are placed on the finished base.
Just about set! Only one more piece which I almost forgot about...
One wee little helmet painted, so now it's on to some glazing!!!


'Giant' is an understatement here :-) ... Stunning work!
ReplyDeleteThanks! Would you believe I have had to make 3 other bases that were this size in the last month alone! Madness! :-)
DeleteExcellent continuation. Superbly illustrated and explained. Your sbs's are excellent. Thanks for sharing:).
ReplyDeleteMany thanks! I have episode three all worked up and ready to post. :-) The final chapter will have to wait until after Adepticon, however...
DeleteAmazing work! Love it. And no airbursh! You are definitely my hero James.
ReplyDeleteHehe...hairy sticks FTW! Yes! :-)
Delete